Hey all you awesome Ellie and Mac Blog Readers!
Jessica from Let's Go Hobby back with another Ellie and Mac Pattern Hack. If you missed my previous posts on the Ellie and Mac Blog, you can check them out by clicking on the titles below!
- Be Invincible & Urban Leggings Mash
- Hack Your Wrapped Love Dress
- Sunset Dreams Dress to Top Hack
- Be Smart Jumper Hack
- Add a Paperbag Waist to Any Skirt
Blog Brainstorming
I have a lot of fun doing these blog posts. I wasn't sure what I wanted to do for this blog, so I messaged a sewing friend to help me brainstorm some ideas. She mentioned that oversized clothing with a tie or knot at the waist is really popular right now (not to mention flattering!).
After looking through some rtw (Ready To Wear) websites, I came across a super cute dress with
- Flutter Sleeves
- Slightly Oversized Through the Midsection
- Seam at the Natural Waist With a Tied Sash
- Knee Length Skirt
Super Cute! Now, how to use an Ellie and Mac pattern to recreate the dress?
Found a Similar Pattern!
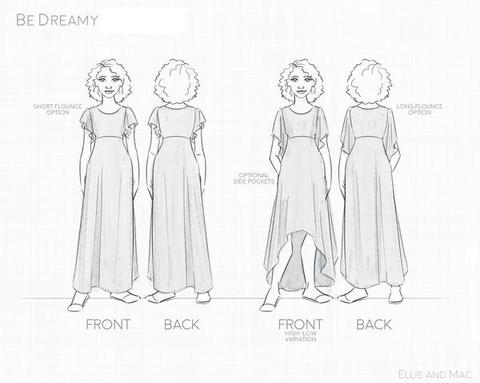
The Be Dreamy Dress has the same type of sleeves. However, the pattern has an empire waist instead of the seam at the natural waist (like in the dress example I found). The Ellie and Mac Be Dreamy Pattern also has a longer skirt with no knee length option.
Here's the Be Dreamy Dress line drawing for reference:
Not to worry though, some modifications need to be made, but they were actually really easy to do with just a pair of scissors, a ruler, and some tape!
My Hacked Dress
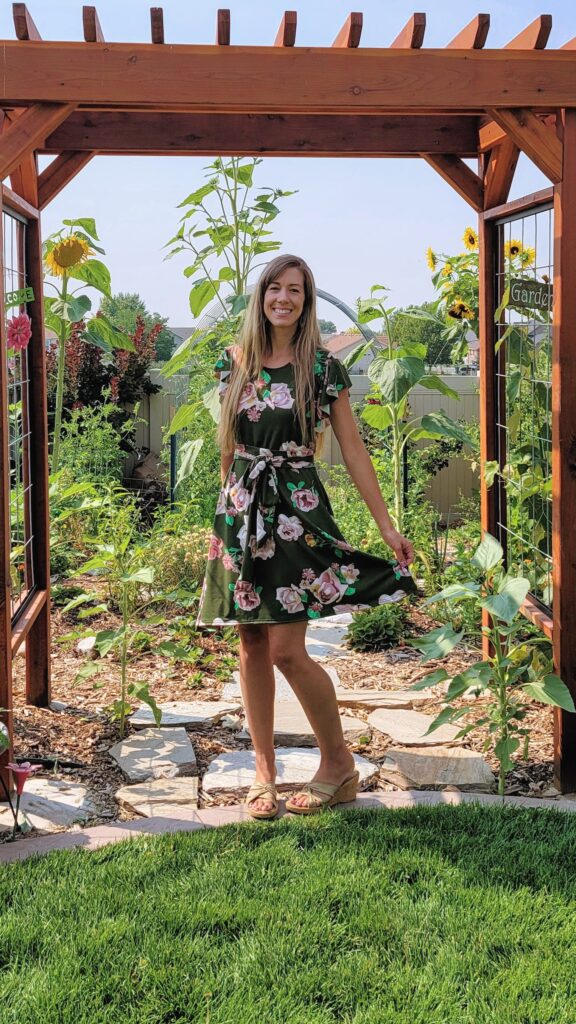
Here's my dress after doing the quick hack! I really love it.

You can see that the sleeves are the same as in the original Be Dreamy Dress pattern. I used the large sized sleeve. But, the waist is dropped, I added a LONG tie, and shortened the skirt portion to just above the knees. (The fabric is a single brushed DBP with 4-way stretch.)
Read on to find out how I did it!
How To Make Your Own Hacked Be Dreamy Dress
- Start by grabbing the pattern HERE if you don't already have it!
- Next print all your pages. Don't forget to select your size(s) using the layers feature in Adobe Reader. If you aren't sure how to do that or want more tips about PDF patterns, you can check out my PDF Pattern 101 Post over on the Let's Go Hobby Blog.
- Assemble the printed pattern pages as normal.
- Cut on all lines as per pattern instructions being sure to grade between sizes where necessary.
Modifying Pattern Pieces
Now here's where it gets fun. If you need to add or subtract length from the bodice for height, you can do that now. Remember that we are moving the waist seam and shortening the dress however we like. So if it's less than an inch difference, you don't need to modify.
Step by Step Instructions
Align the front bodice piece with the front skirt piece making sure to keep the cut on the fold line straight all the way down (left side). Tape the 2 pieces together.
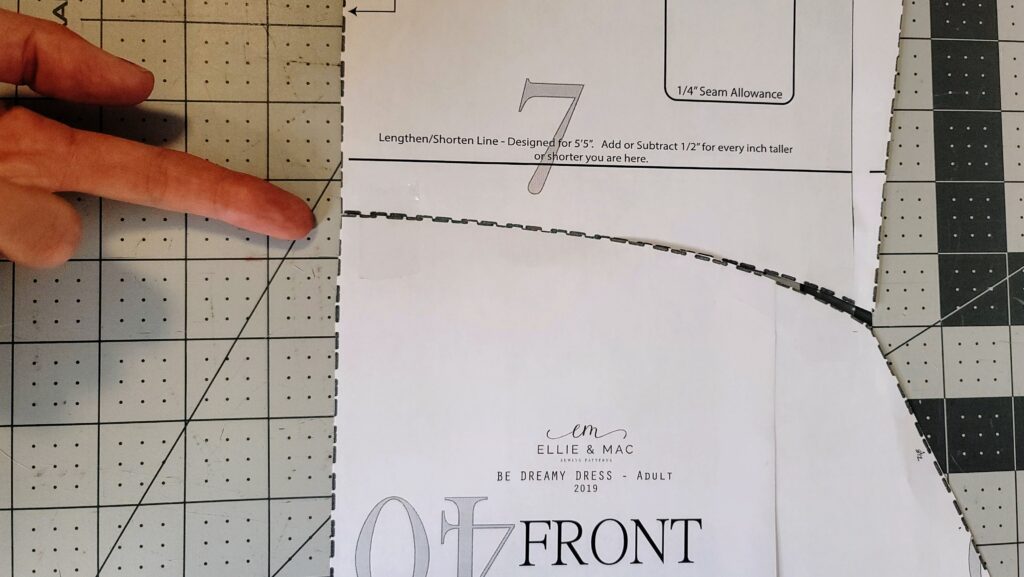
Next slide a piece of scrap paper on the right side of the taped pattern pieces.
Next, we need to know or measure the side waist for the intended dress owner. If you don't know your side waist measurement and are not sure how to measure it, you can check out Manda's post on the Ellie and Mac blog HERE. The average side waist is about 8 inches long. Mine is 8.5 inches even though I'm 5'5" though so it can vary.
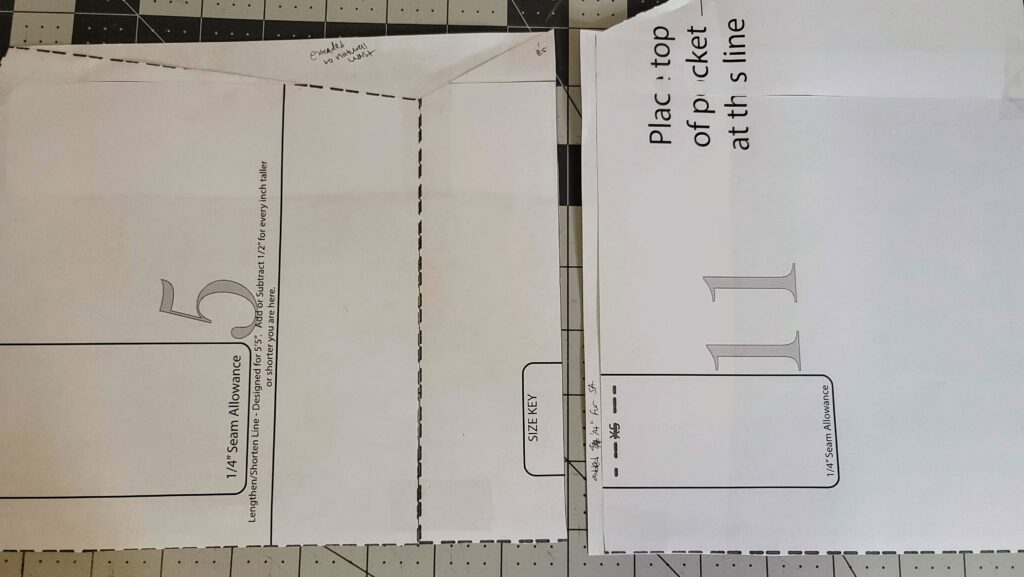
With a ruler, measure from the bottom of the armscye the straight down to the dress, parallel to the left side of the pattern, at the length of the side waist measurement. So, for mine I measured 8.5 inches down from the bottom of the armscye to the dress.
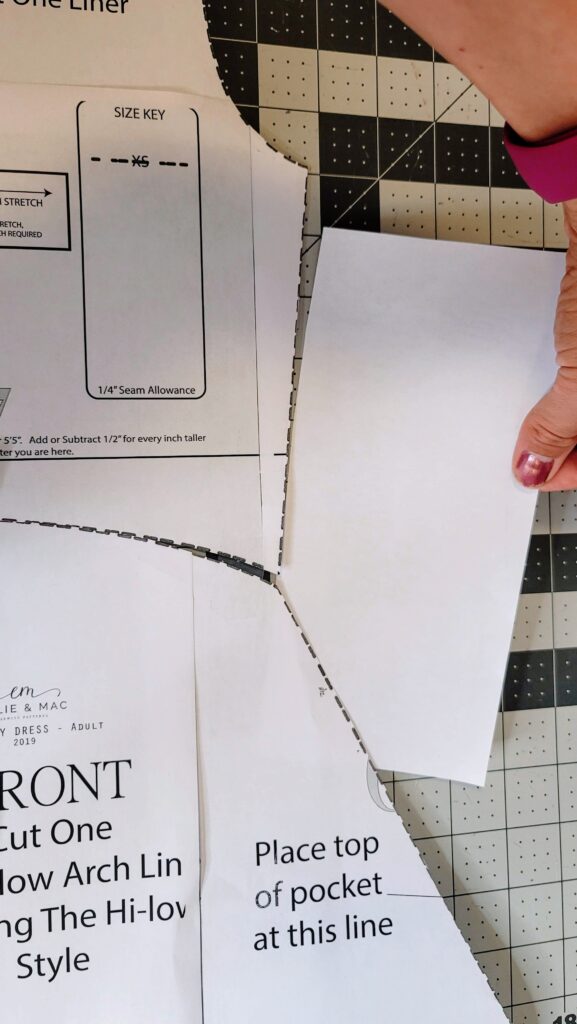
Place a piece of scrap paper at least the length of the side waist, starting at the bottom of the armscye and coming straight down to meet the skirt as seen in the picture below.
(By taking the bodice line straight down, it will add width to the dress. We want this at the waist so that the tie will cinch the fabric.)
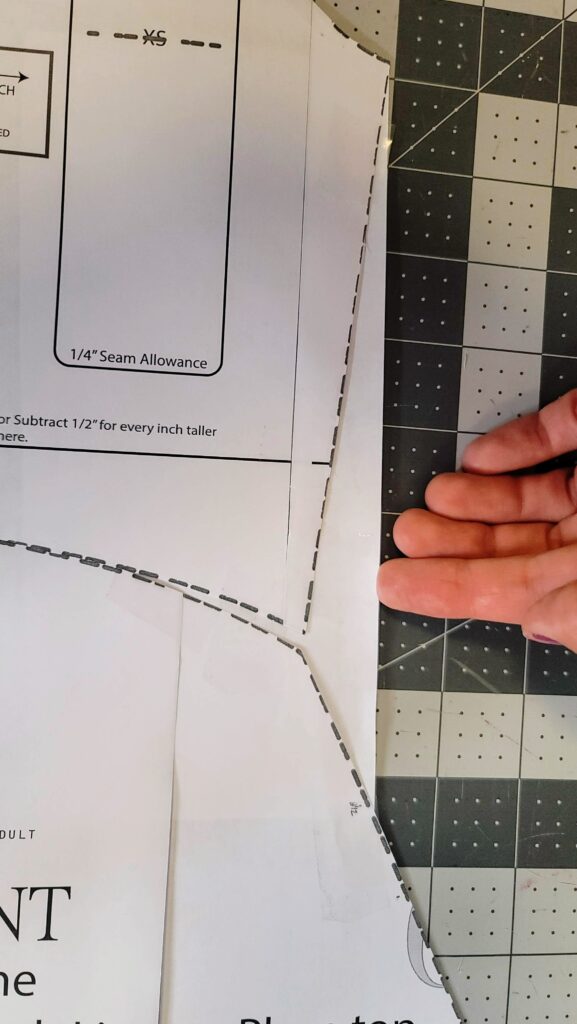
Tape the piece of scrap paper to the bodice and dress pieces. It should look like the picture below!
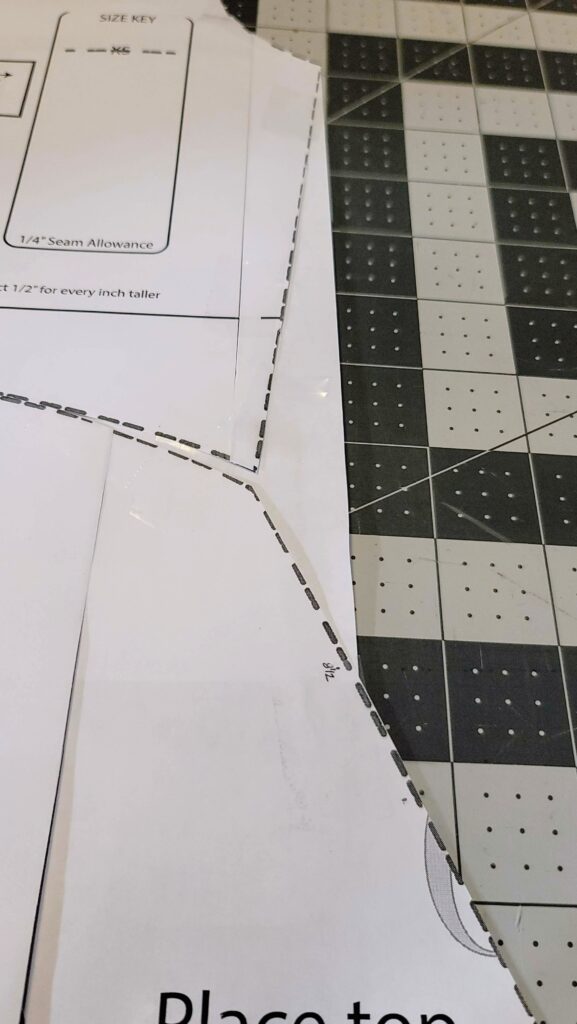
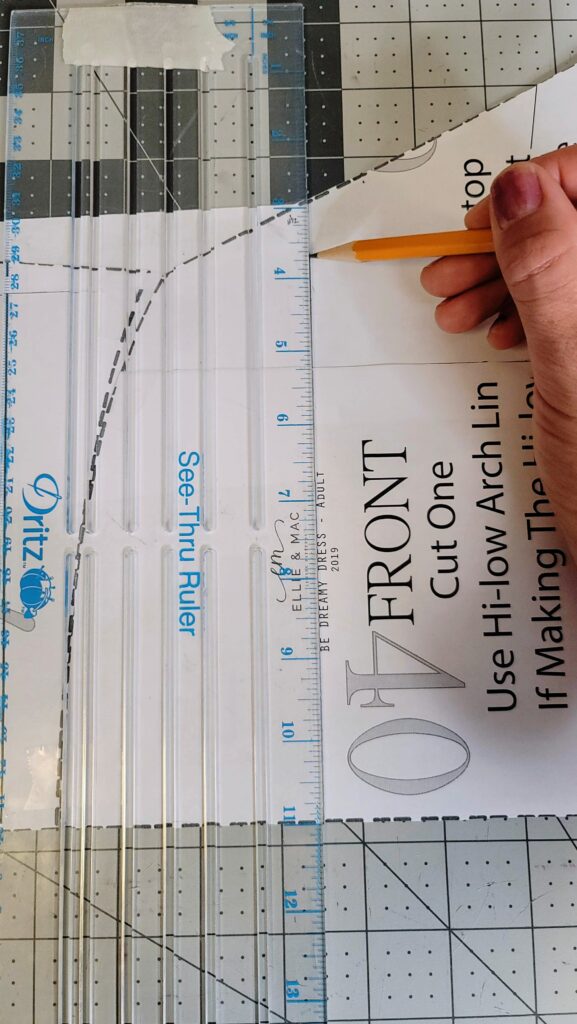
Now we will draw the new seam line. Measure 1/4 inch below where your scrap paper ends (the 1/4 inch is for our seam allowance).
Aligning your ruler perpendicular to the fold line, draw a line across the skirt 1/4 inch below where the side waist measurement scrap paper ends. See pic below for reference!
Cut on the line you just drew. That's the new waist seam.
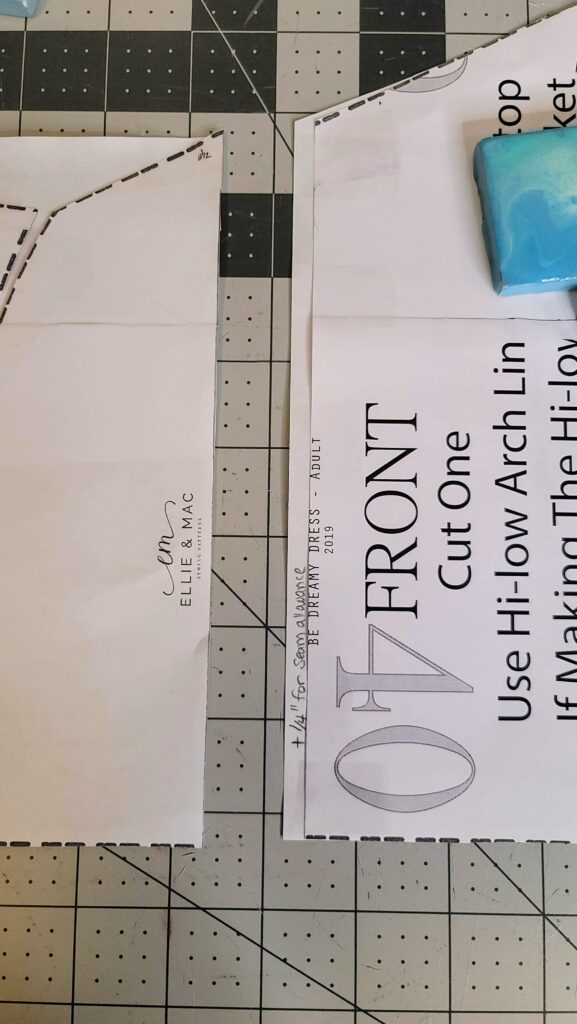
Now we need to add 1/4 inch to the top of the skirt piece for the other side of the seam allowance. See the scrap piece of paper I added on the top side of the skirt?
Next we need to shorten the skirt. If you want your skirt to be knee length like mine, you can either measure from your natural waist down to above your knee and add a hem allowance, or you can use my measurement and add or subtract length for your height.
My skirt length is 22 inches, that includes the hem. You can add or subtract 1/2 inch for every inch that you are taller or shorter than the intended pattern height which is 5'4". So, if you are 5'7", you are 3 inches taller than pattern height, so you would add 1.5 inches to this length. So 23.5 inches would be your skirt length.

You can use a rulered mat or a tape measurer for this part. Then using a ruler, mark your hem length at the 22 inches or so going straight across the width of the skirt, perpendicular to the fold line. Then cut on that line or fold it up and out of the way.

That's it! Now you just repeat the exact same steps for the back bodice and back skirt of the dress. You can see my back pieces completed below.
The final step is to cut your fabric using your newly hacked pattern pieces, then sew it together as written in the Be Dreamy Dress PDF pattern instructions!
How to Make the Sash

The sash is the final touch. Now, this is your dress so you can make the sash as long and wide as you choose!
Here's a few options:
- If you don't like to make bows on your dresses, but you do just like it tied at the side, I suggest doubling your natural waist measurement as the length of the sash.
- If you want a nice bow with decent length ties, I suggest tripling your natural waist as the length of the sash.
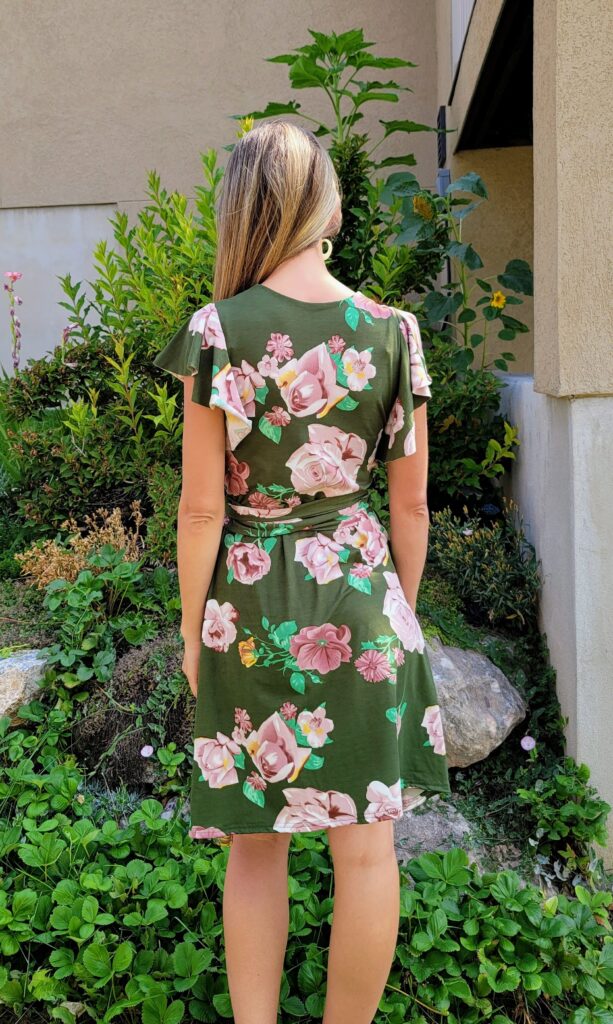
- If you want the sash to look like mine where I wrapped it all the way around, back, and then tied a big bow - then you will need to quadruple your waist measurement as the length.
Keep in mind that you can add as many seams as you need throughout the length of the sash. Mine is two long pieces sewed in the middle.
For the width of the sash, I used 5 inches, which after folding it in half to sew, you would come out with a 2.5 inch wide sash. Many sashes on patterns I've made are 4 inches wide when cut, so 2 inch wide final products.
Be sure to cut the length of the sash along the grainline so that the stretch is in the width of the sash.
To sew the sash you will:
- First, connect any multiple pieces you have by sewing the short ends with right sides together.
- Second, fold the sash right sides together, hot dog style, all the way along the length of the sash.
- Third, sew starting at one of the short ends to close one end of the sash, then turn and continue to sew along the long edge until you are halfway down the full length of the sash. Stop sewing and leave a gap here for turning.
- Fourth, after the turning gap, sew along the rest of the length and turn at the end to sew that end closed too.
- Fifth, turn the sash right side out and either hand sew the gap closed, or edge stitch along the entire lengths and widths of the piece. (Or don't! Don't tell anyone but I never sew those sash gaps closed!)
It's All Done
That's all folks, if you do all that, you're done!


I hope that all made sense. I enjoyed hacking the Be Dreamy Dress. Thanks for coming along for the ride.
If you need any help, feel free to reach out to me on Instagram, Facebook, or via email at letsgohobby@letsgohobby.com!
This post contains affiliate links.
(Written by: Jessica Luckert )