Hello fellow Ellie and Mac lovers! My name is Sasha (@sewsosh) and I’m so excited to share my first mashup tutorial with you all. I’ll keep my preamble short and sweet and get right down to brass tacks, but first: I need to give a shout out to the talented and gracious Lakeisha Webb, to whom I owe all my EM enthusiasm! Thank you.
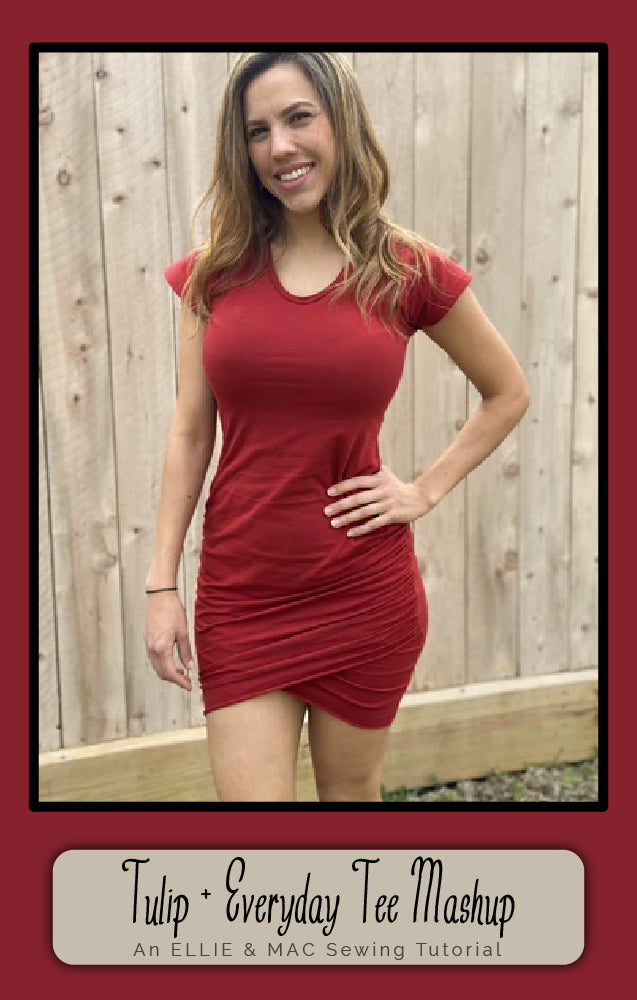
This dress mash up is the culmination of my quest to craft my perfect dress from my favorite EM pattern, the Breezy Top and Dress. It’s taken a few iterations, but I think I’ve finally nailed it. This winter version incorporates major elements of the Sweetie Pie Tunic and Dress and also the cowl pattern piece from the Going Home Raglan. I highly recommend buying them all (I mean, why not??) but it’s not 100% necessary if you have other patterns with a cowl or if you prefer the higher neckline of the Breezy.
Overview: We are going to use the Breezy pattern as a guide for bodice length and the amount of skirt flare, then superimpose the Sweetie Pie bodice/neckline/arm-scythe onto it. We will then level the Breezy skirt to take out the hi-low hem that comes with the pattern. Once we’ve got that basic dress pattern complete I will show you how I modified the cowl neck pattern to cut it as a single piece. If this is all you needed to know to make your own, by all means, skip the following and go do your thing!
FYI #1: Parts of this tutorial will be pictured in doll size scale for convenience, and others in full, real life scale.
FYI #2: I recommend doing your initial tracing in pencil because some blending/erasing will be needed if you are incorporating the Sweetie Pie bodice and leveling the skirt as I did.
Alright, let’s do this!!
1) Preparation. First off, materialize your preferred large blank pattern paper. I have
painstakingly pieced together a large enough swath from printer paper, but there are many other more convenient options out there. You should also have printed and put together your Breezy dress pattern, the bodice portion of the Sweetie Pie and your Going Home cowl pattern.

2) Adjusting your bodice length. Our first objective is to lengthen or shorten our Breezy bodice piece so that it ends at or just above our natural waist curve. We need that bodice to end at the natural waist, so that the flare of the skirt will begin at your natural waist.
The fastest way will be to make a muslin of your breezy bodice piece in a similar material to your project. From there, determine how much you need to add or take off and adjust your pattern.
If you want to try it without a muslin: Pop on over to Youtube and watch Diana’s Southshore Romper SAL video where she talks about measuring and adjusting your bodice for your side-waist measurement. It helped me a lot with adjusting nearly all of my patterns for a better fit. There is also a Side Waist Adjustment tutorial by Manda on the website here: https://www.ellieandmac.com/blogs/blog/how-to-do-a-sidewaist- adjustment-for-the-womens-romper?_pos=1&_sid=4bc52d7a4&_ss=r
NOTE: Think of your fabric type and how it will behave as a full dress. What is gravity going to do to that fabric? Are you using a slinky rayon spandex (RS) with 4-way stretch or a cozy 2-way stretch french terry (FT)? The more vertical stretch (and poor return) your fabric has, the shorter you may want your bodice piece. In fact, you may need to shorten it by as much as 1” or 1.5” above your natural waist for fabrics like RS. The weight of the skirt fabric (not to mention pockets!) will pull everything downward.
3a) Drawing out your bodice and skirt flare. Lay your adjusted Breezy bodice piece down on your blank paper, aligning your fold edge to the edge of the paper. We are going to trace the area from the arm pit to the end of your bodice piece. If you want to use the Breezy neckline and arm scythe go ahead and trace the entire bodice piece.

3b) Align your Breezy skirt pattern piece with the fold edge along the same straight line as your bodice fold edge. Overlap the side seam edge of the skirt over the end of the bodice marking by about a quarter inch. Trace your skirt.


4) Leveling the skirt hem. For me, the Breezy is the Goldilocks of EM dresses in terms of the amount of flare the skirt has. However, most of the time I don’t want the hi-low hem that comes with the pattern. You can create a level hem (or more level) with the following steps:
1) Find the center point above the waist where the two outer lines of your skirt
pattern would meet. 2) Measure the total length from that center point to the bottom edge of your
skirt at the center fold line. 3) Then measure out that same length, starting at the center point, and mark out a
dotted line all along the bottom of the skirt. This is your new hem line.

Alternatively, you can use the bottom of another circle or half circle skirt pattern that has a level hem to round out that area. This is the “winging it” way to do it and may not be for everyone, but it can also work just fine.
4) Completing your bodice (with the Sweetie Pie). Next, take your Sweetie Pie pattern and lay it down over the portion of the Breezy bodice you traced. Match up the fold edge to the edge of your paper and the arm pit of the Sweet Pie to your Breezy arm pit marking and trace the arm scythe and neckline of the sweetie pie.
The Sweetie Pie bodice is a bit curvier and much shorter than the Breezy. At this point you can choose to blend and keep that curve and erase your original Breezy side seam line, or you can keep the straight line of the Breezy. Which ever you choose, make sure to keep that original skirt flare point in the same position.

Here is the finished result. I chose to keep the curviness of the Sweetie Pie bodice, but it now has the length of my tried and true Breezy bodice. I added a lengthen/shorten line from the Sweetie Pie with notes based on my observations with different fabrics. If you want to add pockets, I recommend positioning the top of the pocket piece 3” down from the point where the skirt flares out.

Adding a Modified Single Seam Cowl Neck
This dress incorporates the cowl neck from the Going Home Raglan Sweater. You may use any cowl pattern piece you have or draft your own. Whatever pattern you use, this tutorial will help you:
- Cut your cowl as a single piece to eliminate the side seams.
- Make adjustments to match the length of your neckline.
The best part is you don’t have to make a single cut to your original pattern piece!
1a) Augmenting your pattern for a single seam. Draw a straight line from the neckline edge up to the “cut on fold” edge on one of your angled pattern edges.

1b) Next, fold that edge under, along the line you just drew. You will now have a pattern piece that looks like this:

2a) Prepare your fabric by creating a double fold. First, lay your fabric out flat in front of you with your stretch on the horizontal axis and your grain on the vertical axis.

2b) Make your first fold by pulling the top of the fabric down toward you.

2c) Make your second fold from side to side.


3a) At this point you will need to measure your neck opening on your garment and compare it to your pattern piece to see how much you need to adjust it. Measure your
neckline by folding your garment’s neck opening in half, matching up your shoulder seams as though you are quartering the neck for a band. Lay it out flat against a ruler, making sure not to stretch it. For detailed instructions, check out Lakeisha’s tutorial HERE.

NOTE: The neckline edge of your cowl piece can be anywhere from ~85-100% the size of your neckline. So if you’re short on fabric and can’t make it the exact same size, you’re ok! Make it as large as you can.
My measurement here is about 15.25” x2 = 30.5”. So I’m going to cut my cowl piece as close to that as I can. The Going Home cowl pattern measures 13” on the neckline side, so it is for a neck opening of ~25”, subtracting seam allowance. Therefore, I will need to add some length to my cowl.
3b) Lay your cowl pattern on your folded fabric as shown. Use your ruler to add or subtract length. Pin your pattern in place.
NOTE: If you are subtracting lengh, you can either fold your pattern again and make a new flat edge or hang your pattern off of the fabric by the required amount.

As you can see, I do not have enough fabric to make my cowl piece the same size as my neck opening, but I will end up with a piece that is 14.375 x 2 = 28.75 - 0.5 SA = 28.25” . (93% of my neck opening. Perfect!)
3c) Make your cuts! You are only making two cuts because two sides of the pattern are on the fold. Do not cut on the side with the extra thick fold! You will be very upset..

4) Sew your cowl piece together. You will have a symmetrical piece of fabric with two pointed ends. Match those two pointed ends together, right sides facing. Sew that seam closed with a serger or stretch stitch. This is your back seam.

Now flip it right side out, fold it in half, matching up the neck opening (and back seam). Quarter your cowl and your neckline and sew that puppy on! You’re done!! Now go hem your beautiful winter dress!

And....tada: