Hey Ellie and Mac fans! Jessica here again with another fun pattern hack. I usually blog over at the Let's Go Hobby blog, but I also enjoy writing posts for the Ellie and Mac Patterns Blog. If you missed my previous posts on the Ellie and Mac Blog, you can check them out with the links below:
- Be Invincible & Urban Leggings Mash
- Hack Your Wrapped Love Dress
- Sunset Dreams Dress to Top Hack
- Be Smart Jumper Hack
- Add a Paperbag Waist to Any Skirt
And you can see all my Ellie and Mac posts on the Let's Go Hobby Blog by clicking HERE.
The Pattern
As you might have guessed by the title of this blog post, this is a hack to turn the Poppy Top into a Poppy Dress. The method is really simple, we are just adding length to the garment below the hem.
Below is the line drawing for the original shirt pattern.

I don't know how I missed this pattern before while perusing all the Ellie and Mac Patterns, but what a fun top! The shirt gets some extra character with the placket in the back.
You could add classy looking buttons, fun or funky buttons, or no buttons at all. Anything goes! And with the color blocking, you can make this pattern really stand out.
While I like the pattern as is, I'm always looking for fun ways to make things different and new. So, why not make it a dress instead?!
From Top to Dress

This is actually a really simple hack.
All you need is:
- a tape measurer
- a ruler or two
The nice thing about the Poppy Top pattern is that it already comes past the hips, so it's already wide enough to come straight down from its original length. If you want it to be more of an a-line dress, you could easily swing the line out, but for mine I went straight down from the hem.
Step 1 - Measure
I measured from the top of the pattern to the very bottom of the pattern accounting for the color blocked seam allowance by overlapping the two pieces by 1/4 inch.

Then I measured me from shoulder down at the same length.

I wanted the dress to come to right above the knee. So after measuring, I decided to add 12 inches to the length of the top.
It's better to add too much than too little! I actually ended up cutting 2 inches off the bottom before hemming the dress, so 10 inches would have been perfect for me. For reference, I am 5'5".
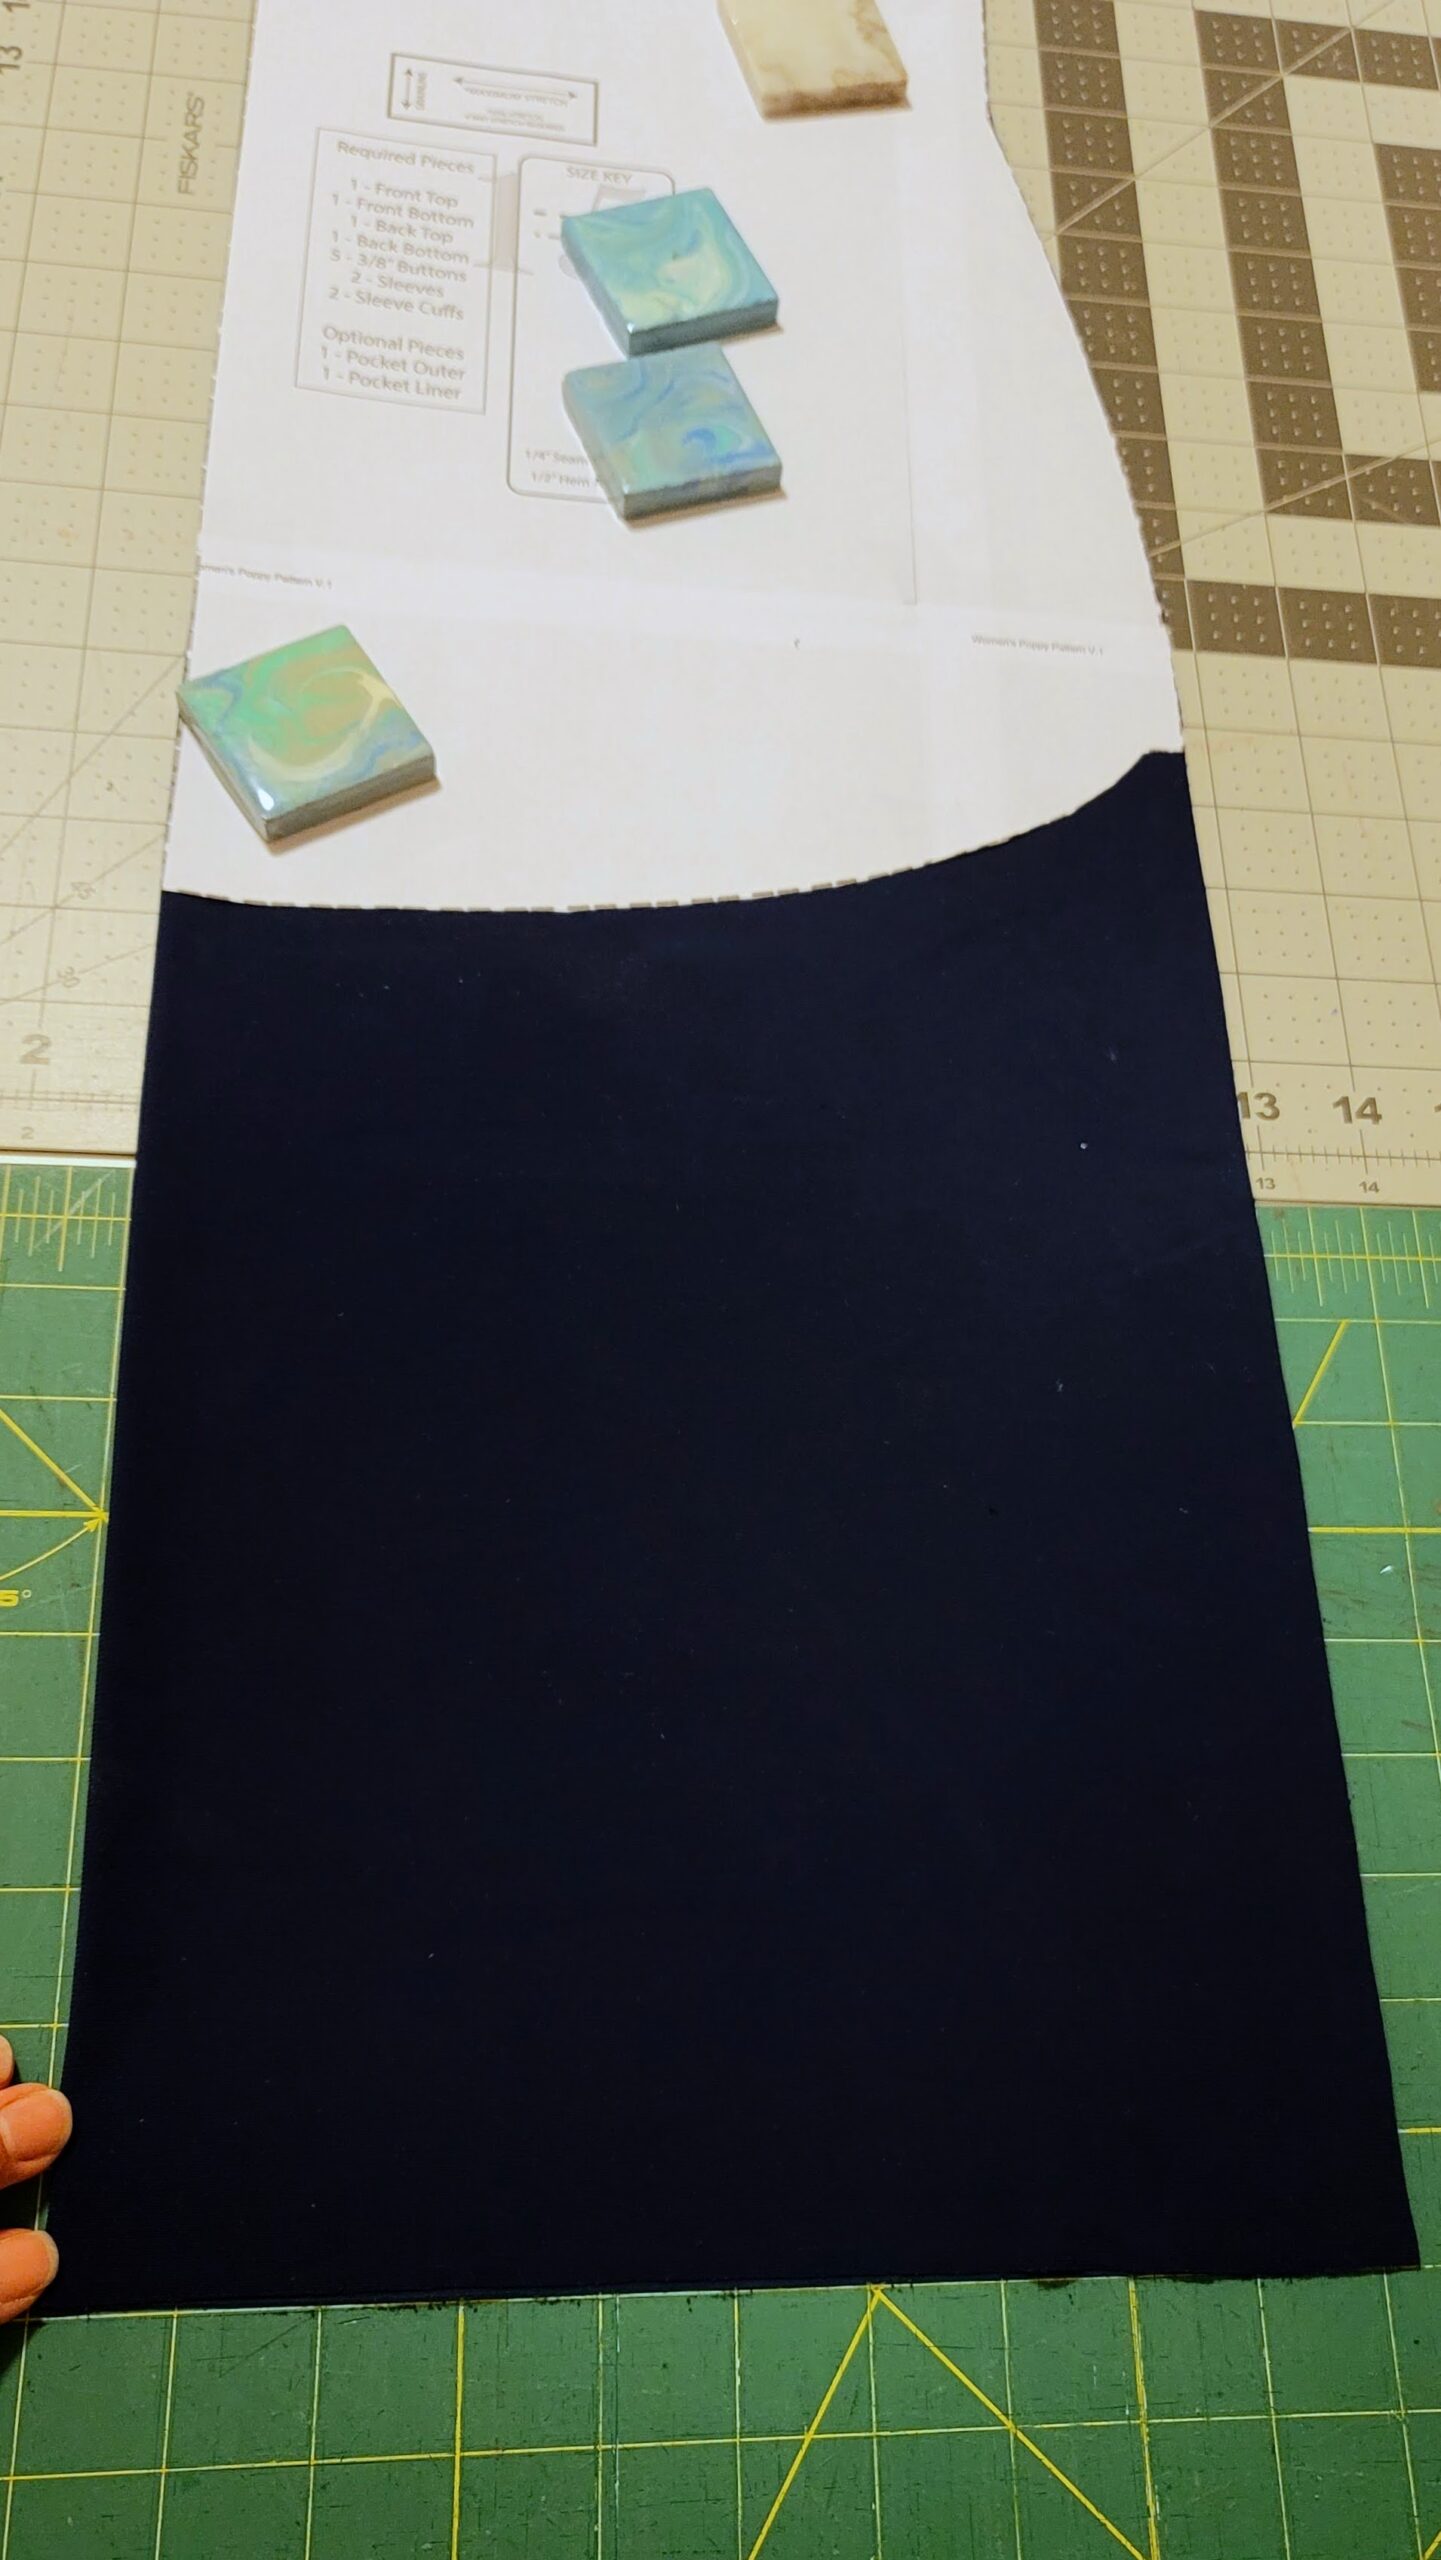
Step 2 - Add length

After lining up my pattern on the folded fabric, I measured down 12 inches from the pattern on the fold line as seen in the picture above.
Next I cut straight across perpendicular to the fold line at 12 inches. You could do the curved hemline too, but a straight hemline is easier to cut and hem!

And finally, put a ruler straight down parallel with the fold line at the widest part of the top and cut down to the end!
And Don't Forget!
Don't forget to add the same length to the placket interfacing! You will be following the instructions in the Poppy Top Pattern pdf on how to do the back placket, but it won't work if your interfacing is some 12 or so inches too short! :)
Step 3 - Buttons
You can attach the buttons as per the pattern recommendations if you want, but of course they won't go all the way to the bottom of the dress. And you wouldn't want them to either - you would be sitting on them!
I deliberated for a while on how many buttons I wanted and where. In the end I decided on three buttons spaced 2.75 inches apart.

I think I would have done them a bit higher after seeing the finished dress on me, maybe 2.25 inches apart? I was trying to have the bottom button hit at my natural waist, but I think it's a tad lower.
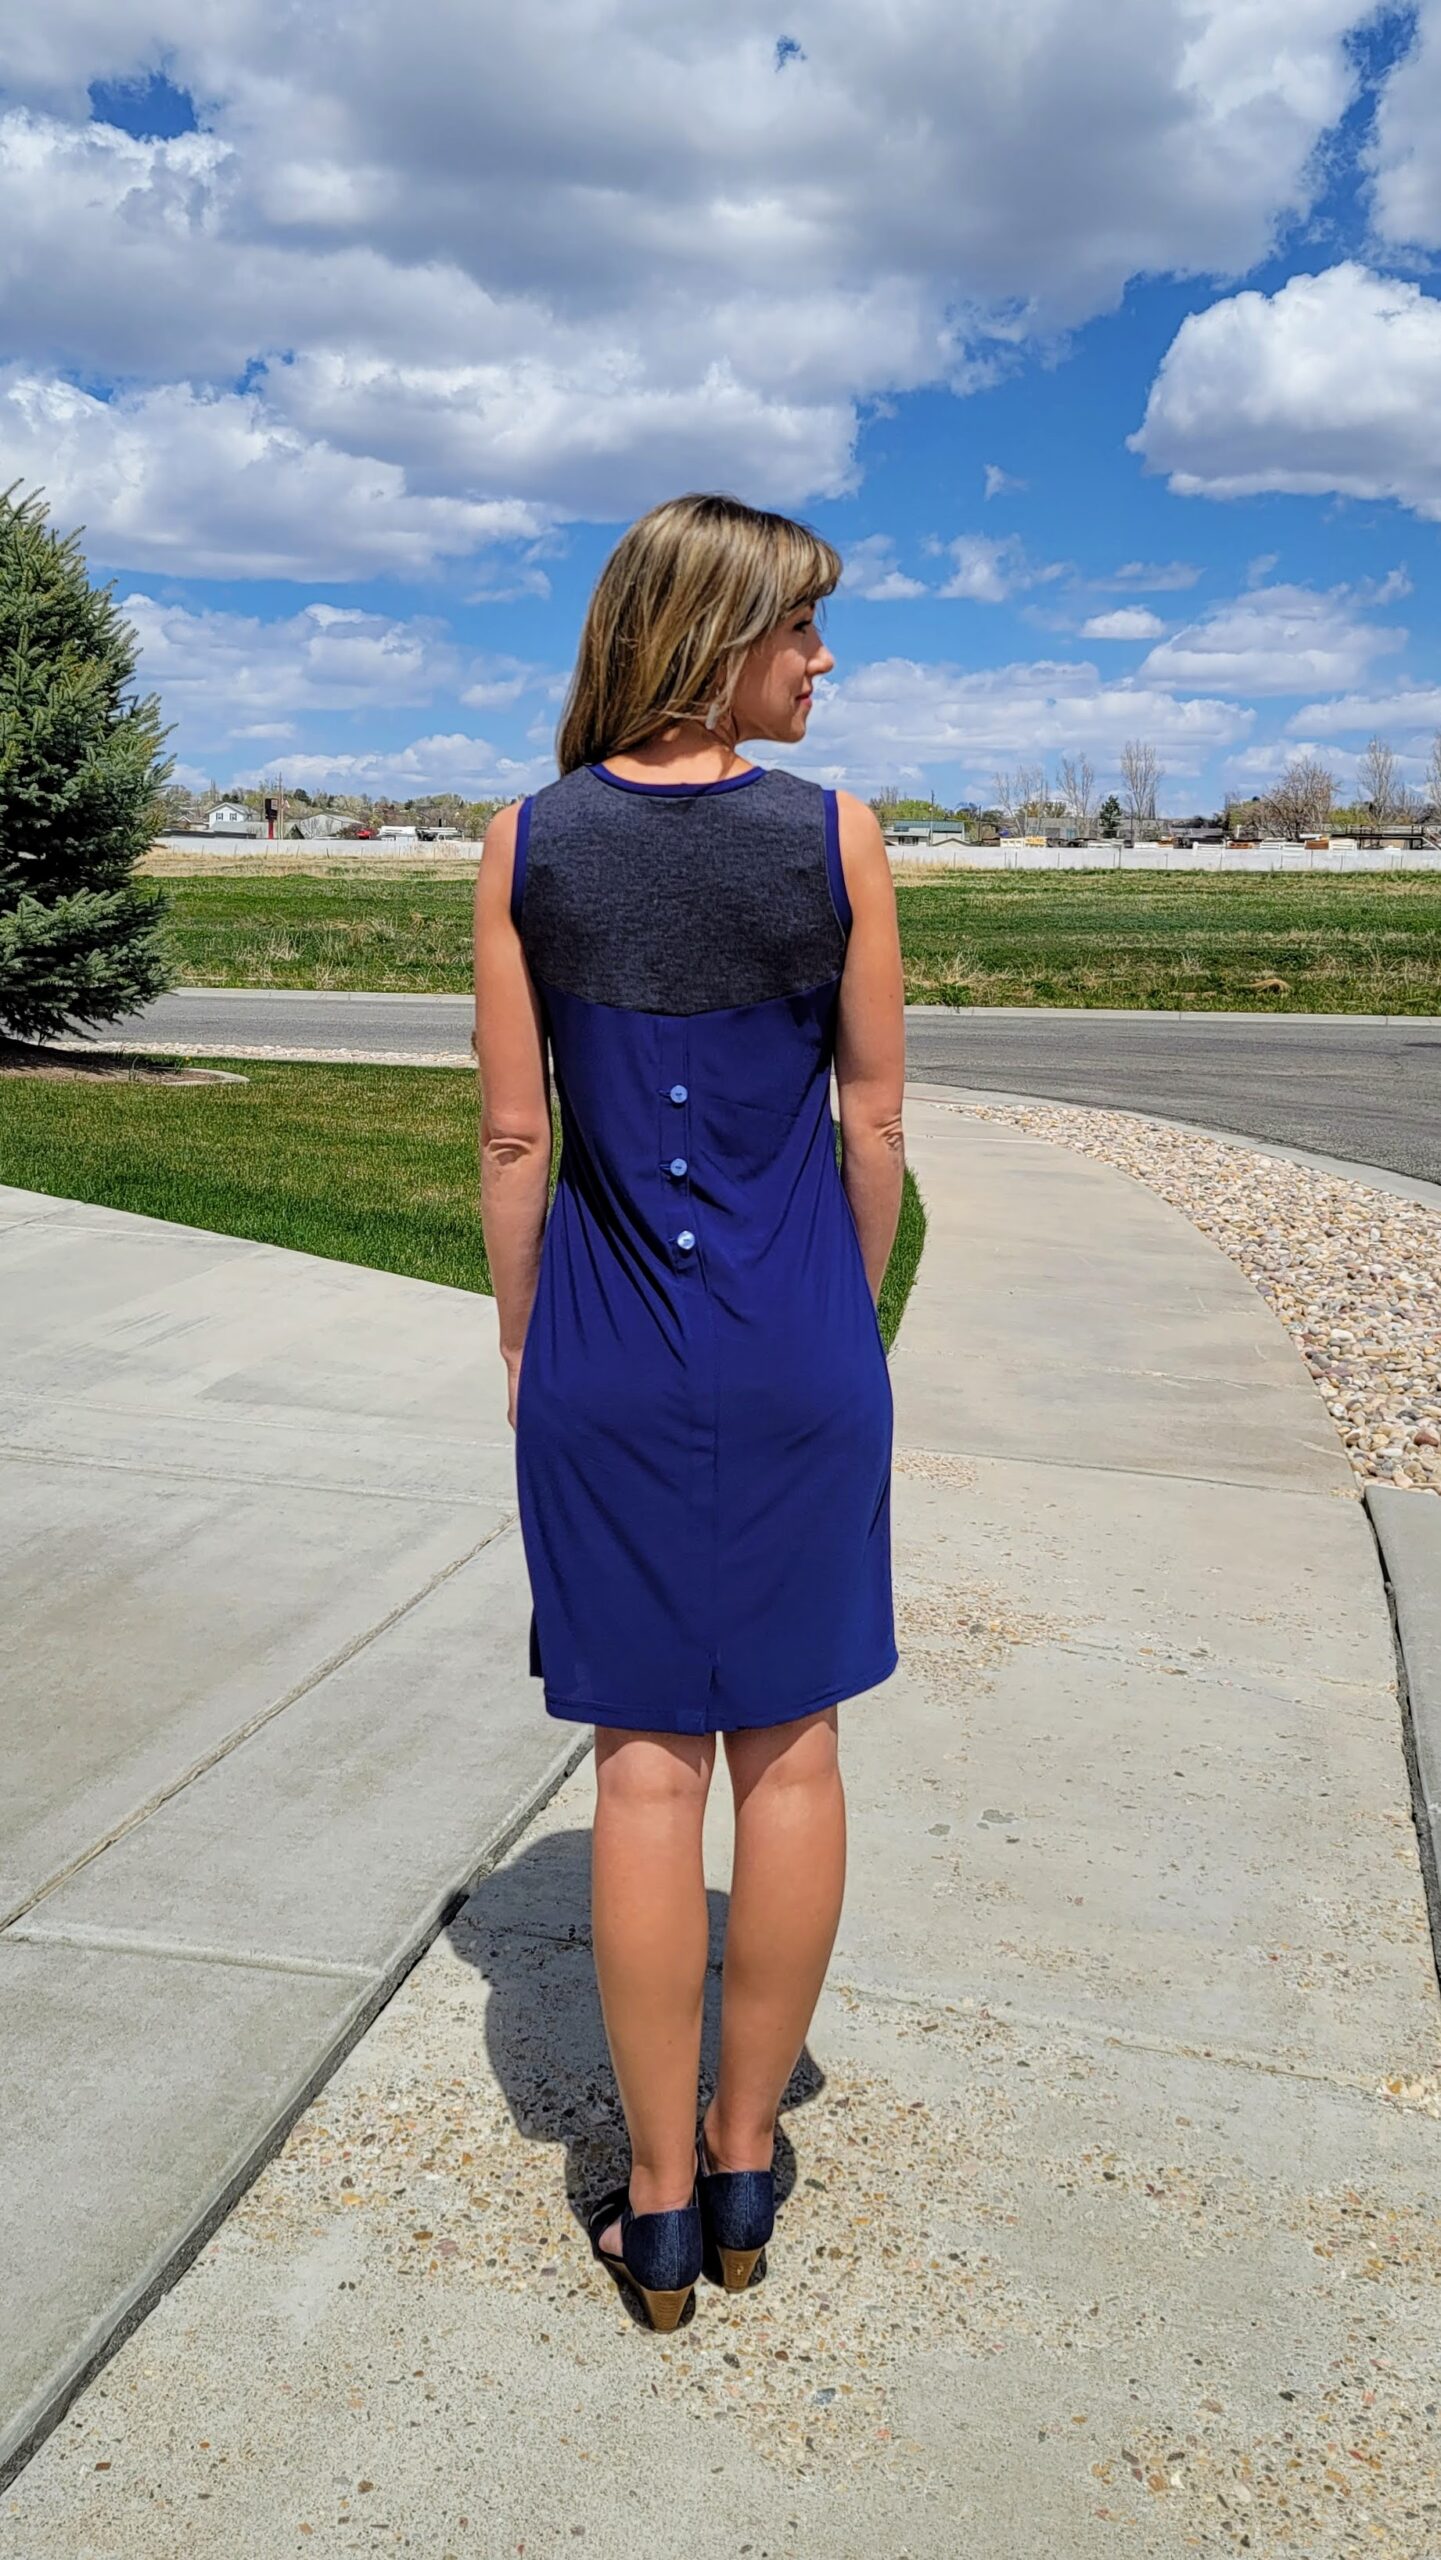
In any case, count and space them however you like. Be creative!
Step 4 - Sew Placket
This step should be done after hemming the dress.
The last step is to sew the placket closed in the back. I thought about this part for a while. I decided to just sew the placket closed after making sure that the width of the dress was adequate to walk in.
You could use a zipper foot to sew all the way down the placket past the buttons, but I opted to sew from below the buttons to almost the bottom. Almost, because I left a little opening at the bottom to act as a decorative vent.
To clarify, you are sewing along the line I'm pointing to to close up the dress in back.

The picture below was taken before hemming the dress as I was trying to decide the length of the vent.
I ended up going with 2.5 inches. So if you want to do the same, you start sewing straight down at below the buttons and stop 2.5 inches before the hem of the skirt. Be sure to back stitch on both ends.

An Idea
I think it would also be really cute to add a panel the same size as the back of the skirt in the back. That way you could add the buttons on the top of the placket and allow the rest of the placket to swing open with the peek a boo panel underneath.
You could attach it to the color block seam or at the shoulder seams. Just don't choose a heavy fabric for the under panel or it may pull the dress backwards.
An Extra Bonus
You might have noticed that this pattern has options for short sleeves or for long sleeves, so why does my dress have no sleeves? I just thought it fit the dress to be sleeveless with the fabrics and look I chose, so I banded the arms.
This is super simple to do. All you do is measure the armscye and make your own band.
I like to fold my armscye as seen in the picture below and then measure.

You will double the measurement, take 85 percent of it, and add the seam allowance. I measured 8.5", so that's:
- 8.5 * 2 = 17
- 85% of 17 is 14.45
- The seam allowance is 1/4", so adding .5 inches and rounding, I got 15" for my arm bands.
And the width can be the same as the neckband. I used the neckband to make the cut a bit easier.

The Finished Product

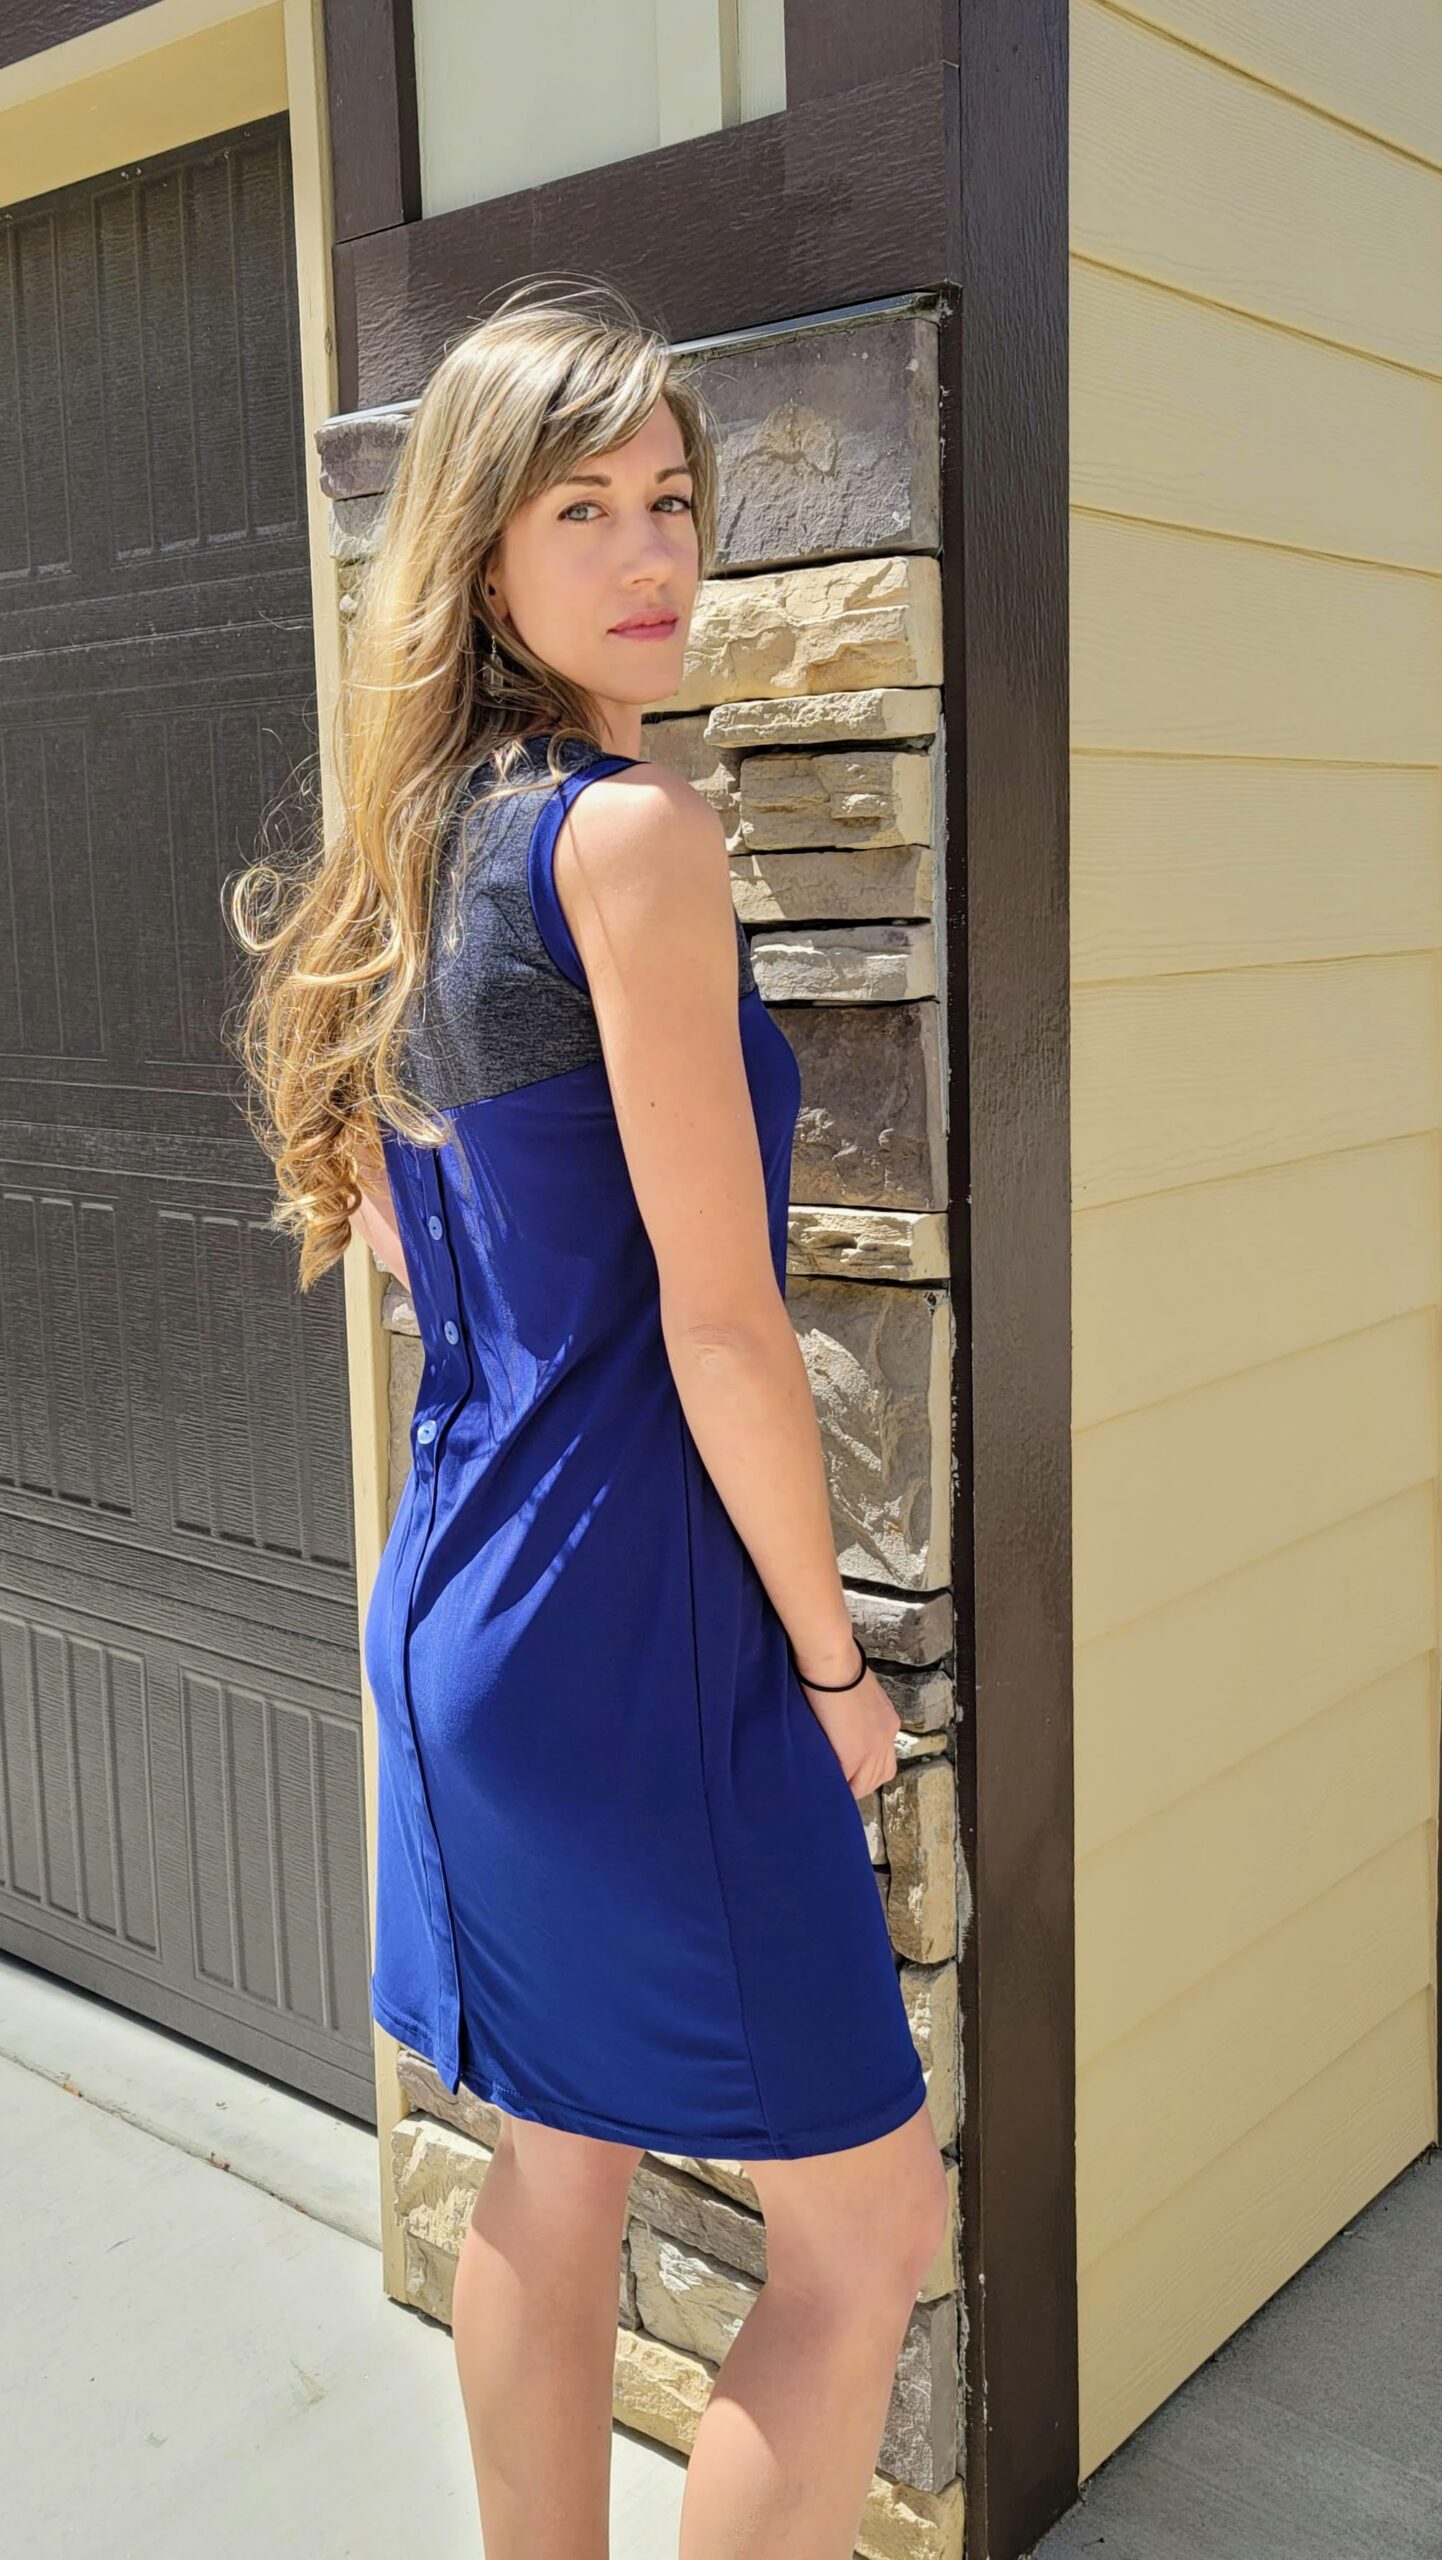


Have Fun
Hope you enjoyed this post. You can find the Ellie and Mac Poppy Top pattern by clicking HERE. I'd love to hear if you end up making it.
If you have any questions, you can reach out to me via by blog email address: letsgohobby@letsgohobby.com
or on Instagram @ www.instagram.com/sewletsgohobby
or on Facebook @ www.facebook.com/letsgohobby
Happy Sewing!!