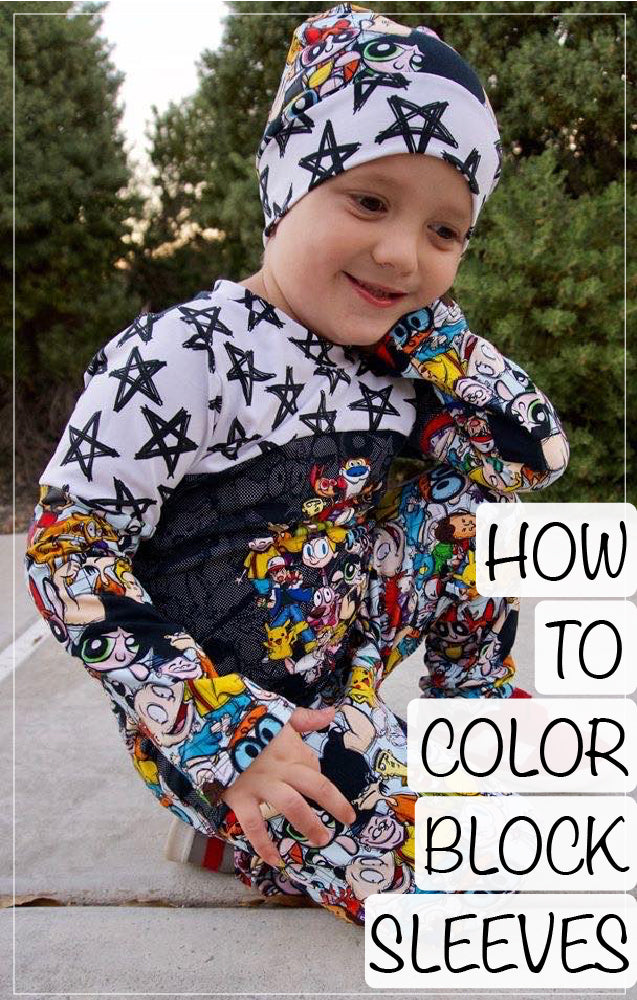
Hey Hey Hey my beautiful EAM’ers! Alisha here again! It feels great to be back bringing you another fun hack! There’s no doubt that I love love love my hoodies, and I love to shake them up a bit! Now, I’m not gonna lie, this hack is a bit time consuming and the measurements can be a bit tricky for the different sizes, but the end results are so worth it! This hack is also great for ALL those scraps you’ve been accumulating! If your scrap bin is anything like mine, I see you, then this project is perfect for you!
Below you will find a list of tools, nothing fancy I promise, that you will need to complete this hack!
- blank paper, tracing paper, or preferred tracing method
- pencil or other marking tool that can be erased if needed
- straight ruler or acrylic ruler
- scissors
This pattern has been discontinued, but we have patterns that you can use to get a simular look:
- Sew Scrappy Top
- My Way Hoodie
Now that we have the tools that we need, we can get this hack a goin’! I’ll keep this as short and sweet as I can for y’all! I also want to note that I used size XXS for this hack. As you go up up in sizes, the angles will end up just a tiny bit different. You can eye and compare your bodice piece lines to the bodice piece lines in my photo in step 15 and kinda eye the shapes. If you have any questions, I’m more than happy to assist!
Step 1: Lets begin by getting our Game Time Hoodie adjusted for height, or any other adjustments that need to be made for you before we trace it onto our blank paper. Now, lets tape 8 sheets of printer paper together, you can also use tracing paper, wax paper or any other method you prefer for this step. Be sure to have enough paper space to trace a FULL front bodice. 
Step 2: Lay the Game Time Hoodie front bodice onto the blank paper you’ve taped together. You can put pattern weights on the pattern so it does not shift while tracing. Now, trace the front bodice onto the blank paper, all the way around, even along the fold. 
Step 3: Flip the bodice over, so that it is mirrored, and align the fold side up with the fold side that you previously just traced. Make sure the neckline and hem lines are aligned as well. Now, trace around the bodice again. 
This is what your traced front bodice should now look like.
Step 4: Cut out your FULL front bodice piece as a whole. Do not cut down the center line that we used to align the fold marks on in the previous step.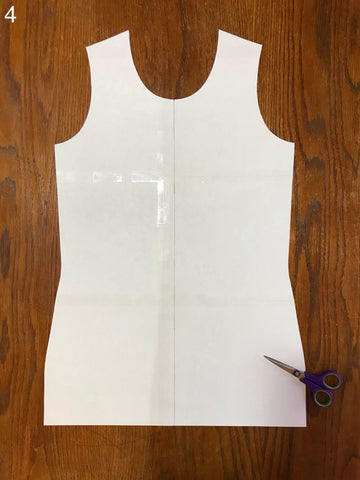
Step 5: Measure down 3.5” from the shoulder edge (shown by the red arrows) on both sides. Mark these 2 spots, shown by the black lines.
NOTE: Be sure the two marks line up with the neckline. 
Step 6: Measure down 2 & 5/8” from the center of the neckline indicated by the black arrow. Place a small mark. Now, starting from the left (while wearing) shoulder mark we previously done, align the shoulder mark with the neckline center mark with a straight ruler or acrylic ruler. Draw a line that measures 8.5”, shown by the red arrow, starting from the shoulder mark and extending past the neckline center. 
Step 7: Align the ruler from the right (while wearing) shoulder mark with the mark you made in step 6, Once aligned, draw a line connecting these two points, shown by the red arrow.
Step 8: To make the next color block piece, keep the line straight from the previous line made in step 7, and draw a line all the way to the side seam, shown by the red arrow.
Step 9: At the bottom hem, measure over 3” from the side seam., shown by the blue arrow. Place a mark.
Step 10. Measure up 3 & 5/8” from the side seam on the line you made in Step 8, shown by the blue arrow. Place a small Mark. 
Step 11: Now connect the two marks made in Steps 9 & 10, shown by the red arrow.
Step 12. Measure down from the right (while wearing) armscye 2.5”, shown by the blue arrow. Place a small mark. 
Step 13. Measure down 8” on the line you made in Steps 10 & 11, shown by the blue arrow. Place a small mark. 
Step 14. Now connect the two marks you made in Steps 12 & 13, shown by the red arrow. 
Step 15. This is what your front bodice should look like now. We want to label our pieces just as they are in the photo here, as this is how I will refer to them as I am sewing them up. 
Step 16. Cut the pieces apart. We will now add 1/4” for seam allowance to all the pieces that have a red mark in the photo below. If the seam allowances is not added, it will result in being too snug.
Step 17. With Fabric RIGHT SIDE UP and pattern pieces RIGHT SIDE UP, cut out your fabric. Be sure to label the pieces, with in the seam allowance so they don’t get mixed up. Trust me, this is highly suggested, and I’m speaking from experience..lol.
NOTE: You will notice that I changed the color scheme after this step. I really wasn’t liking all the green, so I switched one panel for a ruby color solid. The only piece I changed was piece C, I changed it from the green to the ruby solid.
Step 18. Take piece A and place onto piece B, RIGHT SIDES TOGETHER. Pin/Clip. Sew along red line using preferred stretch stitch. Press. Top stitch if desired.
Step 19. Take piece C and place onto piece D, RIGHT SIDES TOGETHER. Pin/Clip. Sew using your preferred stretch stitch along red line. Press. Top stitch if desired.
Step 20: Place piece E onto the sewn piece C/D you’ve, RIGHT SIDES TOGETHER. Pin/Clip. Sew using your preferred stretch stitch along red line. Press. Top stitch if desired.
Step 21. Take sewn pieces A/B and place onto sewn pieces C/D/E, RIGHT SIDES TOGETHER. Pin/Clip. Sew along the red line using your preferred stretch stitch. Press. Top stitch if desired.
Step 22: Whoa!! The Front bodice is now done, and this is what you’ll now have in front of you! Give the front bodice a final good press to make sure all seams are laying flat! Continue on with the construction following the instructions of the Game Time Hoodie. I left the back solid, yeah yeah yeah, I know, taking the easy way out here, lol. 
If you are wondering how I done the sleeves, I took 4 strips of fabric, wider than the sleeves, folded the raw side of the long edge of the strips under 1/4” using wash away wonder tape to hold them in place. I then measured up 3” and placed my first strip onto the sleeve and top stitched it onto the sleeve. I then measured up another 1” and placed the 2nd strip of fabric, and top stitched into place on the sleeve. Repeat for other two strips and other sleeve. That’s it. Easy peasy!
For the drawstrings, I took 3-1” wide strips of fabric by the length I wanted them, and just braided them together. I then sewed the braided drawstrings into the grommet hole when I top stitched my grommet into place, like the instructions of the Be Creative Hood. I then just tied a knot in the other end!
For the hood, I of course am madly in love with the crossover hood from the Be Creative Hoodie and added it instead of the Game Time hood! Either would look fantastic with this color block hack! Can’t wait to see all the amazing fabric combos y'all use! Be sure to share in the Ellie and Mac Facebook group! Until Next time!!
This post contains affiliate links.
Written by: Alisha Scalf


