Hi Ellie and Mac Pattern fans! Jessica back to talk to you about an awesome pattern that I think does not get enough love!
Which pattern is that you may ask?
Well, to answer that - if pictures can say 1000 words, how many can a video say?⬇
(if it looks distorted below, don't worry, Instagram will show you correctly when you click!)
Don't have Instagram? No worries, you can just check out the photos in the post below!
Which Pattern?
If you haven't figured out which sewing pattern I mean, it's the...
.
Drumroll!!
.
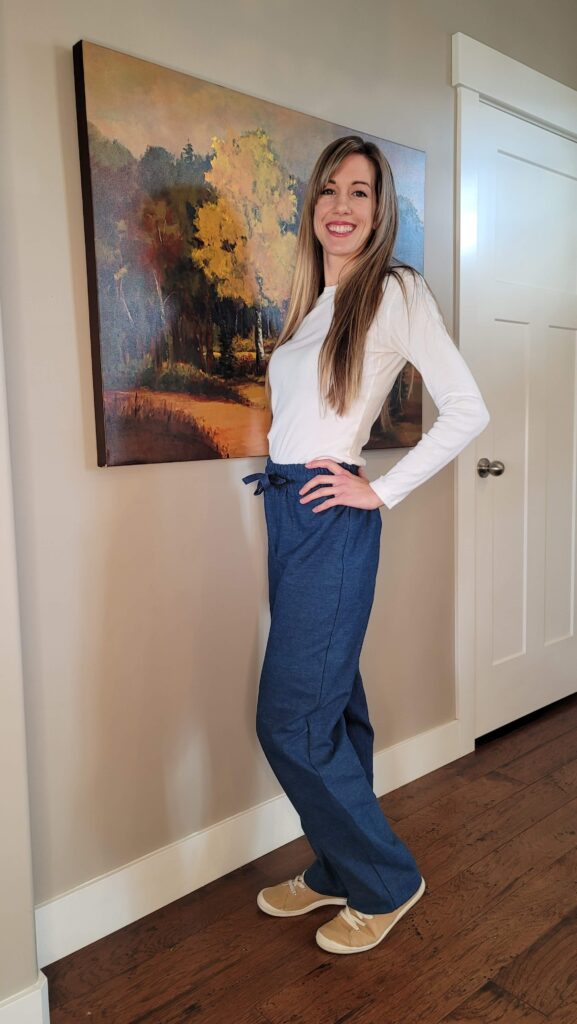
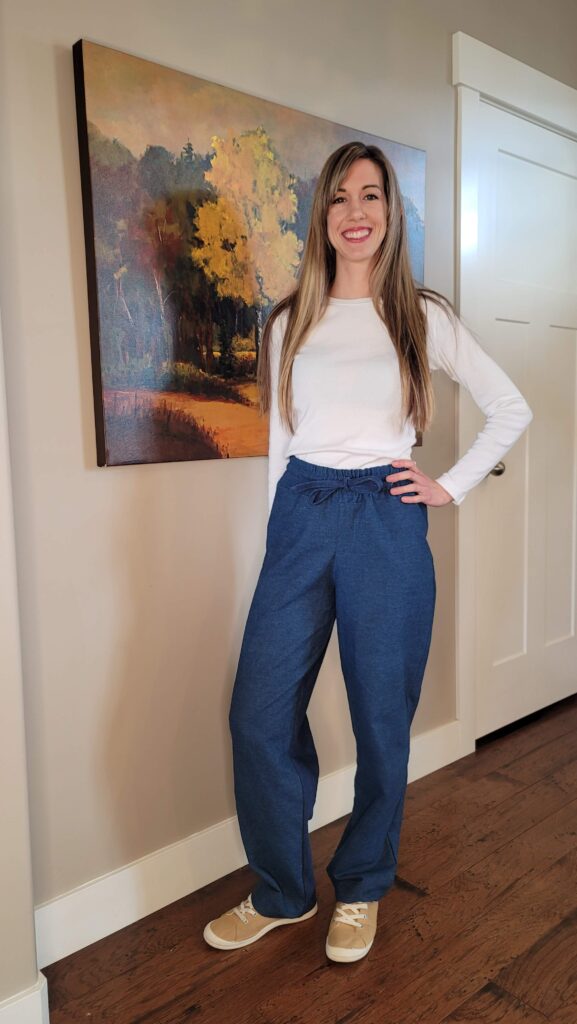
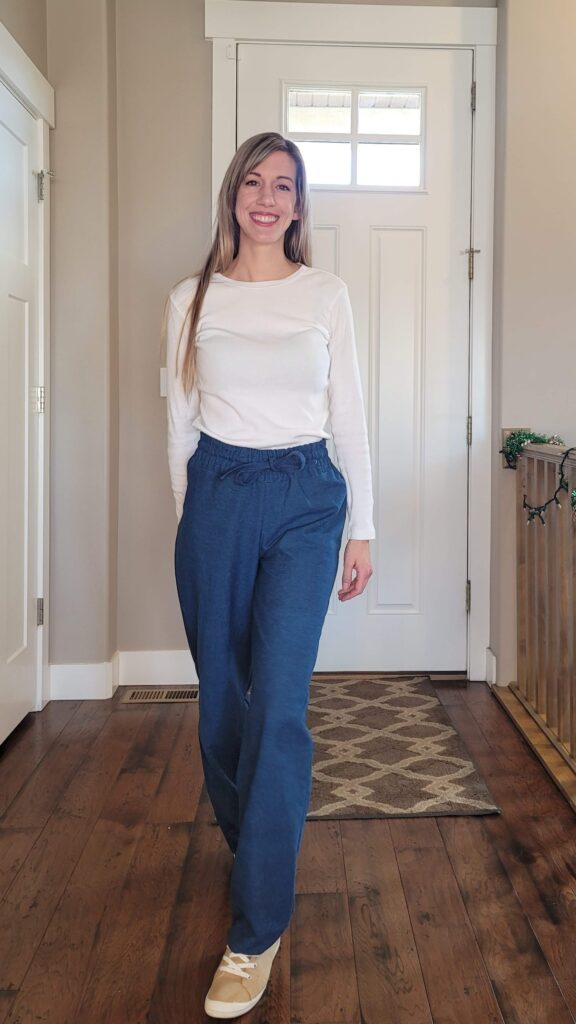
Here they are! Cute Pants right!?
Feel Pretty Pants Pattern Options
Here's the line drawing from the Feel Pretty Pants Pattern Listing:

Pant Length Options
- Shorts
- Capri with Basic Hem
- Capri with Elastic Hem
- Pants with Elastic Hem
- Pants - Regular Length
- Pants - Long Length
Waistband Options
- High Waistband
- Short Waistband
Rise Options
- High Rise
- Low Rise
Lots of options right? And Ellie and Mac has fantastic prices, you get so much for what you pay!

Waistband Details
I chose the high waistband and high rise for my Feel Pretty Pants as I wanted them to come to my natural waist area. That's the style right now!
A note about the elastic - I don't like my pants too tight, so I added 1 inch to the elastic length given for my size. There are ties anyway, so I figured if it was too loose, no worries!
The waistband has is made with lines of stitching to make multiple casings. Depending on which waistband height you choose, you will make 3 to 4 casings and then insert elastic in some and a tie in the middle casing. This part wasn't difficult, but it did take the longest amount of time.
I just fed my elastic and ties through with a safety pin, maybe you have a faster way? If you do, please let me know in the comments? I'm always up for learning new sewing tips!
You can chose to insert grommets or just make button holes for the ties. I chose to do button holes. Making button holes can be scary the first time you do it, but it's not as bad as you think! Just always do a little test button hole first on a scrap to make sure you like the size and know which way your button holer will sew!
Button Hole/Grommet Tips
A little tip here, the instructions don't mention how far down, how far apart, or how wide your button holes should be!
So, here's what I did and it worked great!:
- Place your button holes 1/4" below the stitched line above that you will just have sewn for the casing above.
- Your button holes should be about 1/2" apart from inner end to inner end.
- Your button holes should be at least 1/4" wide as that is how wide your ties will be, add a bit more to account for the thickness of the tie, especially if you use a thicker fabric.
Pant Leg Details
The pant legs are a breeze to sew up, if you have sewn leggings or pajamas pants before, you can definitely sew these! The instructions said to sew the rise first and then go around the side seams and inseam, but I prefer to sew my pants the other way.
Which is, you sew the front and back pant legs, right sides together so that you have a right leg and a left leg sewn up. Then you turn one pant leg inside out and insert it into the other pant leg, matching up the inseams. Then just sew around the crotch curve and voila! Either way works, which ever is better for you!
I have a serger, so I finished all my seams inside the pants as I went. So, I sewed the seams with my sewing machine at 3/8ths seam allowance, then serged at 1/4" seam allowance.
The Hem
I chose to make full length pants with a regular hem. I actually accidentally cut my pants on the long length line and didn't realize that until later. I was wondering why my pants were so long when I tried them on to determine how short I should hem them! Oops!
But it worked out great, I ended up serging the raw edge and then folding the hem up 2 inches and sewing. I like a big hem on wide leg pants anyway!
Still Not Sure About Making Pants?
For those of you who have never made pants, it can be intimidating. Luckily, Diana (who makes a ton of great videos on YouTube for Ellie and Mac) has made a full length video tutorial for the Feel Pretty Pants Pattern. Cool huh!?
I've embeded the video below, or you can get there by clicking HERE.
What is a Pattern?
Recently, Ellie and Mac posted this quote on Instagram:
To the beginner, patterns are a manual. To the expert, patterns are a guideline.
@ellieandmac_patterns
Do you agree with the quote?
The quote post caption asked, "What is a Pattern to You?" One person in the Instagram comments answered, "A sloper." You might be asking, "What is a sloper?"
According to Dictionary.com, a sloper is: "...a basic pattern developed on paper by drafting or in cloth by draping, but with seam allowances omitted, used as a tool to create other patterns."
Now, Ellie and Mac Patterns do have seam allowances. But I think the person's intent was to say that a pattern to them, is a tool to create whatever they want!
An interesting way to look at patterns right? As a basic building block to sew anything that comes to mind!
Want to be Creative?
Need some hack and mash ideas for these to make the Feel Pretty Pants Pattern your sloper? I've got a few up my sleeve.
Pocket Hacks
The Feel Pretty Pants don't come with a pocket option, but the Ellie and Mac Paperbag Pants do!
Here's my hacked pattern version below. The Paperbag Pants have slant pockets which I think would be perfect for the Feel Pretty Pants! Do you think so to?

You could also add belt loops or a paperbag waist to the Feel Pretty Pants using the Paperbag Pants Pattern! These two patterns are a mash made in heaven.
These two patterns are a mash made in heaven.
Jessica Luckert 😉
You could also add patch pockets or inseam pockets!
Waistband Hacks
Another idea would be to add non-elasticized waistband with a button closure or zipper and hook for example. That would give a whole new look to the pants right?!
Pant Legs Hack
These would be great pants to add some flare to by adding a triangular insert to the bottom of them. I'm not sure if you would call it a godet in this particular situation, but that's how I would think about it. If you've ever sewn godets into a pattern, you know what I mean!
What Hack Ideas Do You Have?
I'd love to hear any fun hack ideas you have! Let me know in the comments or you can contact me on social media!
Where to find me:
Instagram - www.instagram.com/sewletsgohobby
Facebook - www.facebook.com/letsgohobby
My Website - www.letsgohobby.com
More Posts on the Ellie and Mac Blog
If you liked this post, awesome! If you'd like to see more Ellie and Mac Blog Posts I wrote you can check them out with the links below!:
- Morning Lounge Wear
- Be Invincible & Urban Leggings Mash
- Hack Your Wrapped Love Dress
- Be Dreamy Dress Hack
- Sunset Dreams Dress to Top Hack
- Be Smart Jumper Hack
- Add a Paperbag Waist to Any Skirt
Some of the links above are affiliate links. There is no extra cost for you, but it gives me a couple extra cents to pay for the fabric that helps me bring you great posts!