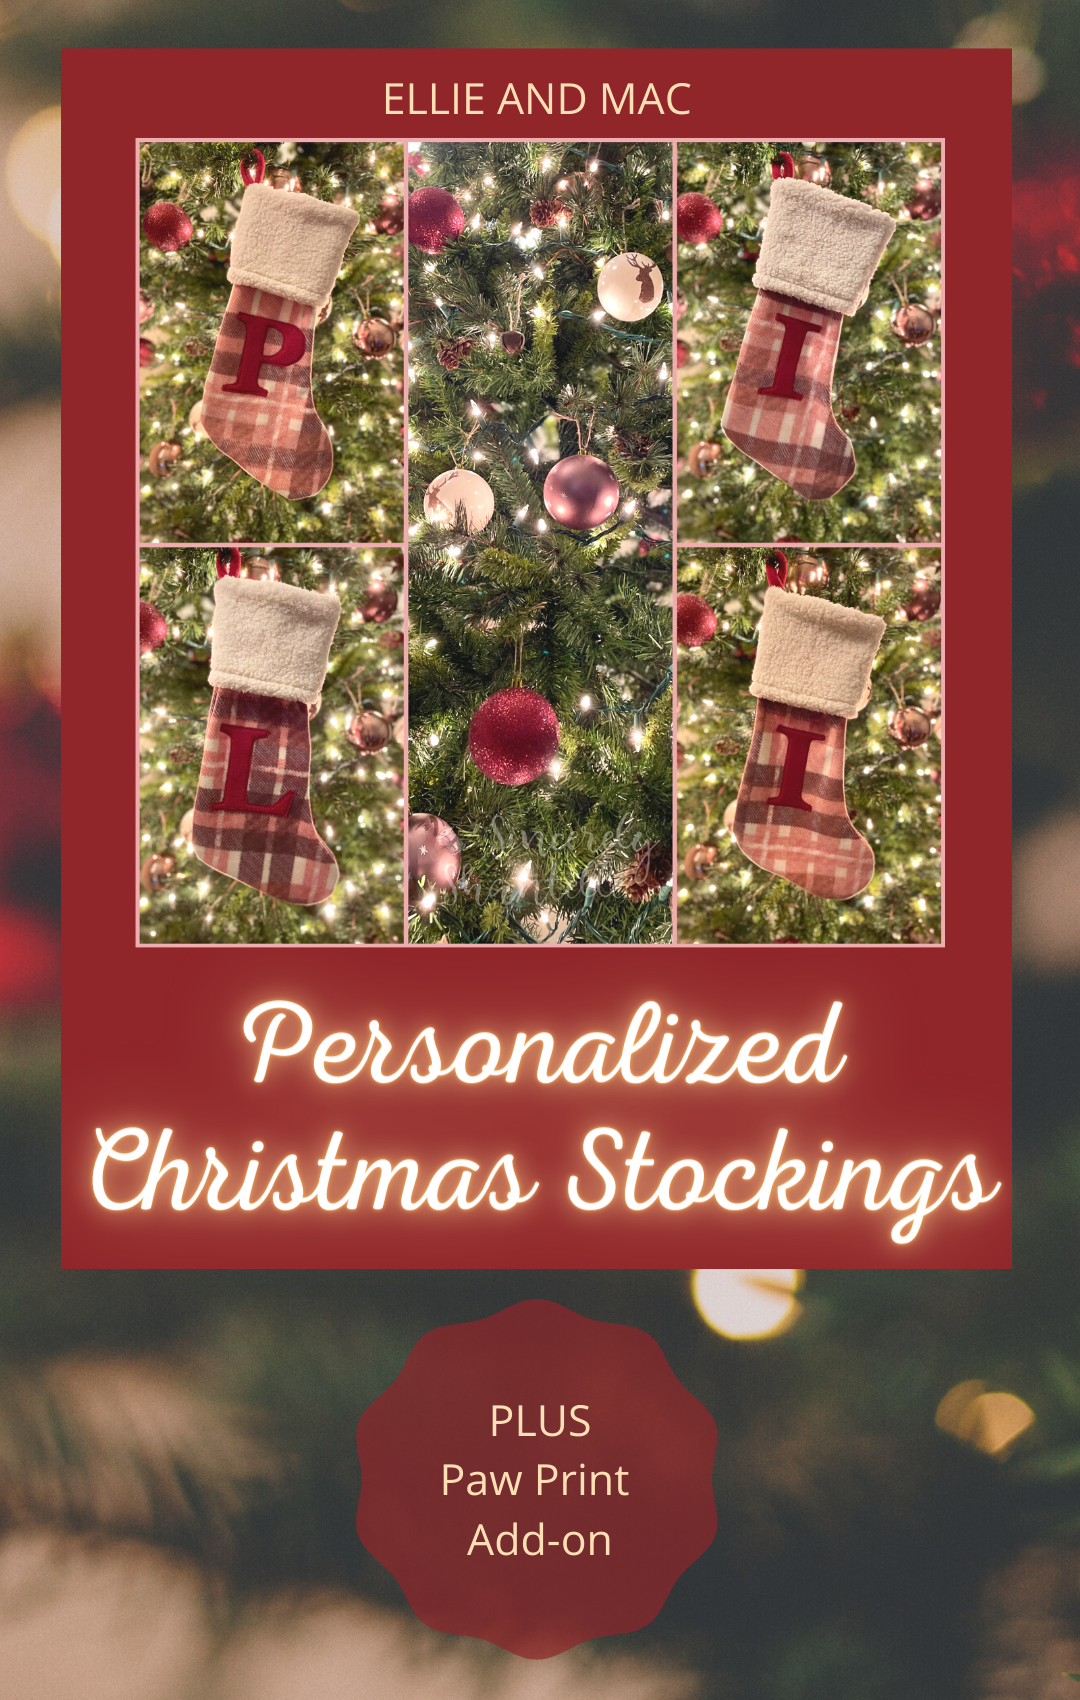
Hello everyone! Ready to sew some ornaments with me? Let’s start off with a short introduction and then dive into this fun holiday project!
My name is Bridgette Latimer, and I’ve been sewing for about 14 years. The holiday season is especially important to me because I get more time with my family. Being a mom of 4 and a military spouse has meant that our time together isn’t promised, so I try to make the best of it and make memories.
Ellie and Mac has helped me to enjoy creating for my family. I’m so excited to share this project with you!


Here is a craft tutorial on sewing your very own Holiday or Christmas ornaments!!!
While it may still technically be fall, it definitely feels like winter already. Let’s gather our materials/notions for these ornaments and get started.

Supplies:
-
Fabric: woven or interfaced knits are typically best, giving a sturdier shape. (Scraps are such a great thing to have on hand for smaller projects like these, and they don’t take much.) I learned that having a bigger template makes for easier sewing later on.
-
Thread and needle for hand sewing or your trusty home machine! I also ended up using hot glue to close up my holes.
-
Shears or snippers (I don’t recommend cutting small pieces with a rotary blade for precision’s sake. My shears worked great for this.
-
A turning tool like “the little purple thang” or even a pencil helps you get your item right sides out and helps to give crisper points.
-
If you’re decorating the fabric with glue, glitter, buttons, or other extras – save that for last. When using a cut file, add it to your fabric or the finished ornament.
-
If you want to stuff your ornaments, that’s your prerogative; just remember to add stuffing before you close up the seams.
-
Lastly, you’ll need little hooks, fabric loops, or yarn to hang them on the tree! I prefer my yarn loops to be 7 inches (17 cm) so that I can fold them over and sew them as a loop. Fabric loops would be the same, but 2.25x7” (5.5x17 cm).

Templates:
I’m using basic shapes, easy enough to google and trace or print as templates. You can also use the super fun Ellie and Mac holiday cut files (and my afflink) here https://www.ellieandmac.com/collections/holiday-cut-files?aff=2917 and then print those to be your pattern pieces!

Preparation step, adding vinyl:
You will get your vinyl cut through the machine (we have lots of information on the website regarding our cut files and the processes involved). Get the pieces weeded and then attach them to your fabric.
Heat transfer vinyl (HTV) is going to require heat to attach it to your ornament, so make sure your fabric can withstand the heat you’re using and that you’ve got the right vinyl. I used Teflon sheets for my HTV, placed between the iron and my ornaments. I did try permanent vinyl first, but it would not stick to the fabric for me at all.
Step 1 cutting your pieces:
Here are all of my pattern pieces, traced from the templates I used. You’ll cut two pieces each for the circle, tree, and candy cane. For the star, you’ll have five diamonds for the front piece, and one full star for the back. You may also want to cut your yarn or fabric loops in this step.

Step 2 Lay pieces with hooks/loops in:
When you place your two fabric pieces together, make sure that the sides you want to show are facing one another. This is also known as “right sides together.” You want the pretty face of the fabrics to be on the outside when you’re finished.
Make sure you have laid your hook or yarn or fabric loop in between your two ornament pieces so that they will be sandwiched inside. Yarn raw edges or the piece of the hook meant to be closed inside will be pointing toward the outside, and the loop or hook towards the inside that will be closed in when you stitch.

Step 3 Sew your pieces together:
Using a straight stitch, sew slow and steady ¼ inch from the edge around your ornament, leaving only one inch open to turn it right sides out.
Carefully avoid sewing over your loop that will be sandwiched inside.
Backstitch at the beginning and end of your seams to prevent your pieces from coming open when you turn them.

Step 3b Sewing the star pieces:
For your star, lay two diamonds on one another, right sides together. Your stitching line will go along the short side (¼ inch from the edge, from the top of the short side until you’re ¼ inch from the bottom.
Backstitch a little bit so that the fabric won’t cause a bunch at the center of your star. Add a third diamond and stitch another single line along the short side. Your star will begin to form.

Repeat sewing short sides together for all the diamonds, connecting them until you have a whole star.

You’ve got two stars now (one pieced together and one solid star) and can sew them together like you did the other ornaments, carefully around the perimeter. Sew ¼ inch from the edge of your fabric, again leaving one inch open for turning.

Step 4 Trim edges:
Carefully trim your excess fabrics, making those edges easier to lay flat when they are turned inside. You can use shears or snippers, leaving about 1/8 inch remaining in the seam allowance.

Step 5 Turn your ornaments so they will show their beautiful side now:
Turn your pieces right sides out. Using something with a pointy edge (like a pencil), you should be able to insert it and push out the points of your ornament, giving you a clearer shape.
The bigger your ornament, the easier it’ll be to turn. The location of that turning hole is key, too, as I learned.
Step 6 Close up the hole of your ornament:
Close the hole to complete construction. A drop of hot glue or sewing it shut with a hand needle both work to finish the ornament.
Step 7 Press/iron:
I recommend pressing it after it’s been turned and made pretty with your pointy tool. Always use a press cloth or Teflon sheet, and be careful with a too-hot iron. You don’t want melted ornaments.
Finger pressing or using a tool called a tailor’s clapper (it’s just a bit of wood), also works to flatten it nicely.

Step 8 Embellish if desired.
You can sew a button on, and it’s a nice touch on the star! Add glitter or anything that will make it feel more festive. Remember, this is YOUR ornament! You get to decide.
That’s it!! You’re all finished. Enjoy the finished look of what you’ve made, and go hang those beauties anywhere you like!


If you’d like to see my other socials, you can find me here: https://www.instagram.com/bridgettebabybundles/ https://www.tiktok.com/@77sewist_
(Written by: Bridgette Latimer)