
Hello friends!! It's Nellie from Sorry About the Mess and I'm here for another tutorial! This time it's going to be quick and easy. The links found in this blog may be affiliate links that cost you nothing to use, but give me a small commission that helps me keep on sewing and sharing with you.
It's no surprise that The Everyday Tee is my very favorite top. I'm pretty sure making this one made put the number of them in my closet up to 8. One of the things about this pattern that makes me love it so much is the seam in the back that all I have to do is fold my yard of fabric in half and cut out the front on the fold and the back on the other side, super quick and easy because I don't have to refold the fabric! A seam up the back is also very helpful for some adjustments like swayback (link to a tutorial here), but not everyone needs that adjustment. So I'm going to show you how to eliminate the back seam.

This technique should work for any pattern with a straight back seam. You can see below that The Everyday calls for the back piece to be mirrored. The edge of the paper is where the seam should be.

Okay, zoom in and check out this little black line that I have added along the back seam of the pattern. This line is 1/4 of an inch in from the original back, eliminating the seam allowance so that it can be cut on the fold without the excess (which would make the neckband too small, so please don't forget to do this part)!

At this point, you have a very important decision to make, do you trim the seam allowance off or keep it and just remember how to cut it so that this doesn't affect the pattern? If you choose to trim, make a note that this piece should now be cut on the fold and that you will only need one of them.

Or you can just line up the pattern piece like I have done below. So that the fold of the fabric is lined up with the "fold" mark created, this way I have the original pattern still intact so that I can still use the pattern as it was originally designed. There is another reason for me that I'll discuss in a little bit later.


But out the back pattern piece just like you would the front, on the fold, so that you have just one piece. And proceed to sew the pattern up as instructed just leaving out the part where the two back pieces are sewn together because there is only one now.

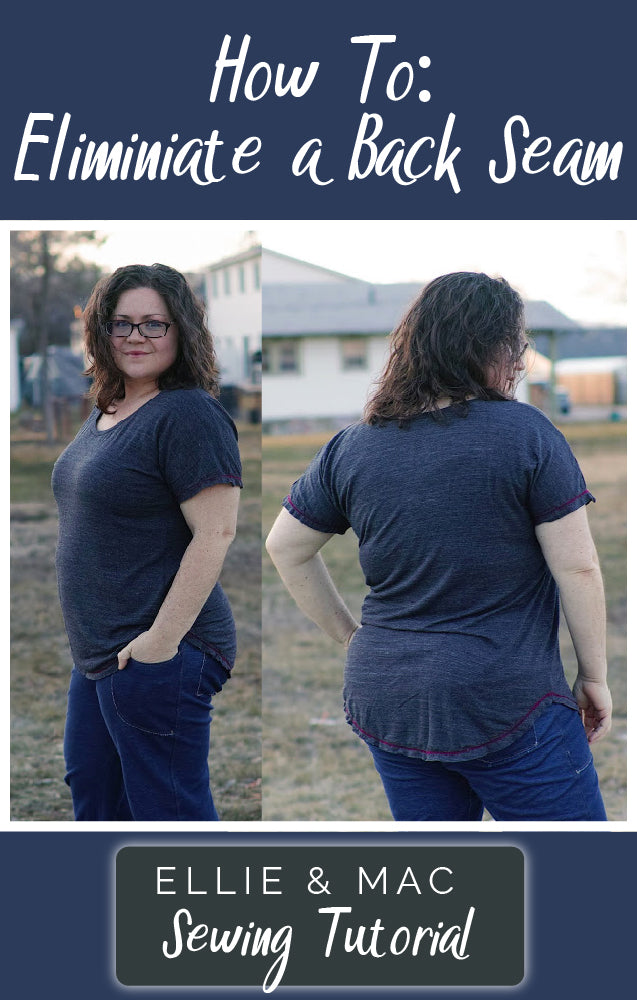
And there you have it! The Everyday Tee cut with the back on the fold! In the photo above you can see my need for a swayback adjustment, which is why I love the center back seam and left it on my pattern, that adjustment is so much easier with a center back seam. Follow the link to the Swayback adjustment if you'd like to learn a little bit more about diagnosing and adjusting for swayback.