Hey, it's Nellie from Sorry About the Mess. Have you seen the Book Club top? It has this great color-blocked V shape across the front, back, and sleeves. This is a beautiful top, but if you need a bust adjustment, it can feel like a nightmare. But have no fear, I am going to show you how to make this work.
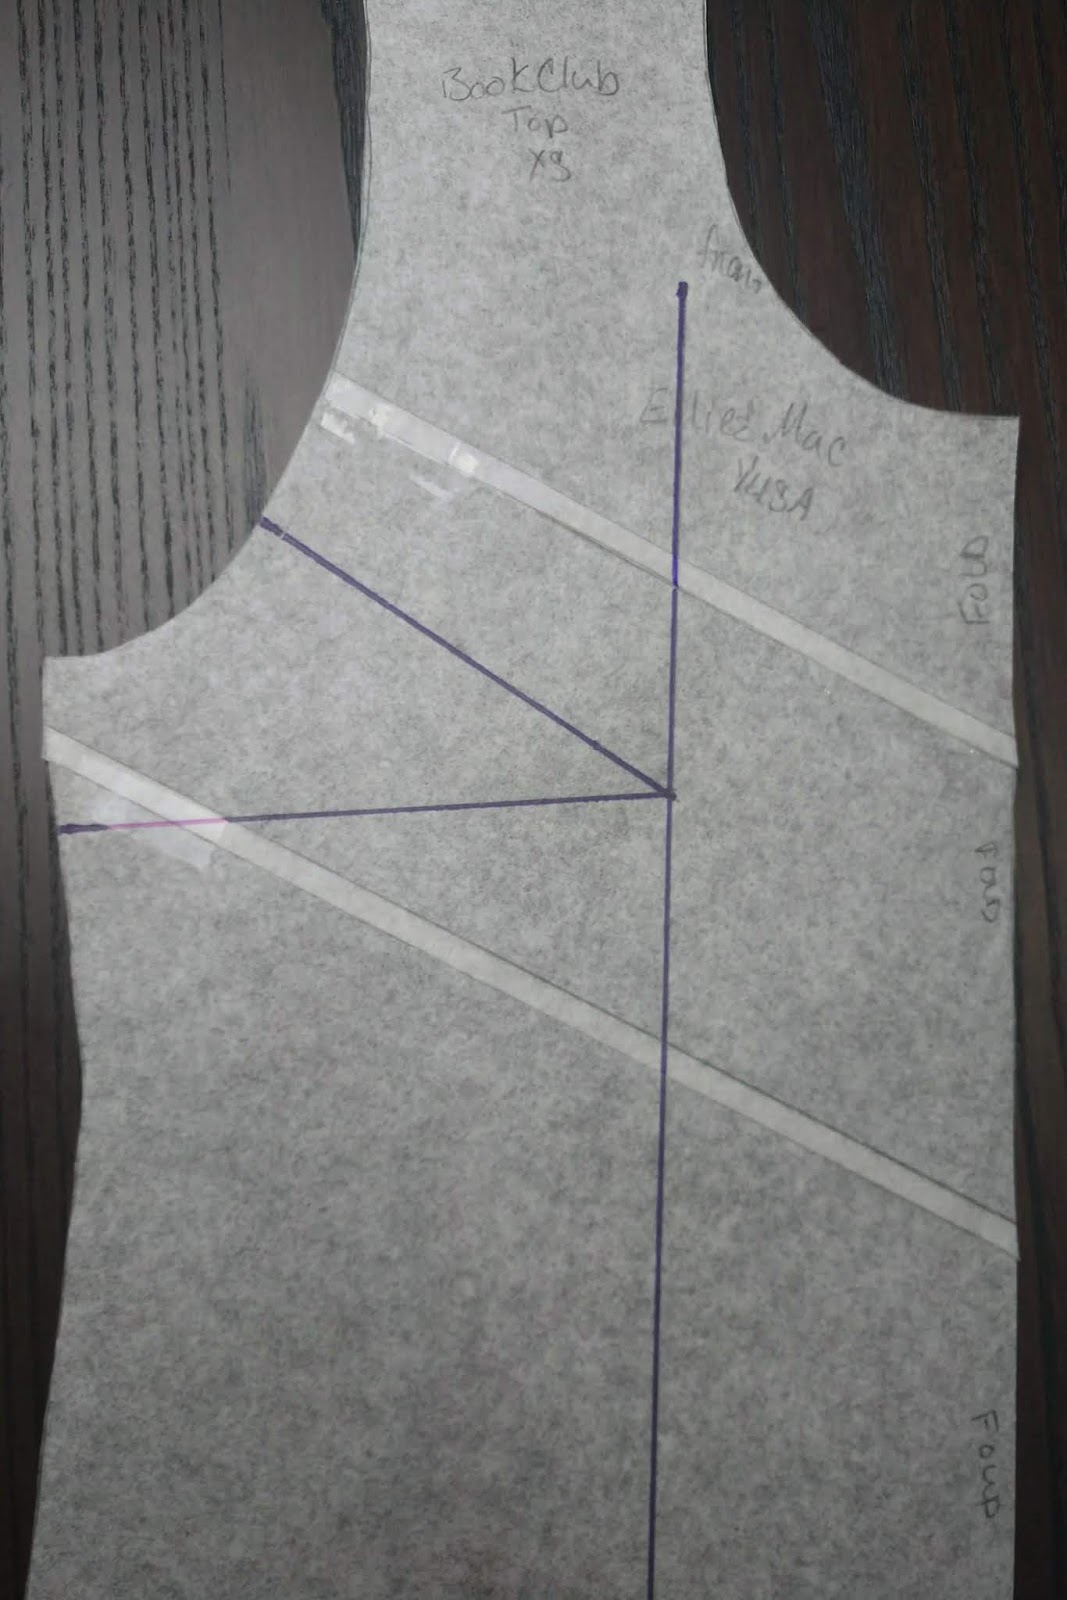
The first thing you are going to do is trace out your front pattern. You will be cutting up the middle and bottom pieces, so make sure you also have the middle and bottom pieces for the back also traced or printed out. Once you have the pieces traced out you are going to tape the front pieces together with the seam allowances overlapped. I like to draw my seam allowances on the pattern pieces, it makes them easier to see.

And then tape them together. You end up with a solid pattern piece for the front. You should also trace out the back pieces separately because this middle and bottom pieces are going to change their shapes once the FBA is done. And you will use the back bottom piece to help reshape the waist once the FBA is done.

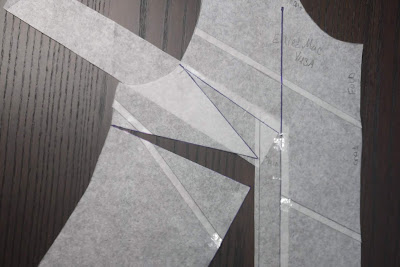
Now we need to mark the bust point and the 3 cut lines (please read up on how to know where to places this point and lines on the FBA blog here). I jumped the gun a little on the above photo so there are lines on that photo as well as the one below.

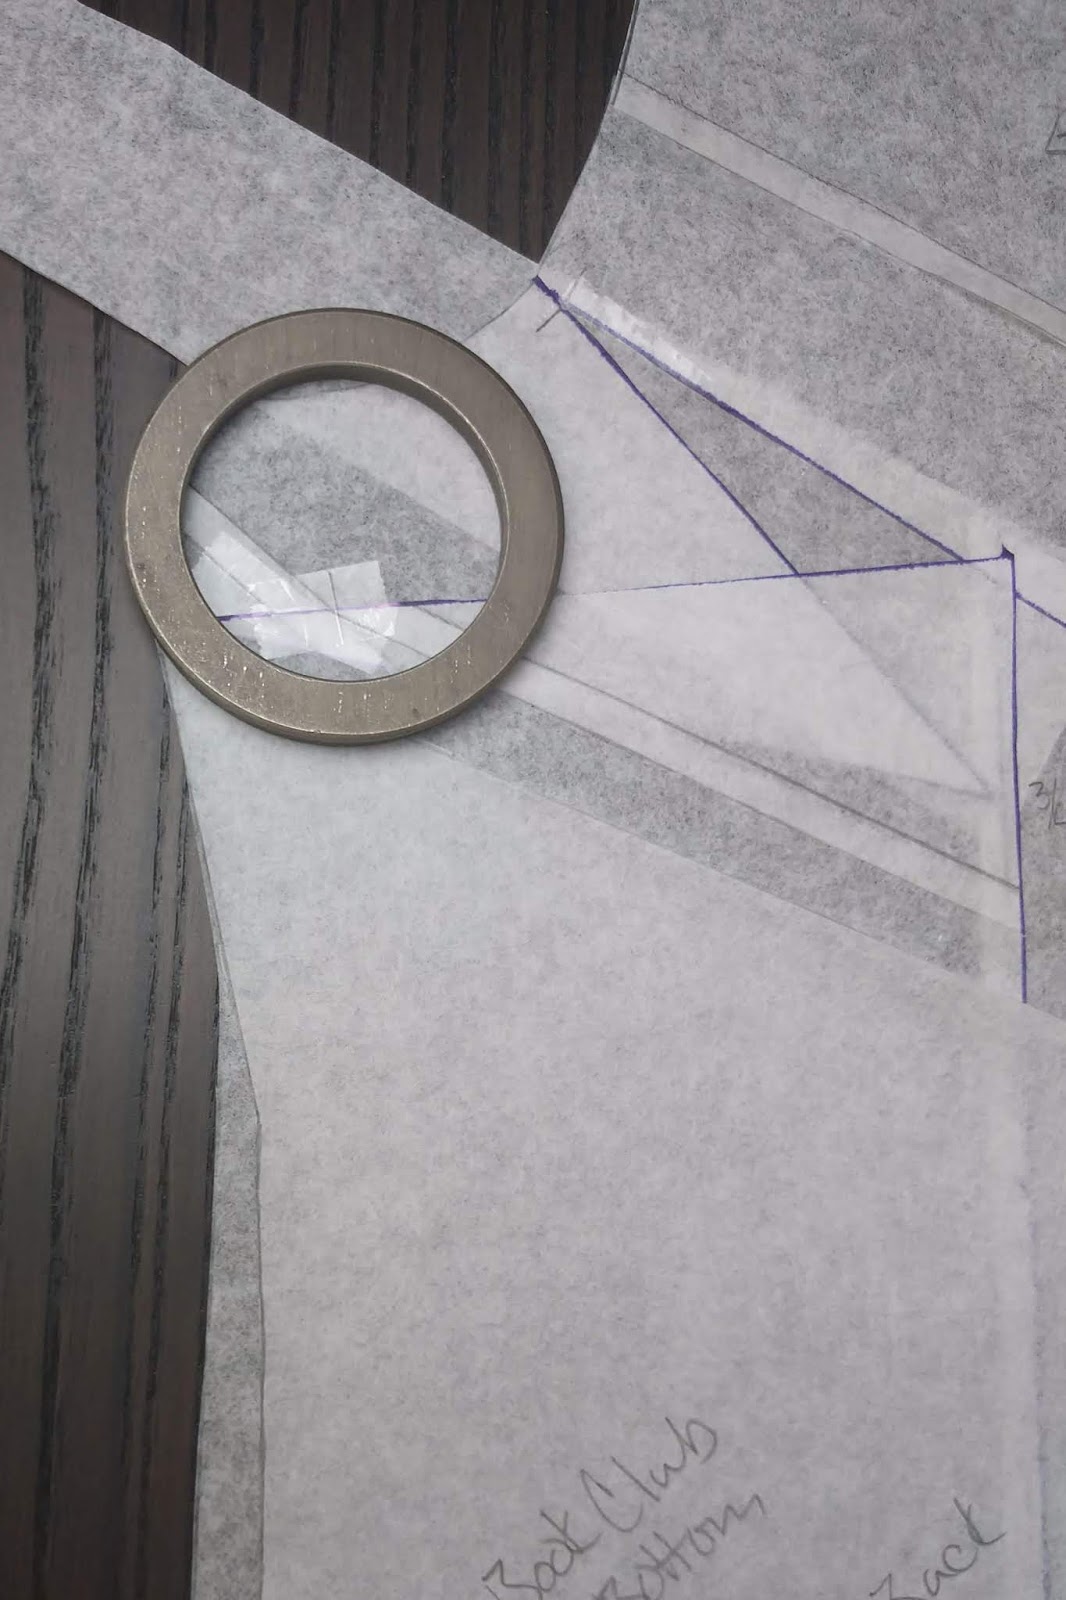
Now you're going to cut from the hem to the bust point and then from the bust point to the seam allowance of the armscye cut line and insert a long skinny piece of paper that is marked off to be the width of the adjustment needed. This time I'm doing a 3/4 inch adjustment.
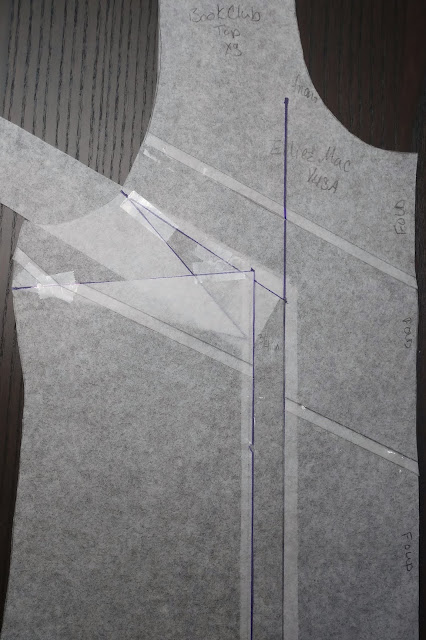
The bust point corner needs to be moved so that it lines up with the adjustment line or 3/4 of an inch away from the original bust point. I like to fill in the pattern with some blank paper and tape it down so it doesn't bend or fold too much.

Now it's time to cut the line from the bust point to the side seam, leaving a small hinge so it doesn't fall apart when you fold it up to be parallel with the adjustment line.
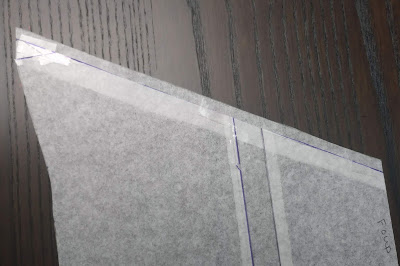
When the last wing is folded up it may overlap the adjustment stripe a little and that's okay. It just needs to be parallel down the entire pattern.

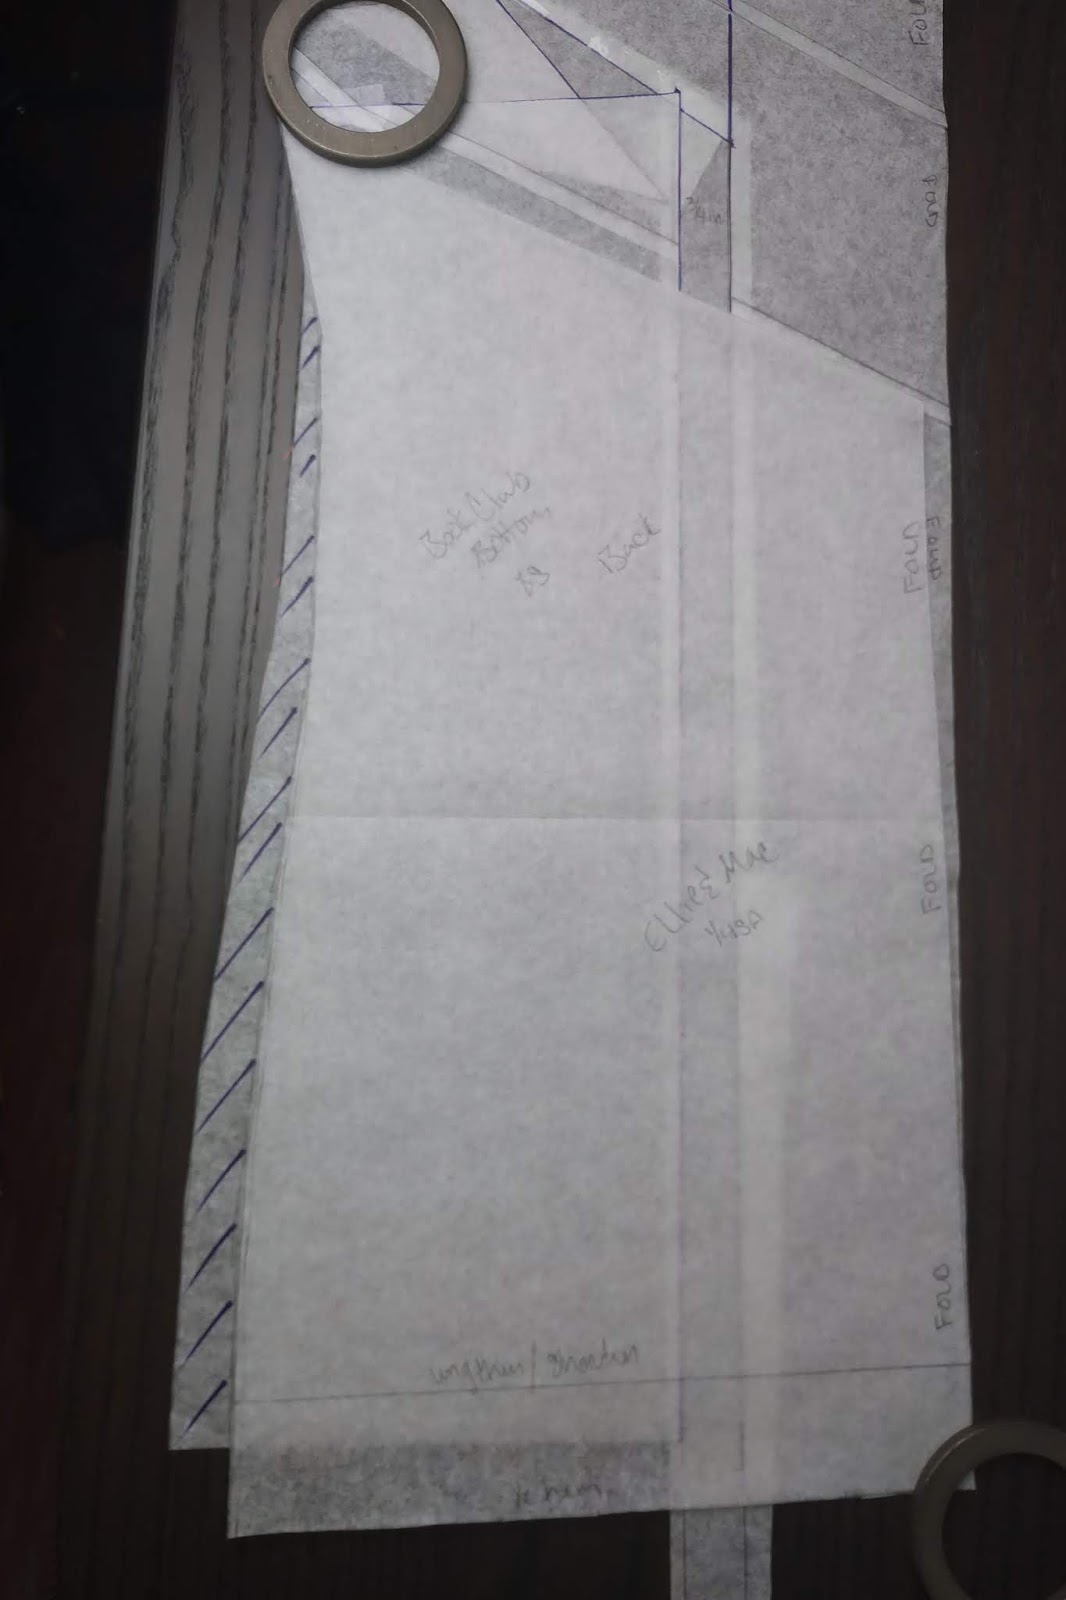
 The next step is to bring the side seam back in after letting it out for the bust. The easiest way to do this is to take the back bottom piece that hasn't been adjusted and line up the center fold corner. Please note that I have not adjusted the hem of this pattern, the order at which these two steps are in is actually interchangeable. It will not change the pattern to adjust the hem first or adjust the side seam first.

The other side of the pattern should be angled up to reach the side seam.

All the side seam that is exposed by the back bottom piece will need to be trimmed off, so trace it out and cut it off. The full front piece is now ready to be divided back up into three sections.


The first thing you are going to do is trace out your front pattern. You will be cutting up the middle and bottom pieces, so make sure you also have the middle and bottom pieces for the back also traced or printed out. Once you have the pieces traced out you are going to tape the front pieces together with the seam allowances overlapped. I like to draw my seam allowances on the pattern pieces, it makes them easier to see.

And then tape them together. You end up with a solid pattern piece for the front. You should also trace out the back pieces separately because this middle and bottom pieces are going to change their shapes once the FBA is done. And you will use the back bottom piece to help reshape the waist once the FBA is done.
Now we need to mark the bust point and the 3 cut lines (please read up on how to know where to places this point and lines on the FBA blog here). I jumped the gun a little on the above photo so there are lines on that photo as well as the one below.

Now you're going to cut from the hem to the bust point and then from the bust point to the seam allowance of the armscye cut line and insert a long skinny piece of paper that is marked off to be the width of the adjustment needed. This time I'm doing a 3/4 inch adjustment.
The bust point corner needs to be moved so that it lines up with the adjustment line or 3/4 of an inch away from the original bust point. I like to fill in the pattern with some blank paper and tape it down so it doesn't bend or fold too much.

Now it's time to cut the line from the bust point to the side seam, leaving a small hinge so it doesn't fall apart when you fold it up to be parallel with the adjustment line.

When the last wing is folded up it may overlap the adjustment stripe a little and that's okay. It just needs to be parallel down the entire pattern.

Notice the hem of the pattern is no longer even, and that's okay. Add some paper under the pattern, tape it down and smooth out the hem.

The hem is going to be curved because the front center needs to be longer than the side seams and the side seam is currently the same length at the back pattern piece and it needs to stay the same for the pattern to go together properly.


The other side of the pattern should be angled up to reach the side seam.
All the side seam that is exposed by the back bottom piece will need to be trimmed off, so trace it out and cut it off. The full front piece is now ready to be divided back up into three sections.
The front top part should be easy to separate. There shouldn't have been any adjustments made to this piece. Just split the tape and the pieces should be ready to take apart.

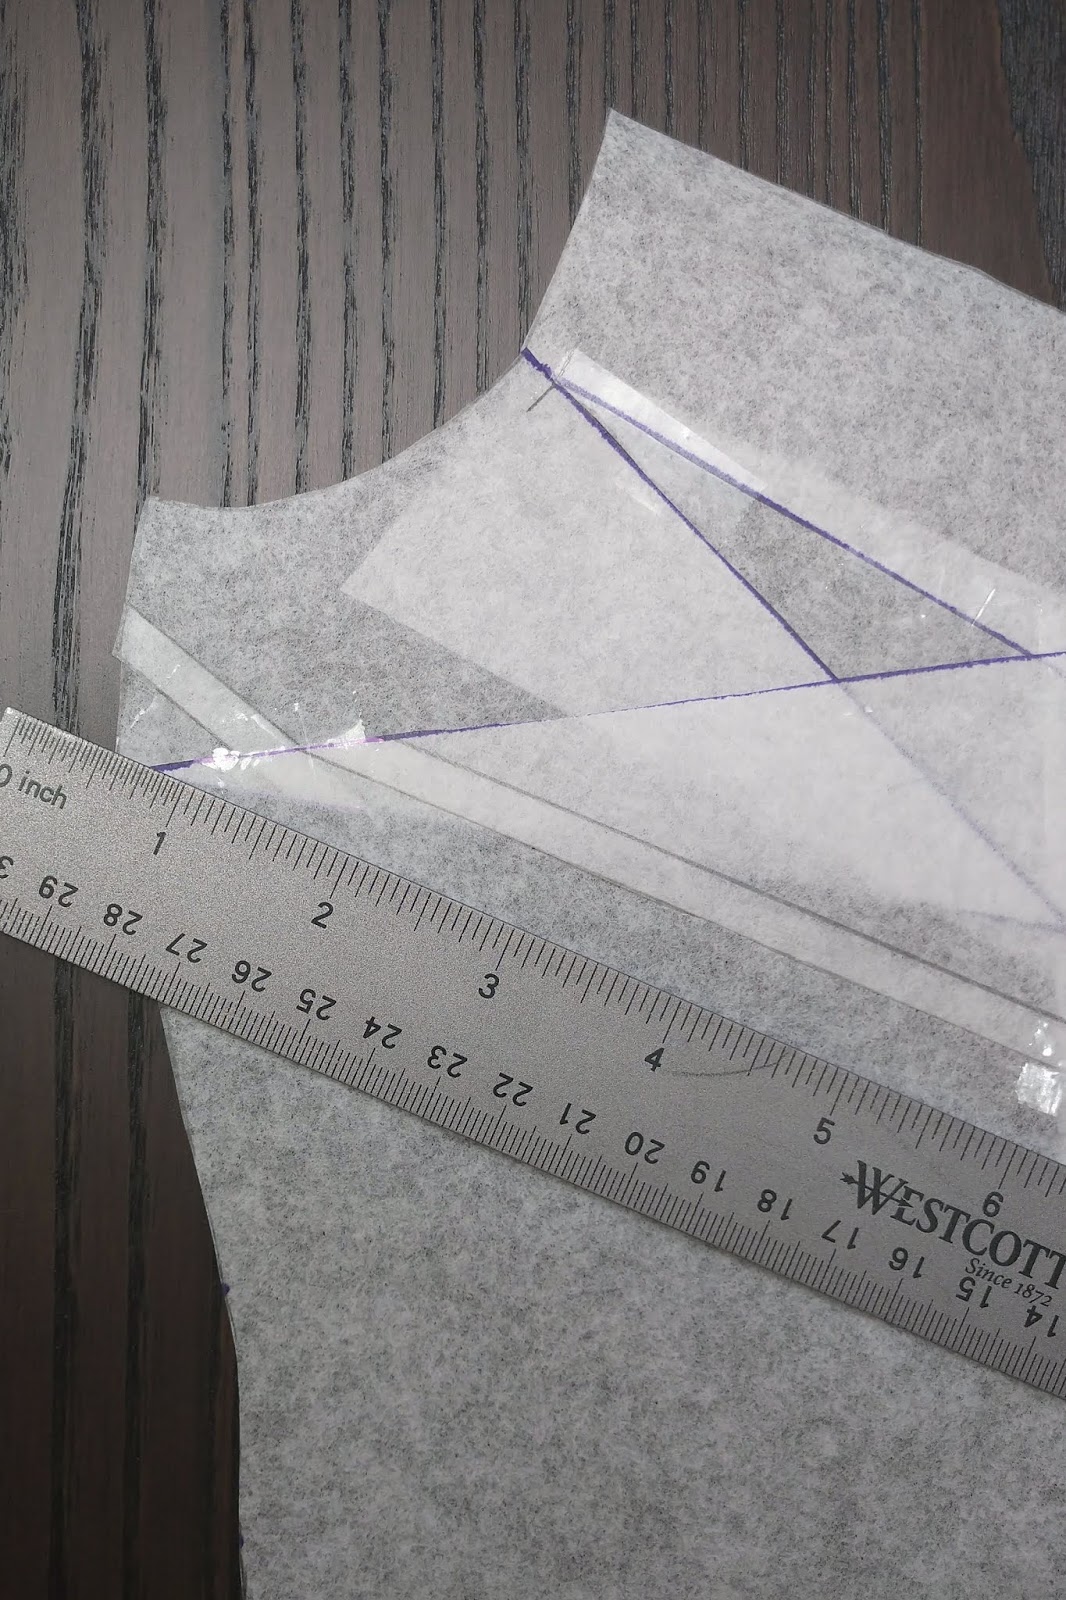
To separate the middle section from the bottom the lines need to be redrawn because we've cut them all apart. The most effective way to do this is to take a straight edge and line it up with the bottom of the seam allowance line of the two corners of the middle piece.
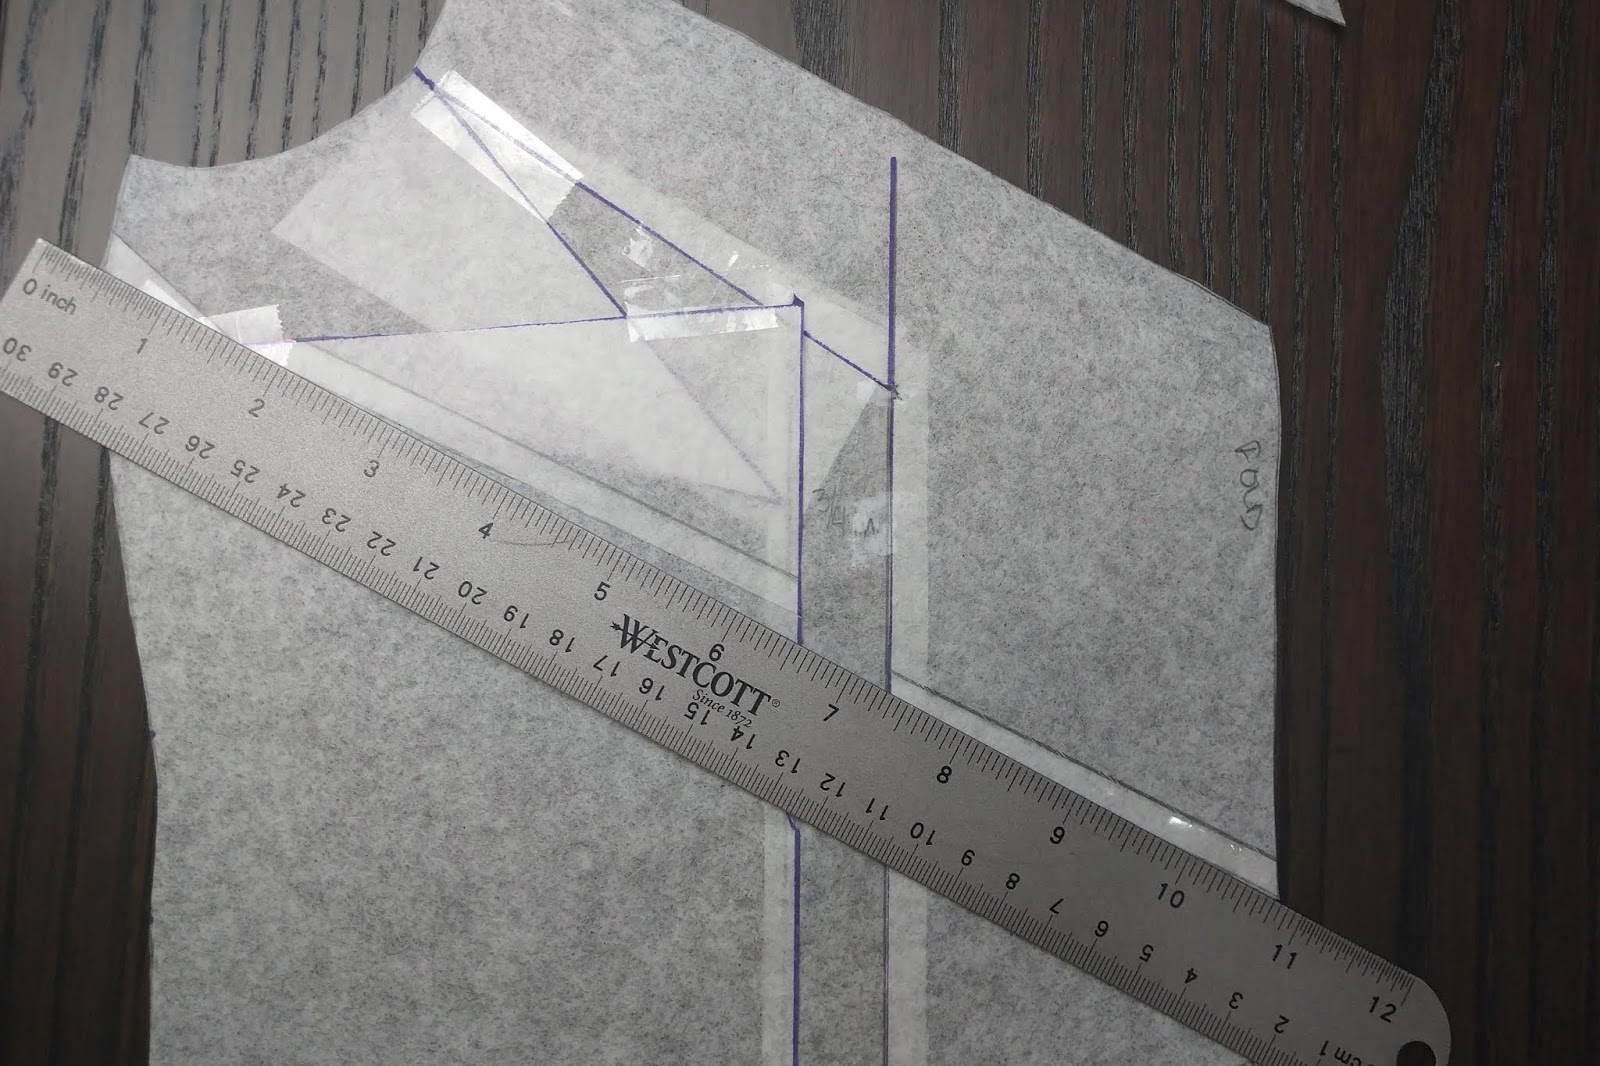
Here is more of a close up to the corner of side seams. One is the outseam and one is the center fold.
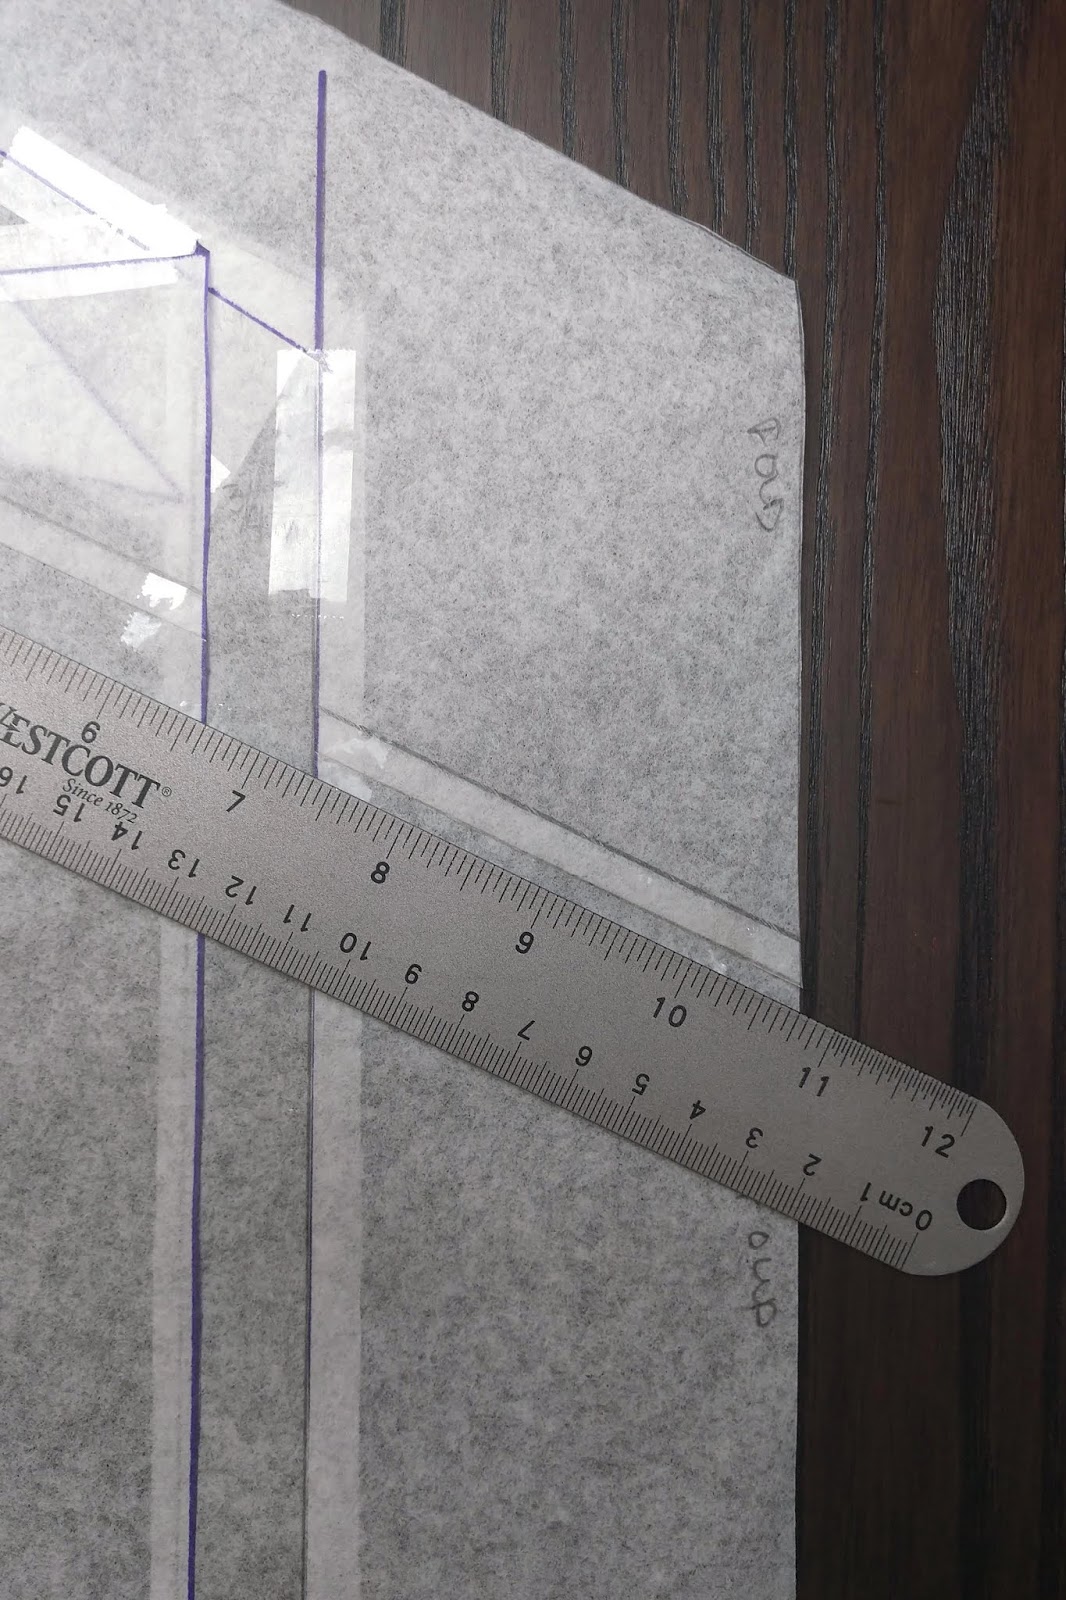
Draw the line from the bottom of both points, this will be the "new" raw edge for the middle section.

Once the two pieces are separated, you won't need to do anything else to the middle piece. It's complete because the seam allowance is still included on this piece. But you don't need to take my word for it, you can check to make sure the length of the side and center front seams are the same length as your back middle piece. There is nothing wrong with double checking.
You do, however, need to add the seam allowance onto the top of the bottom piece. And it should look something very similar to this once you're done.

And now your pattern is ready to use! Yay! I can't wait to see it in the Facebook Group!

You will notice that I hacked my Book Club top to only have 2 color block sections instead of 3. Be sure to check out my blog to learn how I did this!
The links provided in this post may be affiliate links where I receive a small commission from your purchase at no extra cost to you. Thank you for supporting me, my blogging and my sewing!
(written by Nellie Bray)
(written by Nellie Bray)