![]()
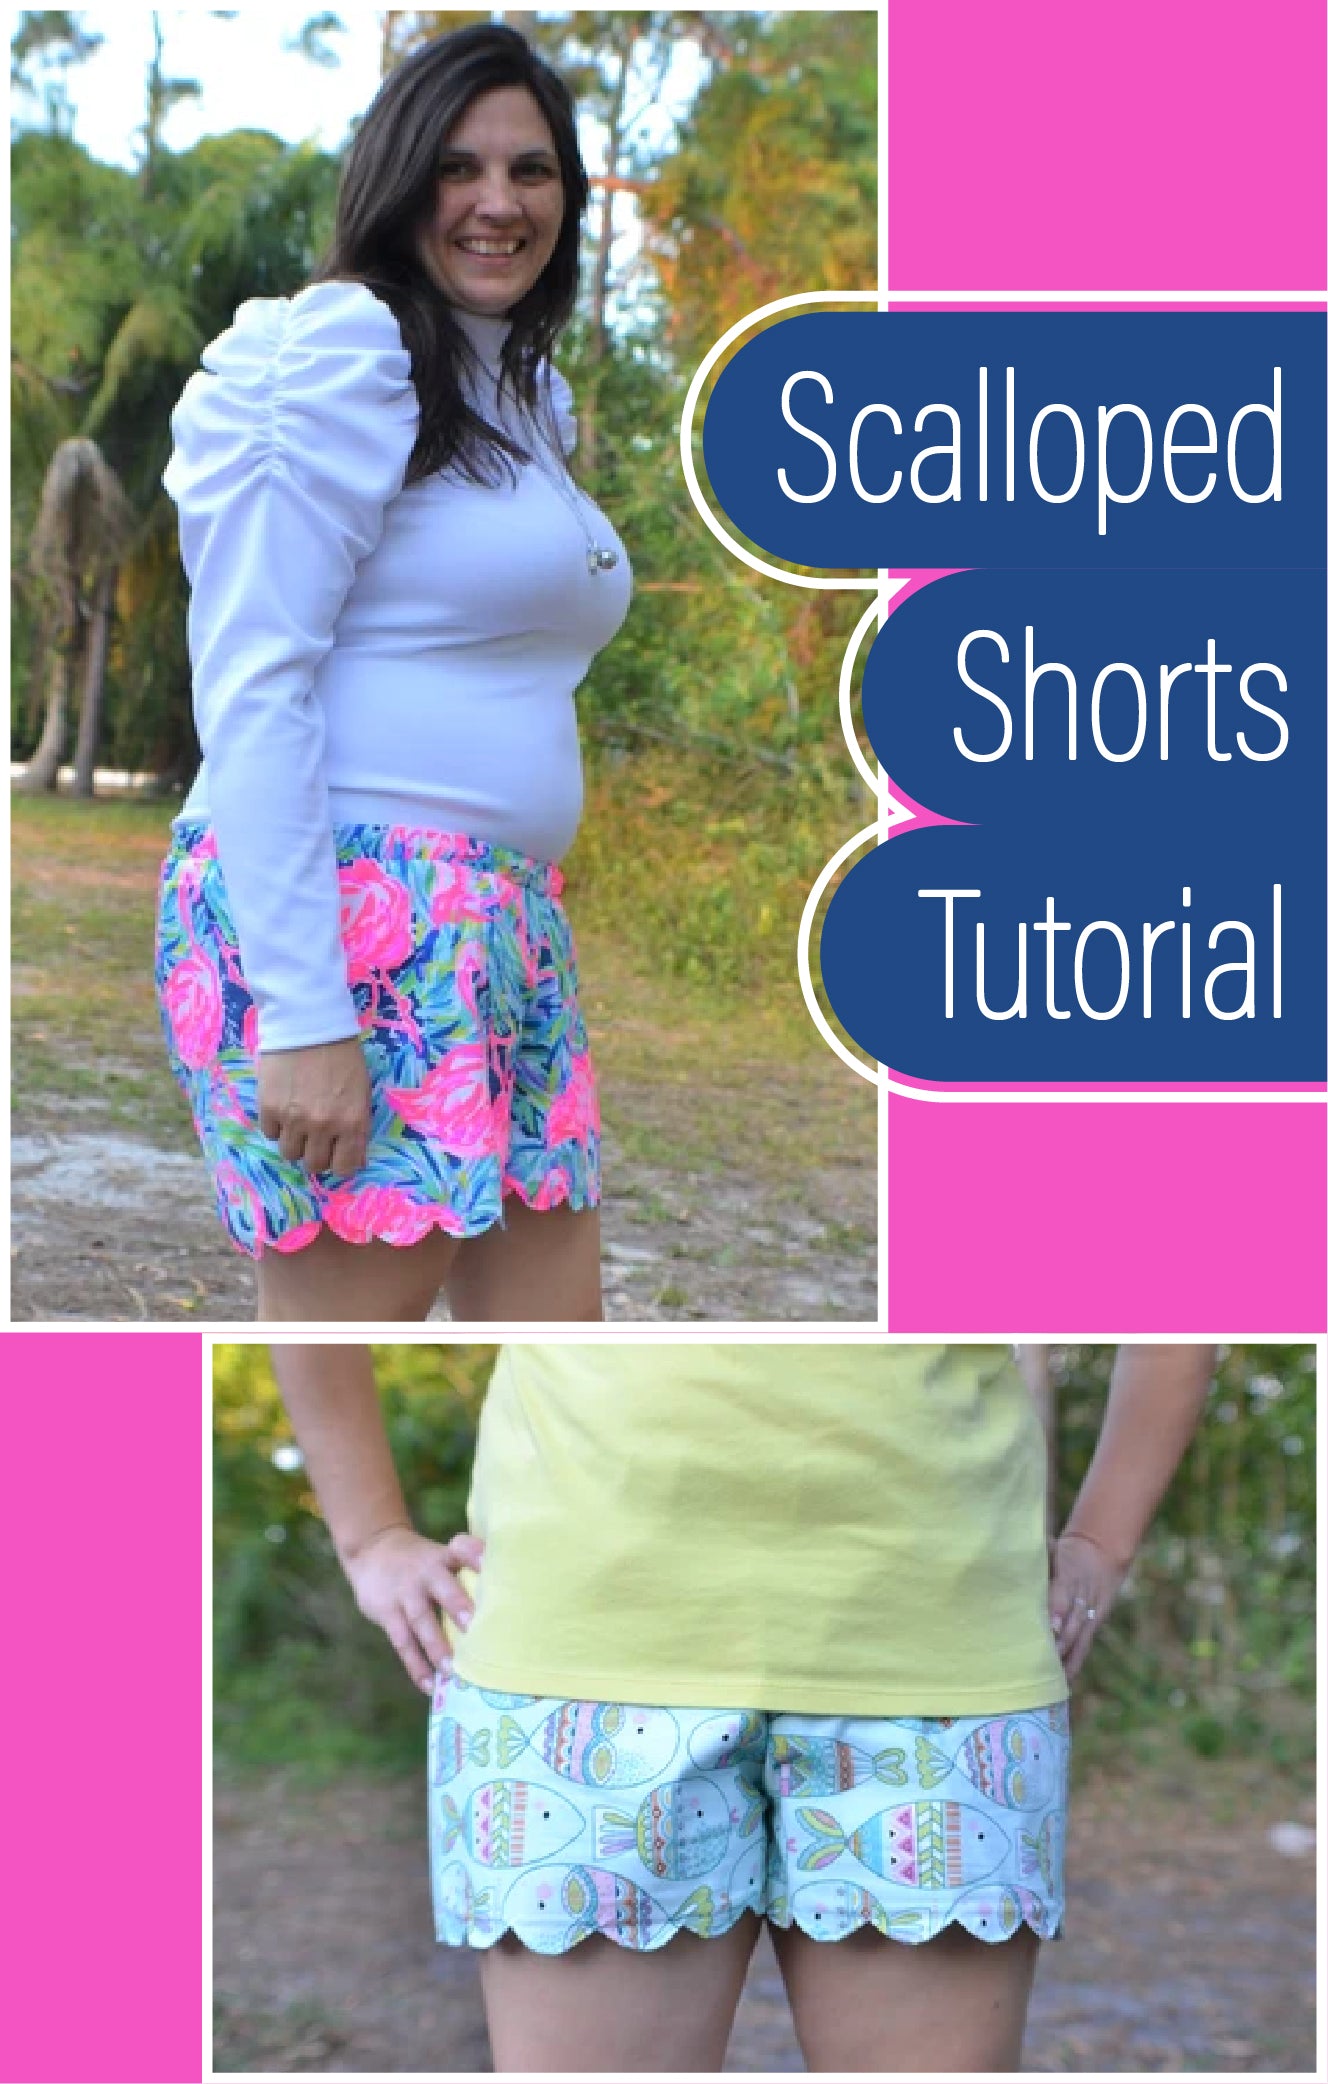
There’s a certain store bought scalloped shorts that has a look that I just love. Being able to sew, I rarely buy ready to wear clothing. One of my favorite things to do is to try to remake some of my favorite looks.
This time, I’m trying my best to recreate these cute scalloped shorts. I love this style of shorts, but I don’t always want to spend the kind of money needed to buy them. So today I’m using the Feel Pretty Pants Pattern to create my own Scalloped Shorts and I want to show you how you can do it, too!


The first thing we need to do is gather our supplies.
- Feel Pretty Pants Pattern
-
About a 2” wide (at it’s widest point) cup (or anything that has a 2” wide circle you can trace your scallops with
-
Lining Fabric (woven, amount stated in pattern)
-
Main Fabric (woven, amount stated in pattern)
-
About ¼ Yard of Iron-on interfacing
-
Other sewing notions stated in pattern

Now we’ll modify our pattern pieces to prepare for drawing our scallops. We’ll start by drawing a strait line 1” above the bottom of our pattern piece. This will be our guide for the height of our scallops.
We’re ready to start drawing our scallops onto our pattern pieces! The first thing we’ll want to do is measure in ¼” (the amount of our seam allowance) at the side seam of our shorts piece (NOT at the crotch seam) and draw a line up to our 1” line we drew earlier. This will help ensure our scallops line up nicely at our side seams. 

Take your cup (or the item you are using to trace your scallops) and, starting at the ¼” mark we made, line the cup up so each end hits the 1” horizontal line trace around your cup. Continue drawing scallops all the way across your pattern piece. I made a size XL shorts and my scallops reached the other end of my pattern piece perfectly. Depending on the size you make this may not be the case. This is why we started drawing the scallops on the outer seam of the shorts and not the inner/crotch seam. Any scallops that end up getting cut off will be in the crotch seam and less noticeable than being on the side seam.

Cut the scallops we just drew out of the paper pattern piece. When you get to your ¼” line, just cut strait across to the edge of the pattern. Repeat all of these steps with your other main pattern piece.
Once we’ve finished preparing our pattern pieces, we’re ready to cut our fabric! The first thing we should do is cut out 4 strips of iron on interfacing. Two that are the length of your shorts back piece and two that are the length of your shorts from piece. Make them each about 2 inches tall. This will be ironed onto the bottom of the main fabric of our shorts and give our scallops a little more stiffness and help them keep their shape better.
For the fabric itself, we’ll cut around the top and sides of the pattern like normal. But once we get to the bottom cut across under our fabric in a strait line about a 1/8”-¼” below our scallops. This will give us a little wiggle room while we’re tracing our scallops onto the shorts.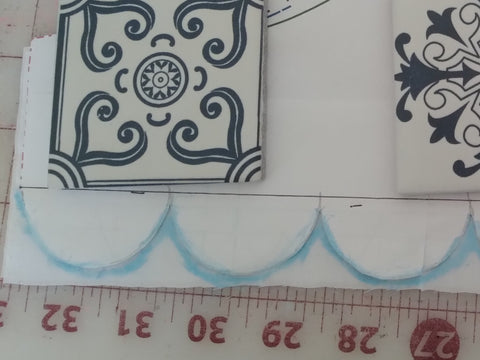

Now we’ll start tracing our scallops onto our fabric! We’re going to start by simply placing our pattern piece on the wrong side of our fabric piece we just cut out. Next, we’ll use our preferred marking tool to start tracing our scallops onto our pieces of lining fabric.

With right sides together, sew the lining and main fabrics together along the traced scallop lines only. Repeat for the remaining shorts pieces (Tip: With your needle in the down position, lift your presser foot and pivot your shorts at the top of each scallop. This will help form nice neat corners/points once we flip the shorts right side out).

We’ll clip the top “corner” or V of each scallop as close to the V as we can without snipping the stitches. I simply did this and left the rest of the fabric there and it worked great! If you don’t feel like you want to leave that much fabric you can also snip off the little bit next to each rounded piece of scallop.

Now we’re going to turn our shorts right side out. Gently push out the scallops and iron them flat. Top stitch around the bottom edge of the scallops.
From here on out we will treat our liner and main pieces as one and follow the instructions in the Feel Pretty Pants Pattern Tutorial to complete our shorts.
Once you’ve completed the remainder of the tutorial you can enjoy your own scalloped shorts for a fraction of the price! (Not to mention, with the distinction of saying you made them yourself!)


If you have any questions about this hack please reach out to me at my Facebook or Instagram!
(Written by Sarah Lewis)