Hi everyone! It’s me again, Manda. We are about one and a half month into the new year now. Maybe, just like me, you have set some sewing or crafting goals for this upcoming year. Or you are thinking about what you want to do this year.
What has been on my wish list for a while is sewing a piece of clothing with those cute 3D letters that you probably all have seen floating over the internet. So I made it one of my goals to complete a piece of clothing with these 3D letters. And I decided to make a tutorial for all of you so you can try it as well (if you want to). Let’s go step by step in this process, it isn’t hard at all. You just need to know what to do.
List of materials:
- Computer
- Outline font of choice
- Printer & Paper
- Chalk/Fabric Pen
- Ruler
- Foam Rubber (around 0.2” / 5 mm is perfect)
- A small piece of interfacing
- Fabric & Matching Thread
- Sewing Machine
- Zipper Foot
- Front Bodice of your Sewing Pattern (I used the My Way Hoodie)
Step 1: Pick a Word
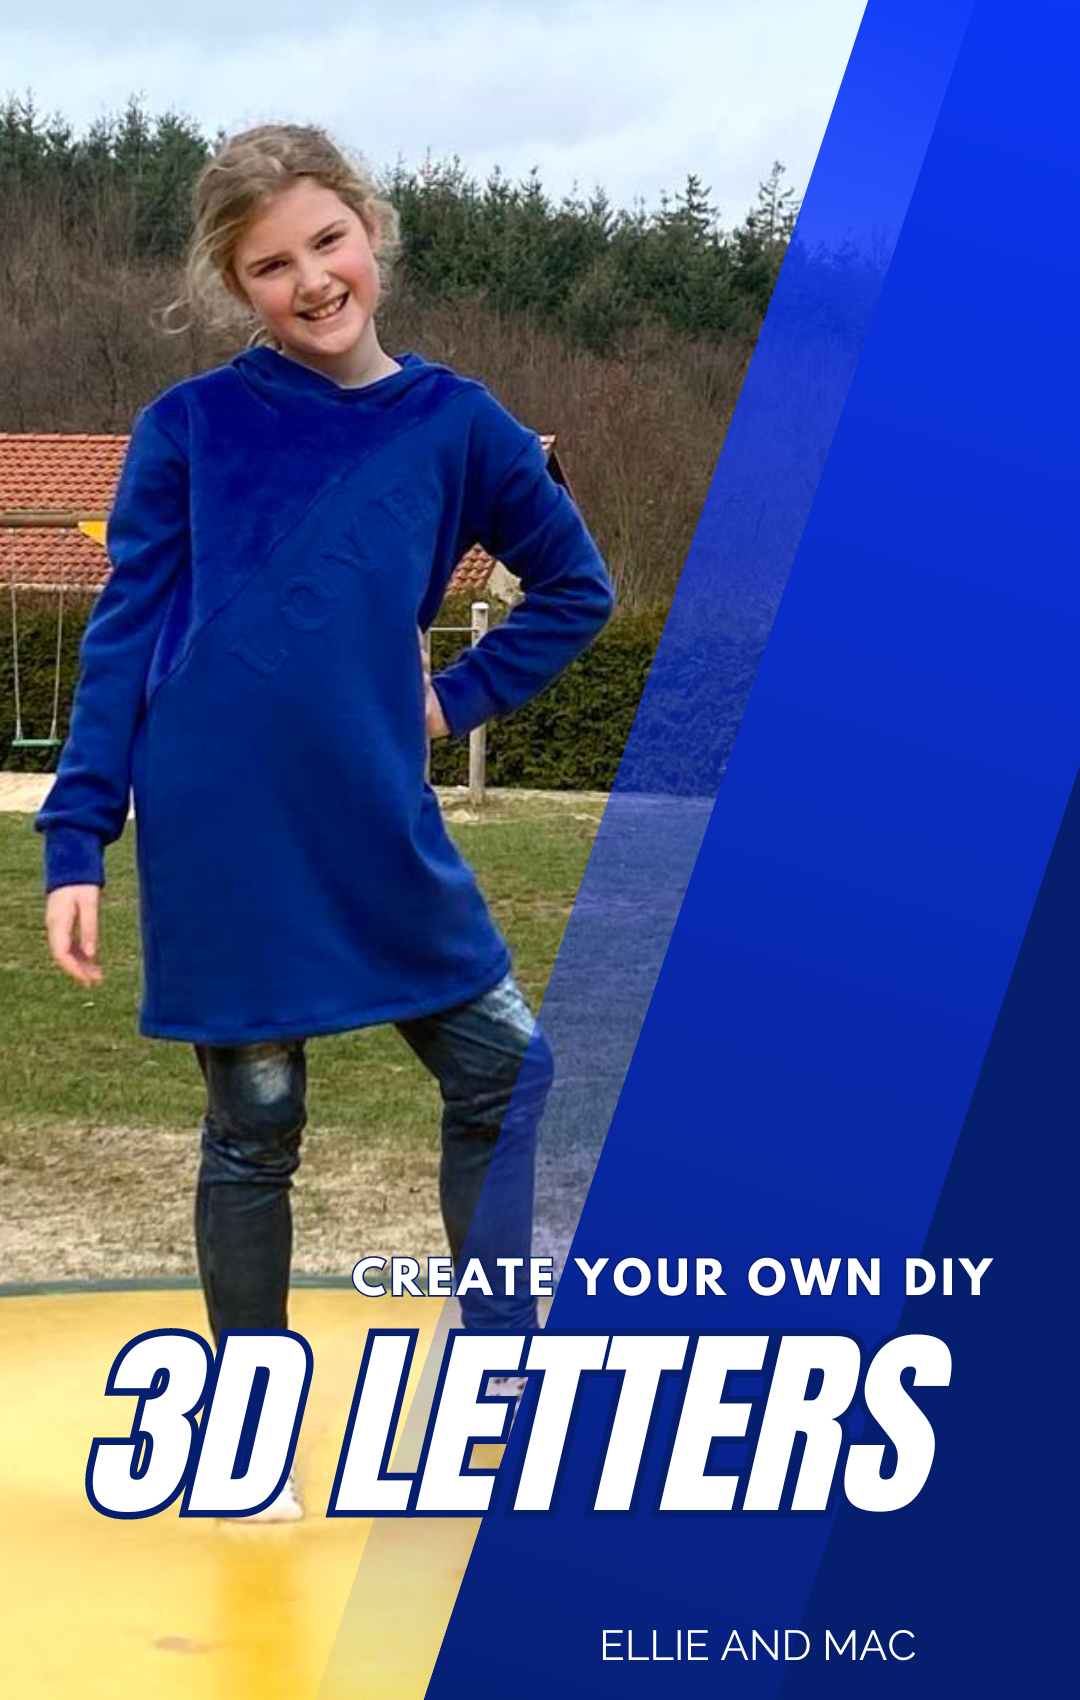
First you think of a word (or a quote) that you want to add to the fabric. I picked the good old word “LOVE” (since you can never have enough of that lol).
Step 2: Pick an Outline Font and Print
When you search in your browser for “outline fonts” you can choose an outline font that you like and install it on your computer. I chose “BaltimoreTypewriter” with font size 200. Then you print the letters and check if this is the desired size of the letters.
Step 3: Cut, Pin & Cut
Cut the outside of the font, and the inside (in my case the inside of the “O”). Then you pin the letters at a piece of foam rubber and cut this carefully out.
Step 4: Time to add them to your fabric!
You place your fabric with the wrong side up, and when you use a directional fabric you need to make sure it will be showcased in the right way. You could even already sew the garment that you want to make half way, or just cut out the bodice. Then you have even more control over positioning the letters to your liking. I am using the My Way Hoodie for my project (I lengthened it for more of a tunic like look).
Lay the letters at the wrong side of your fabric in a mirror image. You can use a ruler and some chalk, or a fabric pen to line out the position of each letter. Pin the letters to the fabric, or when you use a fusible foam you can iron it in place.
Iron/Press a piece of Interfacing over the letters. Make sure the interfacing is ironed/pressed well to the fabric everywhere, especially at the edges of the letters. 
Step 5: Stitch

And that’s all! Turn your fabric and enjoy your DIY 3D letters!