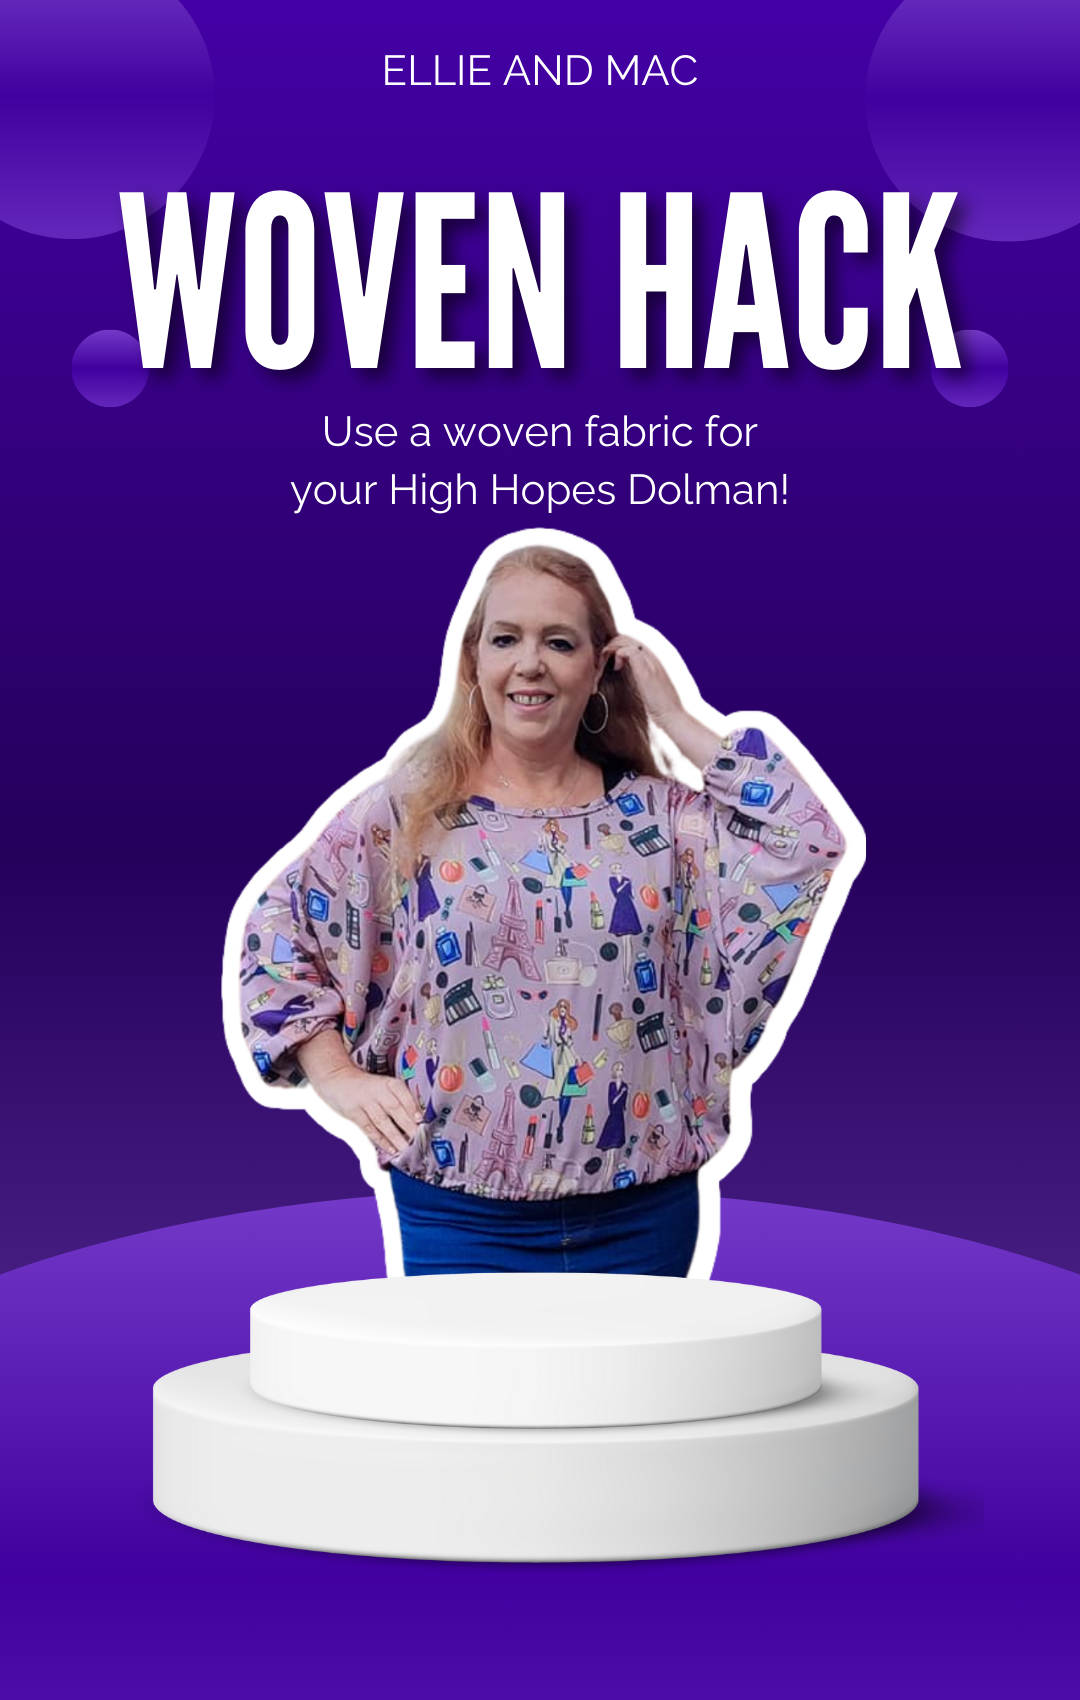

Hi Sewing friends. Its Ruth here and I want to show you how I made the High Hopes Dolman using woven fabric. I see lots of posts in the Ellie & Mac Facebook group asking if any of the stretch patterns can be adapted for wovens. There are so many beautiful woven fabrics in stores but it can be difficult finding simple sewing patterns to use with them that don't involve zips or darts. The High Hopes Dolman is the perfect pattern to use with woven fabric as its oversized, drapey style means it can be adapted with minimal adjustments. I have made 3 so far using both crepe and chiffon but any lightweight woven fabric would also be suitable including cotton lawn, cotton poplin, georgette, viscose challis, bubble crepe etc

What you will Need
-
Your chosen lightweight woven fabric
-
The printed High Hopes Dolman Pattern Piece
-
¼ inch and ½ inch elastic
-
A safety pin or bodkin
-
Pen and Paper
Preparing the Pattern Piece

Firstly prepare your pattern piece. You will only need the main bodice piece for this project. The bands and cuffs are not required as elastic is used on the waist and sleeves. I added 3/4 inch to the bottom of the pattern piece and half inch at the sleeve to allow for adding a channel for the elastic. I cut both the front and back on the wide neckline to create an off shoulder look. This also makes it easy to get over your head as otherwise it might be difficult due to the lack of stretch.
Sewing Up the Bodice

Once you have your pattern pieces prepared cut two bodices out of your chosen fabric. Sew the front and back bodices together at the shoulders and sides as per the instructions on the pattern. I used a straight stitch on my sewing machine and finished the seams with my serger.
Creating the Neck Binding
To finish the neckline I used a binding rather than a neckband. As we are using non stretch fabric you will need a binding that is the same length as your neck opening plus seam allowance. I worked out what length I needed by measuring around the neckline of my top and adding half an inch for seam allowance. (For me this was 38.5) I then cut out a long strip of fabric measuring 38.5 inches by 2 inches.
To create the binding, fold the strip in half wrong sides together and press. Open it out and press each side in half towards the middle.

Then fold everything in half again enclosing the raw edges inside. This
process is the same as creating a double fold bias binding.

Open the binding back out flat and fold each end in a quarter inch and press.

Pin or clip your binding along the edge of your bodice neckline. The RIGHT side of the binding should be face down on top of the WRONG side of the bodice. Starting at the centre back pin along the edge of the neckline making sure the quarter inch is folded over at each end. Continue all the way around making sure the edges overlap at the centre back. This will create a finished seam on the outside.

Using a straight stitch on your sewing machine, sew along the first crease all the way around the neckline.

Once you have attached the binding to the bodice, fold the seam allowance in, then fold over to the right side of the bodice enclosing the raw edges inside. Clip or pin around the binding making sure to cover the stitches you sewed in the last step.

Finish attaching the binding by top stitching along the neckline on the right side of the fabric.

Adding Elastic to Sleeves and Waist
Instead of using cuffs and binding, I finished the sleeves using an elastic casing. I used quarter inch elastic at the sleeves and half inch elastic at the waist. You may use whatever size elastic you prefer but remember to adjust the size of the casing accordingly. To determine what length elastic you will need for the cuffs, take your elastic and wrap it around your arm, stretching it slightly so that it is comfortable and not too tight. Fold up the end of your sleeve half an inch, press and pin or clip. Then sew leaving a gap for the elastic. Insert the elastic using a safety pin or bodkin then sew the ends of the elastic using a zigzag or stretch stitch. Sew up the gap, then repeat for other sleeve.

Use the same method for inserting elastic at the waist. To determine the amount of elastic needed, wrap a piece of half inch elastic around the waist/hip according to where the end of the dolman will sit. To create a casing for the elastic, fold up the bottom of the bodice one inch, press and pin in place. Then sew leaving a gap. Again add the elastic using a safety pin or bodkin, the same way as you did with the sleeves, sew the ends of the elastic together and finally sew up the gap.
The Finished Garment

And there you have it! A fabulous High Hopes Dolman using woven fabric! I really think this style of top works well in woven. It's oversized style is perfect for showcasing fabrics with bold and unusual prints and the lightweight woven crepe drapes beautifully for the batwing sleeves.

I have made 3 of these so far, including a swimsuit cover up which I made the same way as above but added 6 inches to the length and left out the elastic at the hem. It was perfect for my recent holiday to Gran Canaria and was definitely a conversation starter around the pool!

I hope you have enjoyed my tutorial on making the High Hopes Dolman using woven fabric and I hope you have fun making your own unique tops. Please share your pics of your makes in the Ellie & Mac Facebook group as I would love to see them.
(Written by: Ruth McNerlan Sharpe)