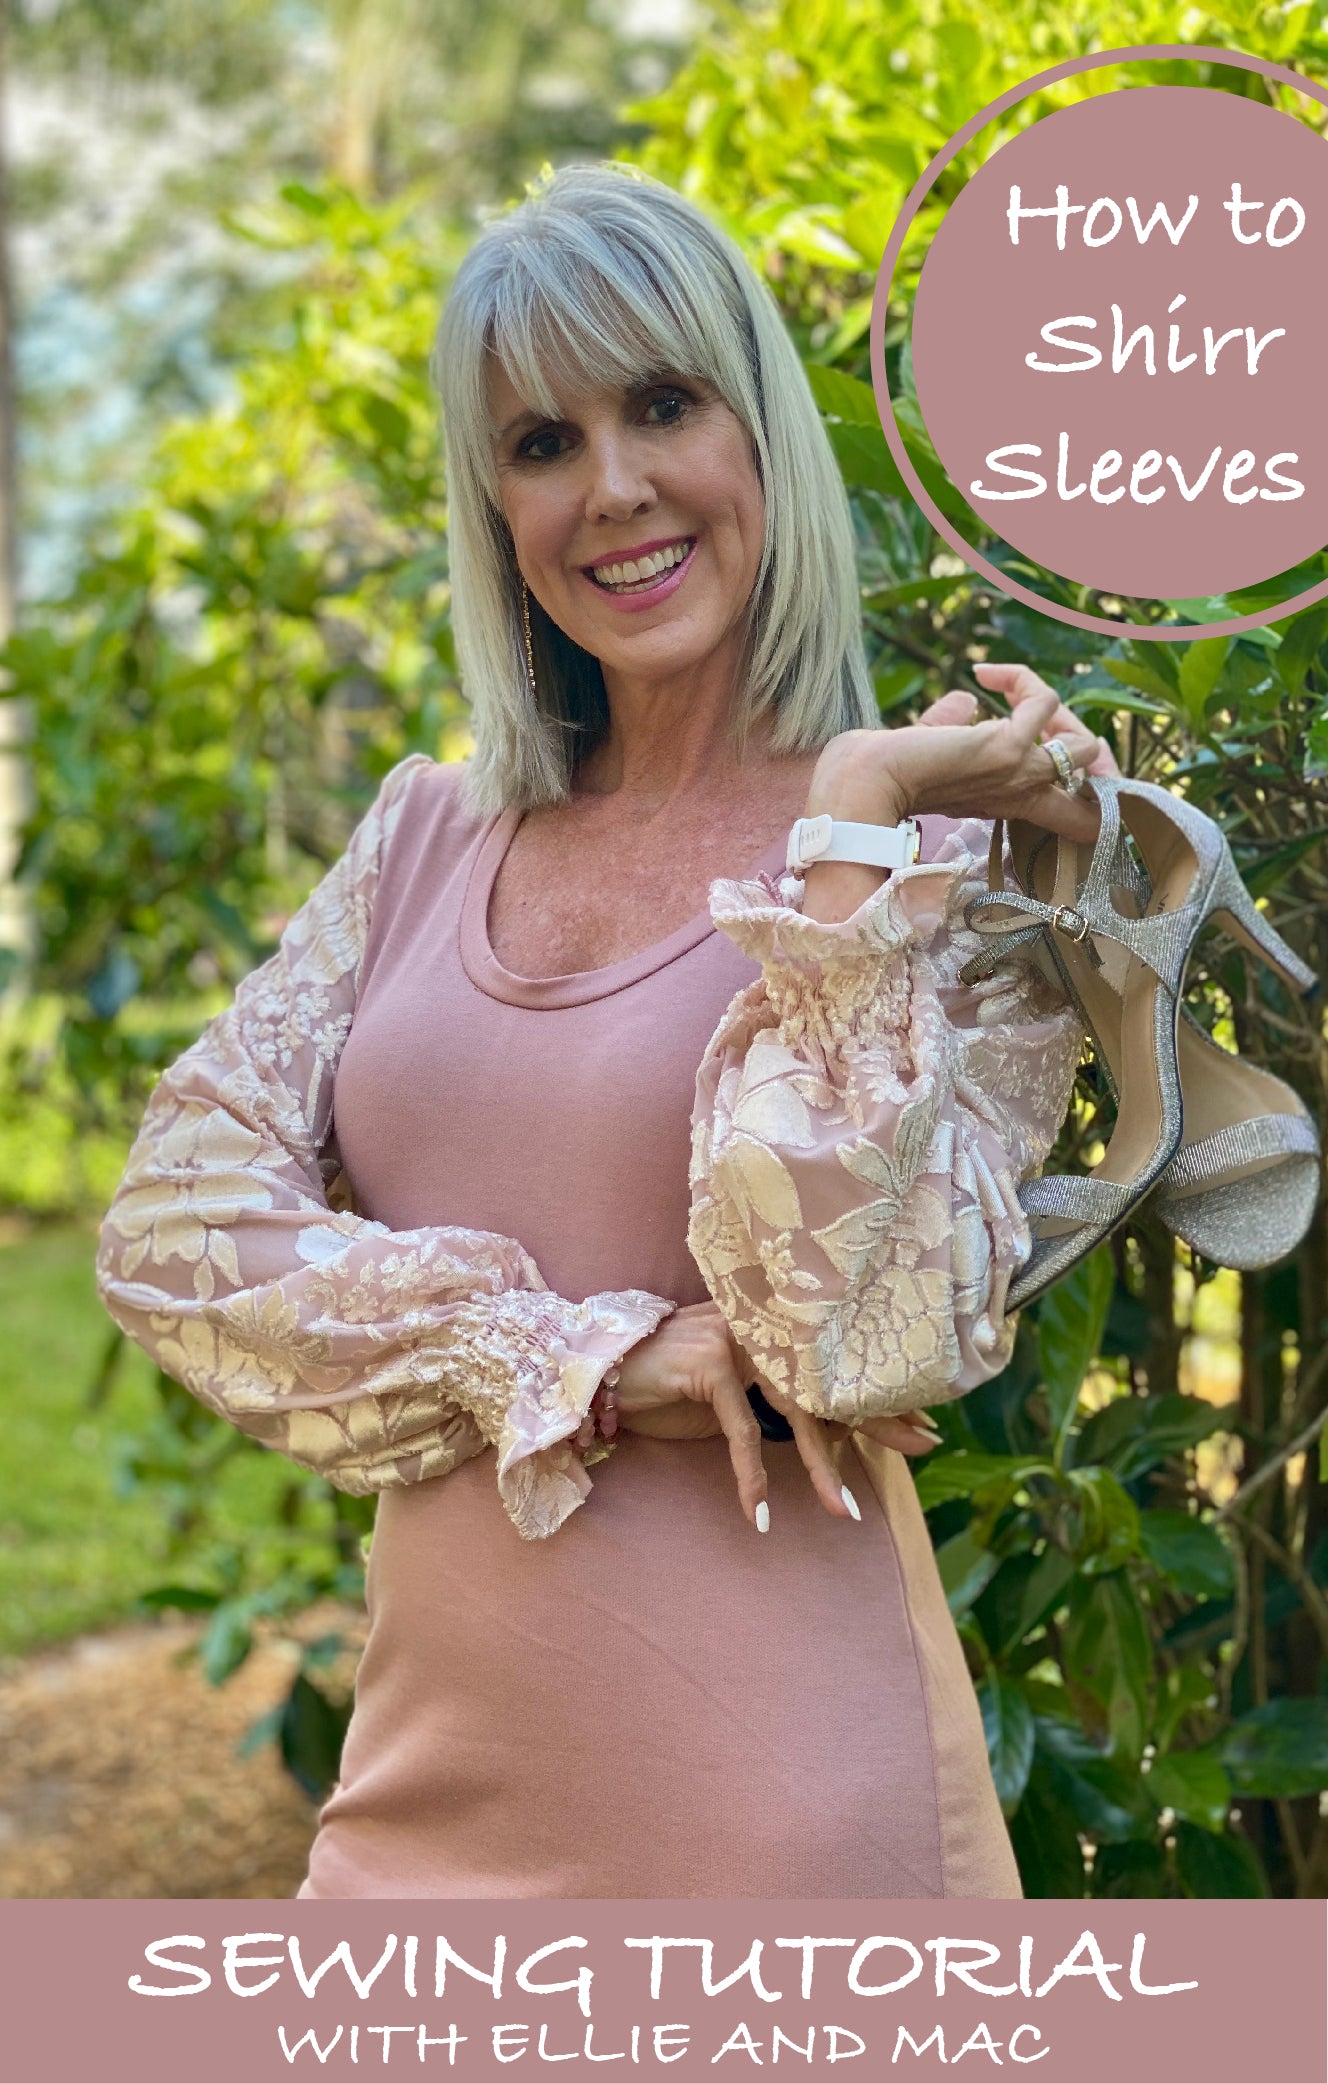

I am totally obsessed with Bishop sleeves! They are so romantic and dramatic all at the same time!

The good news is that Ellie & Mac sleeves, for the most part, are interchangeable.

The Bishop sleeve that I use most of the time is from the Cuddle Tunic pattern (linked below). It seems to fit well for most bodices and is easy to work with. But this time I added my own twist-Shirred Sleeves!
And here is how I did it.
Supplies needed:
-
Elastic thread

-
Bishop sleeve from Cuddle up Tunic #affiliate
-
Bodice of your choice. I used Day to Night this time. #affiliate
-
Ruler
-
Marking pen
-
Sewing machine
I won’t talk too much about the actual mechanics of how to actually do Shirring, but instead will link Diana’s video here. She explains it so well! BTW, did you know that Ellie and Mac have sooo many great videos on Youtube?! Check them out.
The Cuddle Bishop sleeve will need just a few modifications:
-
Cut the bottom straight across to create a straight hem. The original pattern has a bit of a curve to it, and you will need it straight for a simple hem.
-
Narrow the lower portion of the sleeve in some, I took out about an inch (this was not enough). This will help it fit around your wrist once the shirring is complete. I found out the hard way… that shirring only brings it in so far and the lower portion of this pattern was made to gather into a cuff. Don’t worry if it is still too big once competed, you can narrow it more afterwards with your serger. I did!

-
Be sure your shirring threads go all the way to the edge of the sleeve when sewing them in. They will need to be caught when you serge down the side of the sleeve so that they hold. Ask me how I know…
-
If for some reason the shoulder portion of the sleeve is slightly bigger than the opening on your bodice, simply gather your sleeve slightly. I added a gather line 2” across the top and it gave a nice little lift to the sleeve. I actually prefer it this way.
-
Add length to the sleeve since there will be no cuff. To ne precise about this, you could add the width of the cuff plus a hem allowance. I winged it and think mine are a bit long.
Shirring Tips:
- Definitely hand wind the bobbin.
-
Be sure the bobbin elastic thread is pulled through the tension disk in the bobbin holder. Ask me how I know…
-
I did 6 lines of shirring and love the look.
-
Hem the sleeve first. I did a ½” hem but think that a rolled hem would be pretty too especially since I used a sheer flocked fabric.
-
Draw your first line (using a water soluble pen or chalk), then use your presser foot as a guide the width of each line after that, no need to draw each line out.

Attach sleeves per the pattern you are using. And you are done!
(Written by: Suzanne Giles Todd)