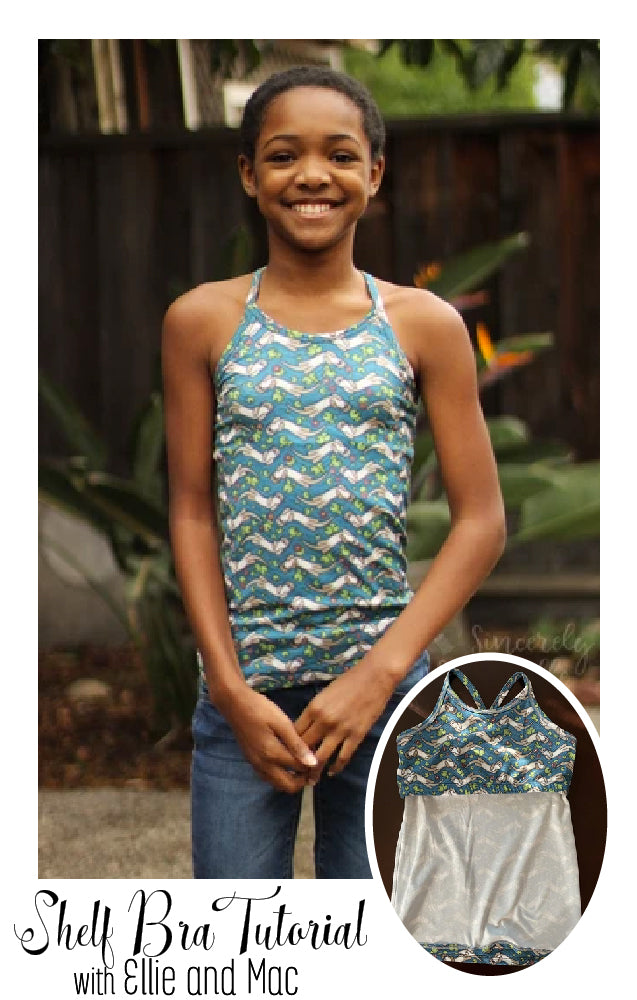
Hey y’all! It’s Lakeisha from Sincerely, Shantelle. It’s been a while, but I’m back again with a hack that I’ve been meaning to write up for a super long time. Shortly after the Kids Cami and Undie pattern was released, I saw people asking about a shelf bra option for kiddos who may need a little more coverage.
The pattern doesn’t come with the option included. When my own daughter asked for a new one, I decided to go ahead and photograph my process. This hack is super easy, and aside from the required materials for the pattern, you will also need a little extra fabric for the shelf bra and elastic of your choice for the band (I used knit elastic for this tutorial, but you could also use plush underwear elastic, fold over elastic which is also called “FOE”, or even some extra picot. Totally up to you and the wearer. If you already own the pattern, let’s get to it! If you still need to grab it, here’s the link: Kid's Cami, Undies & Shorts Pattern (affiliate link attached).
After printing, assembling, and cutting your pattern, you will need to create pattern pieces for the front and back shelf bra. To do so, measure the height of the front bodice along the center fold. Write this measurement down. You will then divide this measurement into third and write this number down, too. Using the second measurement, measure down and make a mark along the front center fold. In the example, my bodice height was 17”. Dividing that into thirds gave me 5.67”, which I rounded to 5.75” just for ease. I measured down 5.75” and made a mark. The new step is to draw a parallel line to the other side of the front bodice. Before proceeding, you will need to decide on the amount to add for your elastic. In the example, I am using 3/4” elastic, so I added 3/4” below the line. I can easily fold this piece under if I decide to attach plush elastic, FOE or picot to the raw edge, as you don’t need additional height in the shelf bra for anything that will attach directly to the edge without being folded.
Next, you will need to trace the outline of bodice, only down to the line you marked in the previous step, including your elastic height, if added. The front shelf bra will be identical to the front bodice shape, except only a third of its height.

Align the back bodice to the side seam of the front bodice. Make a mark in the same position as the line you drew as a guide for the front shelf bra. Draw a parallel line to the other side of the back bodice, just like you did for the front bodice. Now trace the outline of the bodice down the line you making in the previous step. This creates your back shelf bra.

Cut all pattern pieces for the cami, including the two you just created. You should have a front bodice, front bodice shelf bra, back bodice, back bodice shelf bra, front cami and strap binding (or picot, if using), and shelf bra elastic of your choice.
Place the cami bodice pieces right sides together and sew the side seams. Do the same with the shelf bra. Leave the cami wrong side out and turn the shelf bra right side out.

Place the shelf bra over the cami with wrong sides together. Baste the cami and shelf bra together around the entire neckline, over the armscye all the way to the back. This will help keep the two layers together while you’re attaching the elastic or binding to the edge. Your shelf bra and cami that are basted together will be treated as one piece for this process. Prepare your bindings (if applicable) according to the pattern instructions, and attach it (or your picot elastic).

Separate the shelf bra from the cami, as shown in the photo. Measure around your wearer’s ribcage to decide on a comfortable elastic measurement. I just measured my daughter’s lower chest and then subtracted 1”. Whatever method you choose, take care not to make it too tight. Overlap the elastic 1/2” and sew to form a loop. Divide the elastic and the shelf bra opening into four equal parts and mark with pins or clips.


If sewing knit elastic or similar (as pictured), place the elastic over the wrong side of the shelf bra. If you are attaching FOE, you will actually enclose the raw edge, instead. If sewing picot or plush elastic, you may need to sew it directly to the right side. Choose the method that makes sense for your elastic type. If you sewed your elastic to the wrong side, the next step is to fold it underneath and topstitch in place. I crossed my daughter’s straps in the back, at her request and it made no difference in fit.


Tada!! You now have a lined cami with a shelf bra. You could experiment with different types of fabric, depending on the wearer’s needs and comfort level. You could use solids to save your custom fabric, since the shelf bra won’t be visible anyway. In fact, I recommend using a solid if your cami is a light color, to prevent the design from the shelf bra possibly showing through. I hope you found this blog helpful and that you feel confident enough to add a shelf bra to your next cami!! Find me over in the Ellie and Mac Facebook Group if you ever have questions on the techniques here or need further help. Until next time, friends….

(Written by: Lakeisha Webb)


