Hi everyone! It is Leonie and this is my first blog post for Ellie & Mac. If you are an active member of E&M Facebook group, you have seen my post from time to time. I love sewing my family and myself, testing new pattern and pushing myself to learn new sewing skills. I am very excited to share with you a sewing hack to transform a regular sleeve into a puff sleeve. Accessible for everyone either you’re a beginner or a confident sewist.

Before jumping straight into the tutorial, print or draw your sleeve and make any adjustments needed to fit your own measurement: grading for bicep, adding or removing length, etc. For example, I graded mine from 3xl to 2xl for my bicep measurement.

Firstly, draw a horizontal line (red line in the picture below) approximately 1’’ under the armscye point. Then, draw a perpendicular line (blue line in the picture below) in the middle of the sleeve or at the notch separating the front from the back in this pattern.

Secondly, draw parallel lines at equal distance from the vertical line done in the previous step. I, personally, chose to draw them at a 2’’ distance from each other. For my example, I ended up with a total of 8 sections, but you can choose to work a smaller number of sections or more. However, a higher number of sections might be hard to work with and a too small will not give the puff sleeve effect you are looking for.

Once the desired number of lines are drawn, it’s time to cut your pattern to start the transformation. First, cut on the red line to create two pieces.

Second, carefully cut your vertical blue line but making sure to STOP before the red line. This piece needs to stay attached together.

It is now time to add volume in our sleeve to create the cute puff sleeve effect. I start by tracing a vertical line (show in blue in the picture) at the notch separating the front from the back. It is going to be our centerline from where we will start each section of the sleeve.
Then I tape down the right and left end to their original placement to keep the sleeve form.
Then, I place the first two pieces from both side of the centerline 0.75” away from it, then I repeat the same distance from each other for every piece on either side as shown in the picture below.
I personally decide to separate each section by 0,75’’ but it’s up to you. It is a number I like to work with, but you can choose a bigger measurement for a puffier sleeve effect.

The most difficult part is now done!
You now must redraw the top of your sleeve as shown in the picture below. First, mark 1’’ above the top of your sleeve in the middle. It is going to be your new point that separates the front from the back of your sleeve. Then redraw your sleeve using the original shape has reference. My new sleeve line is illustrated in blue with the computer to be more visible but me careful to have a rounded shape and NOT a straight line. Finally, recut your pattern sleeve piece.

With your new sleeve pattern, cut your fabric. Remember to mark the front, back and the notch separating the front from the back using your preferred method.

You made it, now time to get to the sewing machine! Using your sewing machine sew two rows of gathering stich from the middle of one side to the other, illustrated in red in the picture. Do not sew your gathering stich on all the sleeve like I did, I sadly had to use my seam riper to correct my mistake.

On the wrong side of your fabric, draw a vertical line (illustrated in blue) starting at your notch separating the front from the back. I draw mine 8’’ long. This would be your guide to sew your elastic. Adding an elastic help creating the puff sleeve effect and prevent your fabric from being droopy. It also elevated the look and create a ‘’je ne sais quoi’’.
You can use 1/8 to 1/4 elastic which I find easier to sew. Baste your elastic at the top of the sleeve, then gently stretch it while sewing it.

There’s only one thing left, sew your sleeve according to the pattern method. To match the armhole, you are going to have to gather your sleeve using the gathering stich made earlier. And… Voilà! You now have a beautiful self created puff sleeve.
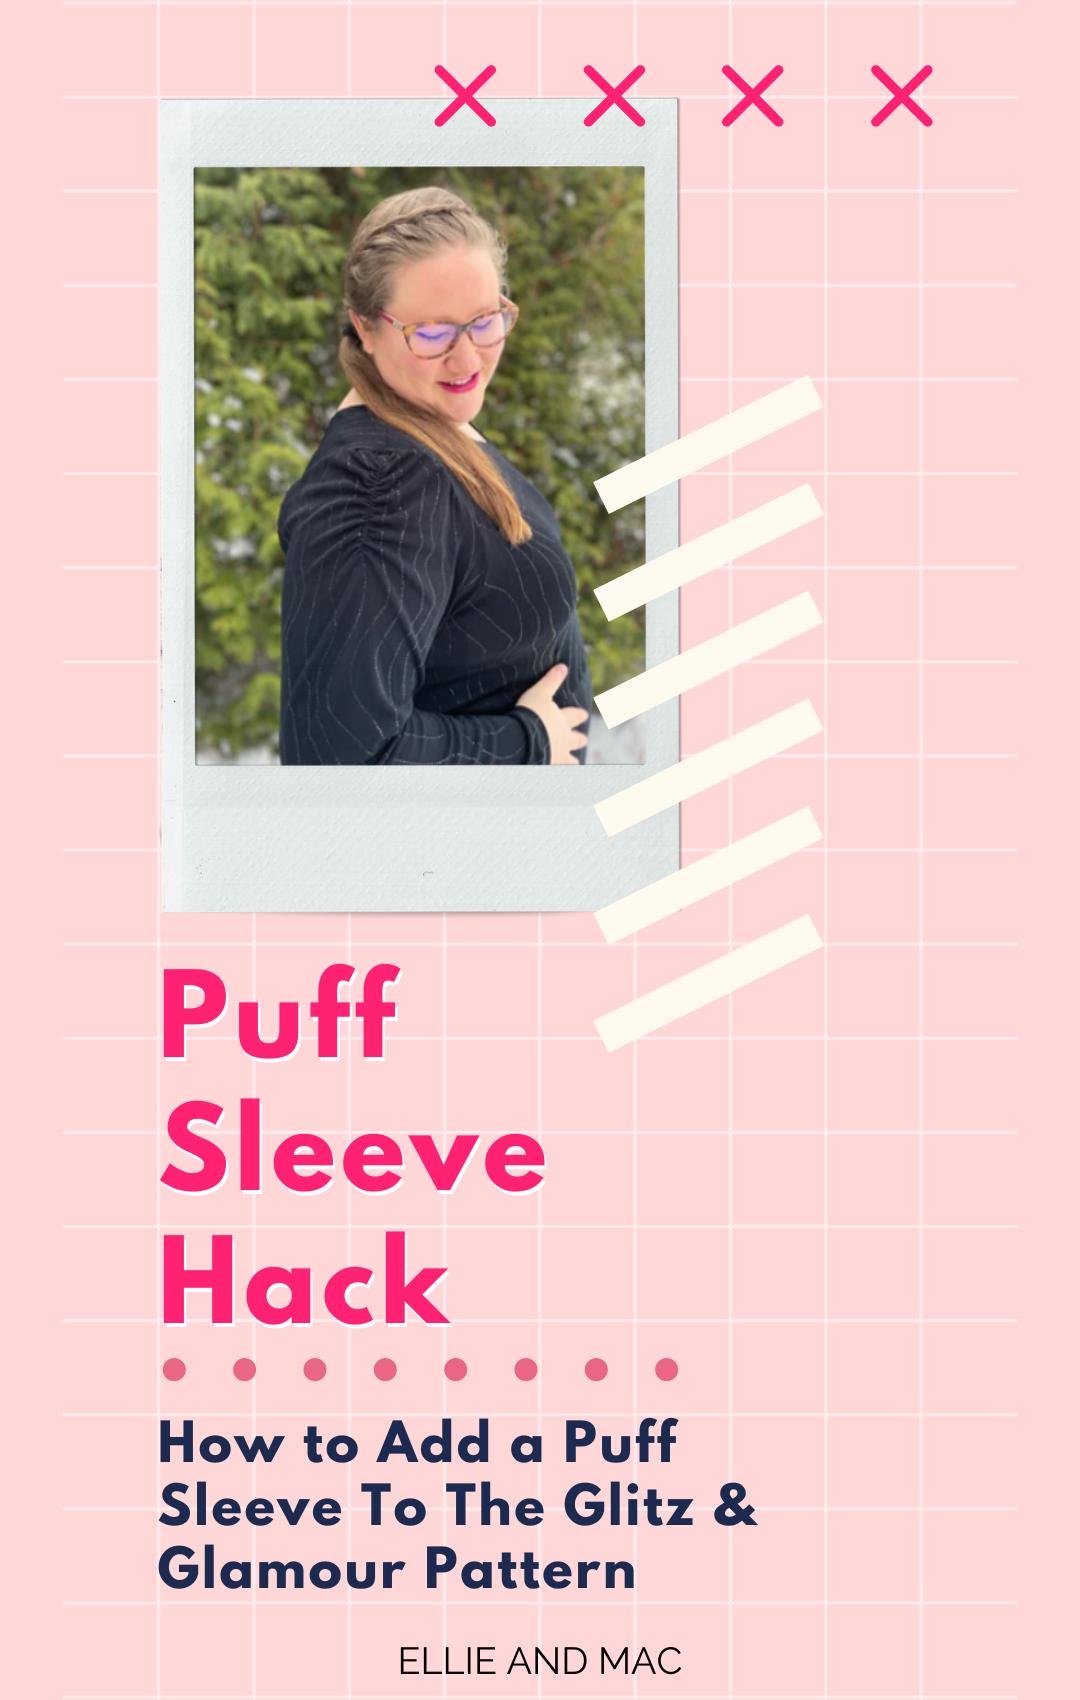
Here is the result of mine on the new Glitz & Glamour Top, Peplum and Dress.


I hope you enjoy learning how to create all by yourself, a puff sleeve on every pattern you want, and you feel inspire to try it on your own. Can’t wait to see your make on Ellie & Mac Facebook Groupe.
If you like, feel free to follow me on social media @sew_with_leonie on Instagram or @lebazarcreatifdeleonie on Facebook for my French sewist friend.
(Written by: Leonie Levesque)