One of my favorite things about sewing is being able to see something on the internet or in a magazine and figuring out which pattern I can use to replicate it. I can sit for hours looking thought Pinterest and taking screenshots of outfits I want to make. I saw one a while back that I thought would make a great “Last Day of School” dress. Considering school is over in May and we are now in March, I figured I better get cracking. So I pulled up the picture on my phone again.

Looking at how the dress flows, I knew I needed a knit fabric that draped. I went to my stash in search of a solid double brushed poly. I wanted a pastel blue or even lilac. Sadly, all I had a burgundy from Pretty Posh Prints. Since I made a resolution this year sew from my stash, it would have to do.
The next thing I needed to look for was the lace. I had gotten a box of lace from a destash Facebook group a few years. I know there had to be something in there that would work. I found this beautiful 1.5” cream crocheted lace that would be perfect for the sleeves and a 3” tulle lace that would for the hem.
Now that I had all my materials, all that was left was to figure out the alterations needed for the Pinterest dress.
I started with the sleeve and bodice. The lace on the sleeve goes all the way to the waist. I choose the flutter sleeve option and measured the length. For the 4t, it was 1”. Next, I measured the bodice at the side seam (arm to waist), which was 4.5”. And my lace was 1.5”. With these measurements, I figured out I needed to add 2” to the sleeve length. I did not take into account hem allowance become I knew I would use it would attaching lace to sleeve.
4.5 (total length of bodice) – 2.5 (sleeve length + lace length) = 2

To make the new sleeve pattern I added 2” to the “Fold Line” and at the other end of the sleeve. I connected it with a curved line.

Next was the skirt. I measured the width of my lace, the width was 3” and marked my pattern 3” up from the bottom. Once again, I did not worry about hem allowance since I was going to use it when attaching the lace. I traced my pattern into my fabric making the new marks. I used the same pattern as a guide to create the new curve.
To construct the dress, I first attached the lace to the sleeves and skirt. Then I attached the strips (belt) to the front and back bodice. From there I just followed the directions on the pattern.
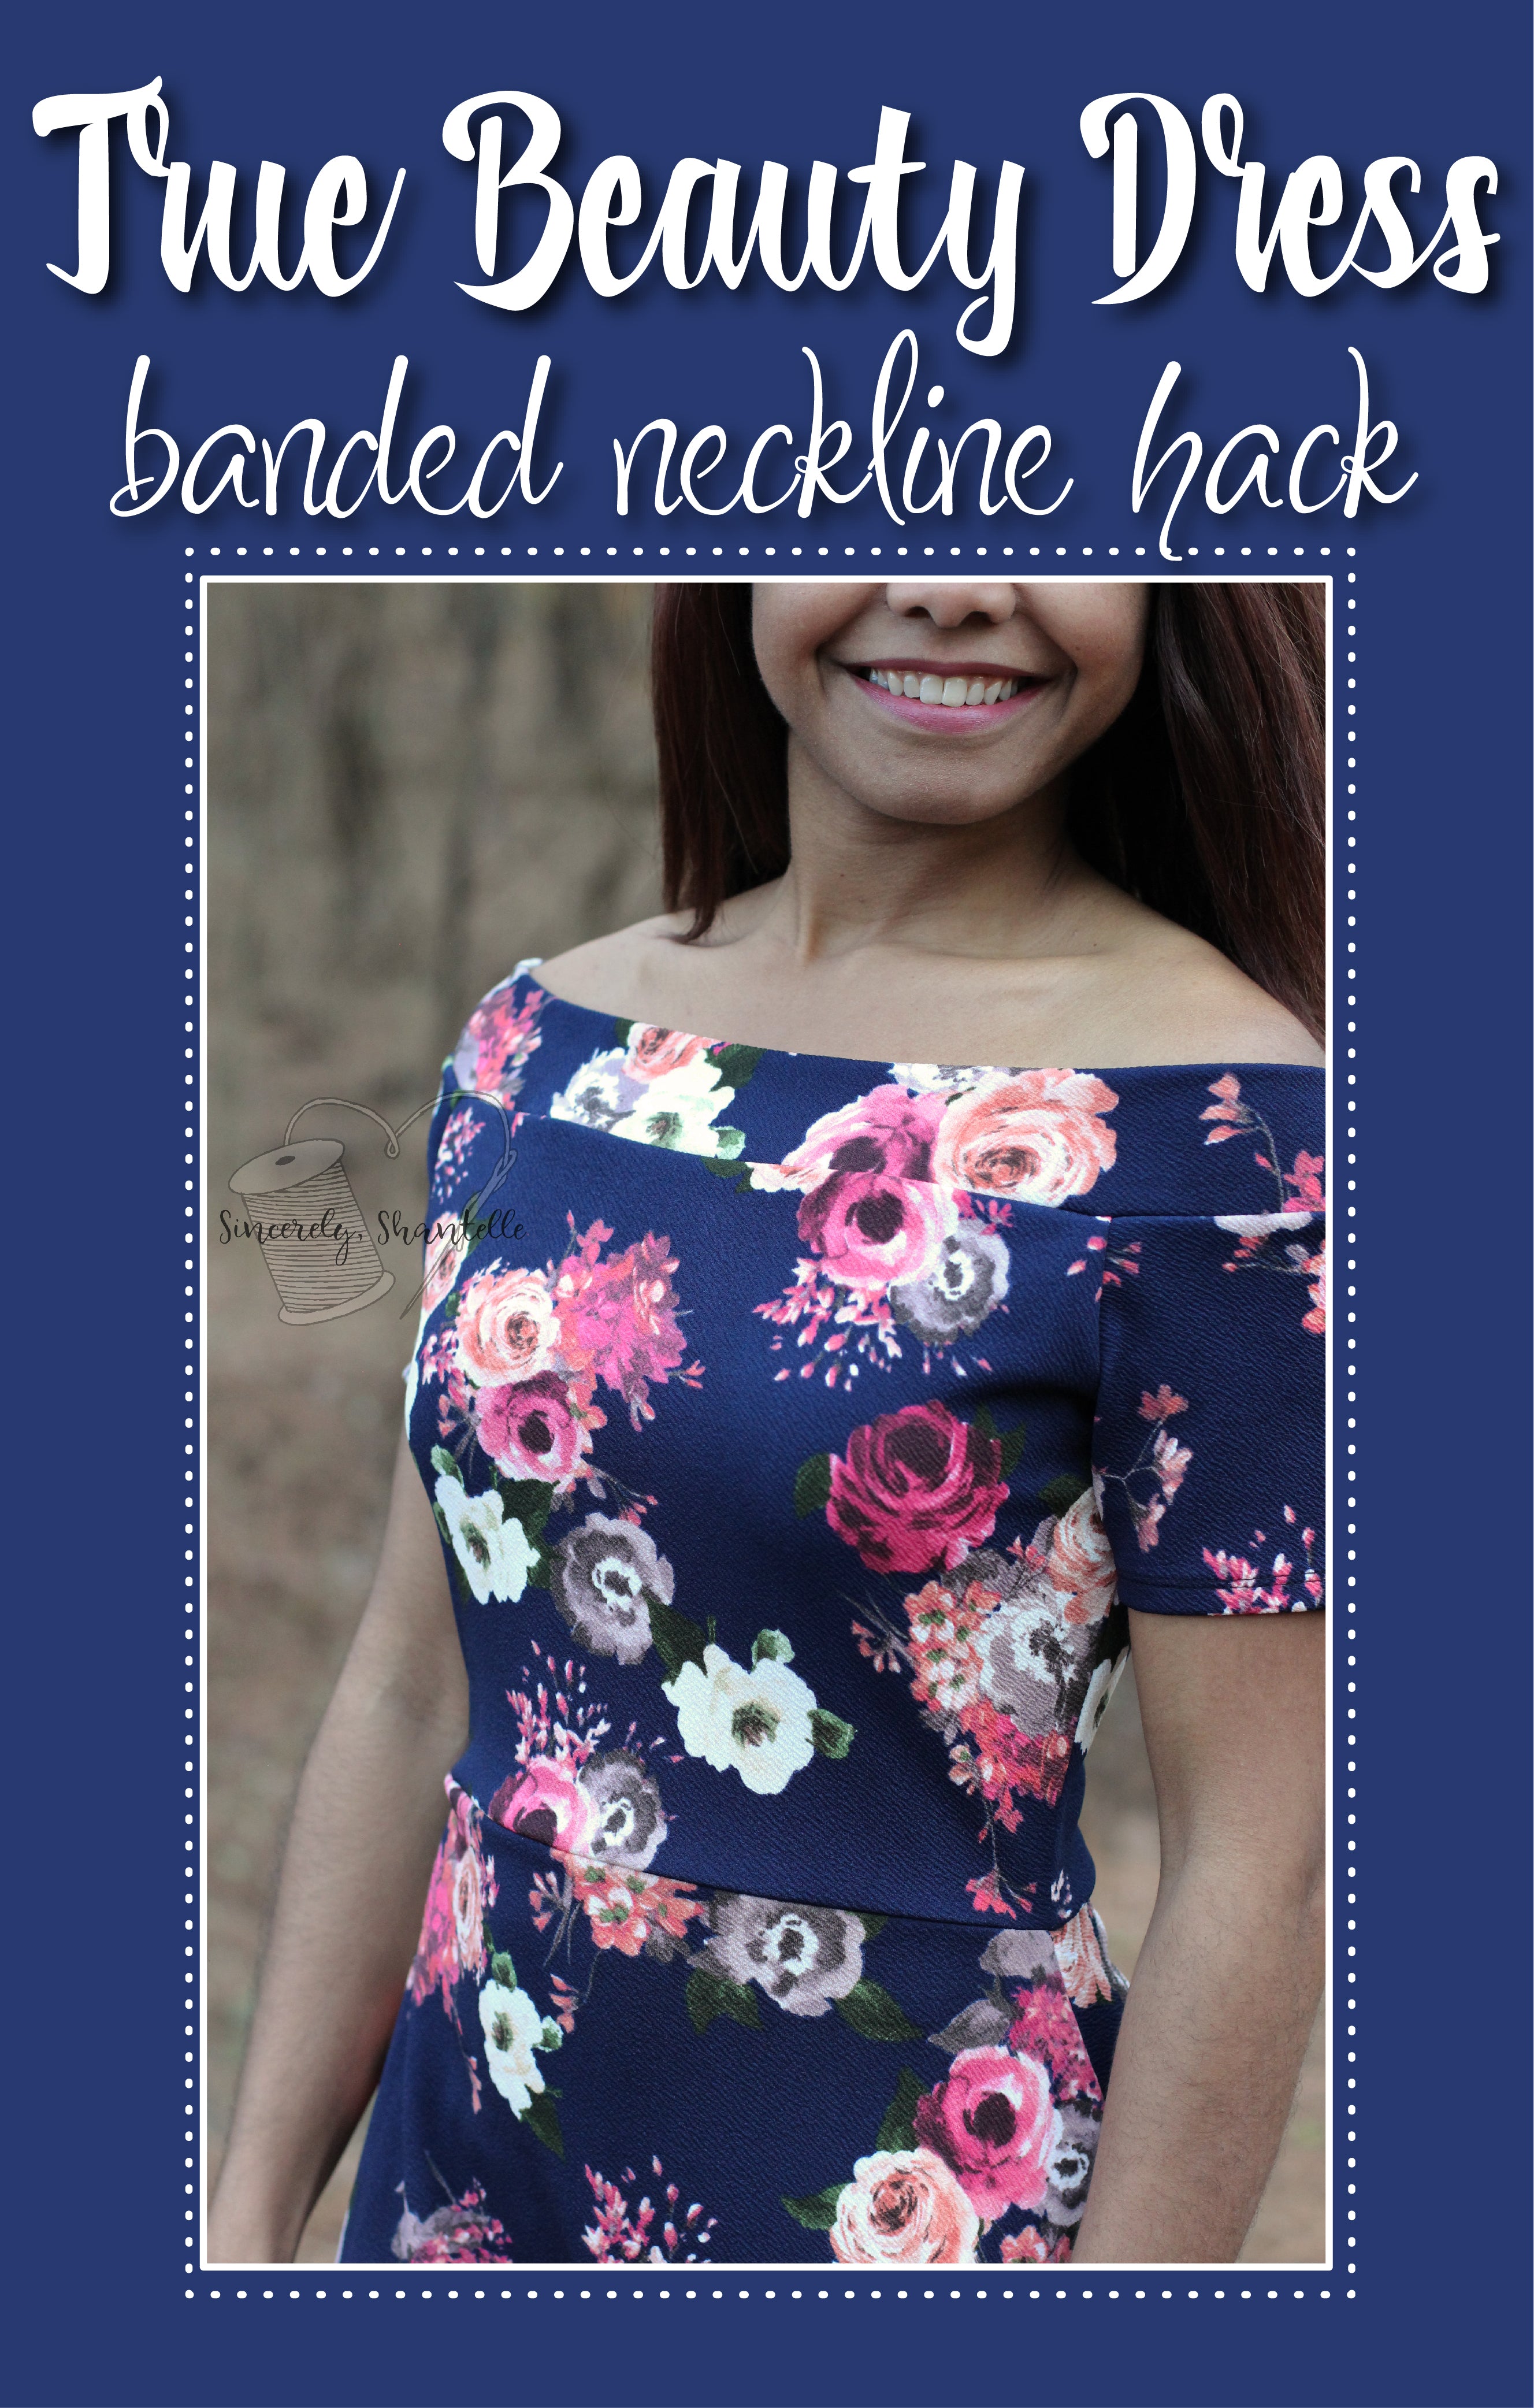
For the neck, I decided to do a seam covering binding. I felt it gave it the fancier look I was going for. To do this I attached the band wrong side of the fabric and flipped it over to right side, covering the seam and edge stitched in place. If you would like more detailed instruction watch the YouTube video tutorial on the Men's Tank. Diana does a great job explaining and showing how it is done.

The final thing I added was the flower for the belt. My lace was 1.5”. I cut a strip of 3.5” wide by 22”. I folded the short edges in 0.25” and then folded it in half lengthwise. Then I attached the raw edges of the fabric to the bottom of the lace with a gather stitch. I knotted one end and pulled the thread on the other end creating a gather. Next, I twisted the gathered edge to make a flower and stitched it together in the back. I attached the flower to the faux belt in the middle and added a few small hand stitches to the edge of the flower to tack it down to the dress. Another option would be to attach a piece of felt to the back of flower and add a pin to the felt. This way the flower is removable and makes it easier when washing the dress.
This is the final result. I am very happy with it and my kiddo loves it. I would consider this a Pinterest Win!! We both agree it will be great for the last day of school. That is if she can wait that long.


Picture courtesy of Pinterest
I ran though my patterns in my head to see which one I could alter to achieve a similar look. The School Cool Dress was the first one that popped into mind. How appropriate is the name?Looking at how the dress flows, I knew I needed a knit fabric that draped. I went to my stash in search of a solid double brushed poly. I wanted a pastel blue or even lilac. Sadly, all I had a burgundy from Pretty Posh Prints. Since I made a resolution this year sew from my stash, it would have to do.
The next thing I needed to look for was the lace. I had gotten a box of lace from a destash Facebook group a few years. I know there had to be something in there that would work. I found this beautiful 1.5” cream crocheted lace that would be perfect for the sleeves and a 3” tulle lace that would for the hem.
Now that I had all my materials, all that was left was to figure out the alterations needed for the Pinterest dress.
I started with the sleeve and bodice. The lace on the sleeve goes all the way to the waist. I choose the flutter sleeve option and measured the length. For the 4t, it was 1”. Next, I measured the bodice at the side seam (arm to waist), which was 4.5”. And my lace was 1.5”. With these measurements, I figured out I needed to add 2” to the sleeve length. I did not take into account hem allowance become I knew I would use it would attaching lace to sleeve.
4.5 (total length of bodice) – 2.5 (sleeve length + lace length) = 2

To make the new sleeve pattern I added 2” to the “Fold Line” and at the other end of the sleeve. I connected it with a curved line.

New Sleeve
To give the dress the belt look, I cut some of the bodice at the bottom. I wanted it to be 0.75” wide. Since there is already a 0.25” seam allowance added to the bodice and the skirt, I added 0.5” to compensate. I marked the bodice at 1.25” and drew a line. Refer to Bodice picture above. I did the same to the front bodice and cut 2 strips of fabric at 1.25” by width of bodice on the fold.Next was the skirt. I measured the width of my lace, the width was 3” and marked my pattern 3” up from the bottom. Once again, I did not worry about hem allowance since I was going to use it when attaching the lace. I traced my pattern into my fabric making the new marks. I used the same pattern as a guide to create the new curve.
To construct the dress, I first attached the lace to the sleeves and skirt. Then I attached the strips (belt) to the front and back bodice. From there I just followed the directions on the pattern.
For the neck, I decided to do a seam covering binding. I felt it gave it the fancier look I was going for. To do this I attached the band wrong side of the fabric and flipped it over to right side, covering the seam and edge stitched in place. If you would like more detailed instruction watch the YouTube video tutorial on the Men's Tank. Diana does a great job explaining and showing how it is done.

The final thing I added was the flower for the belt. My lace was 1.5”. I cut a strip of 3.5” wide by 22”. I folded the short edges in 0.25” and then folded it in half lengthwise. Then I attached the raw edges of the fabric to the bottom of the lace with a gather stitch. I knotted one end and pulled the thread on the other end creating a gather. Next, I twisted the gathered edge to make a flower and stitched it together in the back. I attached the flower to the faux belt in the middle and added a few small hand stitches to the edge of the flower to tack it down to the dress. Another option would be to attach a piece of felt to the back of flower and add a pin to the felt. This way the flower is removable and makes it easier when washing the dress.
This is the final result. I am very happy with it and my kiddo loves it. I would consider this a Pinterest Win!! We both agree it will be great for the last day of school. That is if she can wait that long.

This post includes affiliate links. They do not cost you any extra but do help fund my pattern/fabric collection.