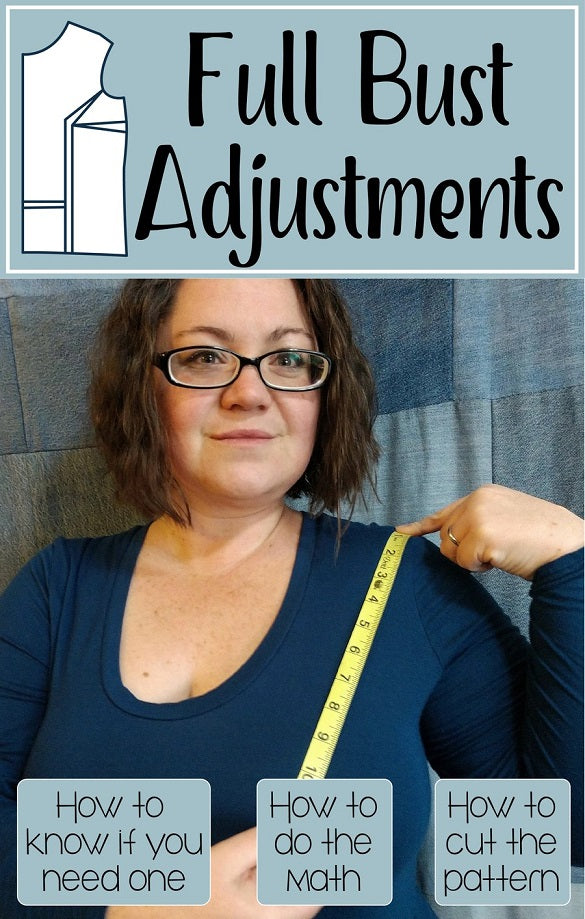
Measuring Yourself
Why Don't Patterns Have an Upper Bust Size Chart
How Ellie and Mac Patterns are Different From Other Patterns
Doing the Final Calculations
Converting the Measurements Into Pattern Pieces
The Last Step of Doing the FBA
Hey sewing friends!! It’s Nellie from sewmessy.blogspot.com and today we are going to talk about a very difficult and long adjustment topic. The Full Bust Adjustment. The FBA. It’s almost a dirty word because it’s not a fun adjustment and it’s hard to figure out how much to adjust by and where to adjust, and there is almost no way to know if you’ve gotten it right other than by making another shirt/dress to see if it fixed the problem.
I am going to be painfully honest with you, if you were to google “how to do a full bust adjustment” you are probably going to find half a dozen or more tutorials where they teach about doing an FBA and how much to adjust for and how to adjust in at least half a dozen different ways. Everyone seems to have their own way of doing things. Which one of them is correct? Well, probably all of them. Because, as I have stated before, sewing with knits isn’t a science, there are so many variables because of the difference in patterns and fabrics to work with, so if something works for you and it’s different from what I use or different from what someone else does, it doesn’t mean you are doing it wrong, it doesn’t mean you should change, it just means you have found something different that works for you. And that’s a win in my book!
How Do You Know if You Need an FBA?
So, how do you know if you need an FBA?
One very clear sign is when your shirt is too tight and squishes your boobs until they look like you stuffed with a tissue box, or at least that’s how I describe it. Haha! Sorry! That might be just a little extreme, but it happens. A more common issue is having fabric pull between the breasts. Or maybe there are pull lines at the side of the breast. Or the side seam near the bust is being tugged towards the front. Another common problem is putting on a shirt and it fits except for the neckline is really low and wide and the sleeves are too wide and long. This says that the size used for the bust was too large for the chest and arms.

Measuring yourself
But really, who wants to go through that much fabric to find out if you need a FBA? There has got to be an easier way, a way to measure before all the cutting and sewing and disappointment happens.
And there is a way!! And it’s so simple! Measure your Upper Bust and use that measurement in place of the Full Bust.
First, refer back to this post on How to Measure Yourself to make sure to measure the Upper Bust and the Full Bust correctly. And then I am going to throw 2 brand new measurements at you. We need the center point of the bust, called the Bust Apex. To get that measurement we need to measure from breast to breast, right at the fullest part of the bust, right at the peak of the curve. You may need to look in a mirror and from several angles to make sure you are right at the peak of each breast. It is more difficult than you would expect to find the most pointy part, because it is not necessarily right at the nipple.

Next, we need to measure from the end of the shoulder to the Bust Apex. The end of the shoulder is not where your arm, skin, muscles and tissues ends. We are actually looking for the place on your arm where the Trapezius is. Yeah, I didn’t know where that was either. Be sure to reference the picture below. But, this is where your sleeve seam should lay.

There are other places you can measure from, but they are really going to depend on the style shirt you are making. Measuring from Trapezius to Bust Apex is the most common for regular inset sleeves. Some of the other points are from the place where the neck and the shoulder meet, the hollow at the center of the neck and the center front waist. Measure both sides. If there is a significant difference between the two measurements, like more than half an inch, you may want to adjust both sides of the pattern separately. Which means tracing out the whole pattern, not just half and adjusting both sides separately and cutting the fabric flat instead of on the fold. But this is really only needed if there is a significant difference in the size or location between breasts.
Take a look at the pattern size chart. I am going to create some sizes to work with. These numbers are pulled from thin air, not for anyone specific, they are going to be for teaching purposes only. Upper Bust: 31 (yellow) Full Bust: 34.5 (red) Waist: 24 (green) Hips: 37 (blue)

Yes, I chose to use XXS because it takes less paper to print and trace!
The first thing you should notice is that if the shirt size is chosen by the full bust measurement it will still be 2 sizes too big! Except for in the hip. Even when grading down two sizes for the waist and back up for the hips the neck and sleeves would still be too large. So the size should be chosen by the UPPER BUST measurement in place of the Full Bust because of the upper body size.
Why Don't Patterns Have an Upper Bust Size Chart?
I hear you saying, “But why don’t the patterns just have an Upper Bust size chart and tell us to use that size to go by?”
Well, there is an easy answer to that question. An Upper Bust measurement would make it more difficult to determine just how AWESOME Ellie and Mac patterns are because Lindsey drafts her patterns differently from most other designers. Let me explain how Ellie and Mac patterns are different.
But before I can do that, we need to have a little background first:
Bra sizes. They are usually denoted by number and letter. The number is found by measuring the Under Bust and is usually just the closest number rounded down. So if your Under Bust is measured at 32 ¾ inches your bra will be a 32. Alright, now the cup letter is determined by how much larger the Full Bust is over the Under Bust. So if your Full Bust measurement is a 34.5 there are 2.5 inches difference between the two measurements. This is where the letters come into play:
You may have heard of patterns designed with cup sizes? It’s a common thing to ask what cup size patterns are drafted for, if you haven’t hear that yet, you probably will now! Haha!
Most tissue paper patterns are drafted for a B cup. Quite a lot of PDF patterns are drafted for a C cup and occasionally a D. But those letters are not the same thing as bra cup sizes. Pattern cup sizes are determined by the difference between Upper Bust measurement and Full Bust measurement. They are named the same, just found in a different way.
Does that make sense? Bra cup size is determined by Under Bust and pattern cup size is determined by Upper Bust, so having a large bra cup size doesn’t automatically mean you need a Full Bust Adjustment and it doesn’t determine how much of a Full Bust Adjustment will be needed.
How Ellie and Mac Patterns are Different From Other Patterns
Before I forget, let me tell you how Ellie and Mac patterns are different from other PDF designers. Other designers decide on a cup size and ALL of their patterns and sizes will have the exact same cup size (remember, this is the Upper Bust to Full Bust difference). But Ellie and Mac patterns are designed to have a variable cup size. Meaning that the smaller sizes will have a smaller cup size and larger sizes will have a larger cup size. Which is totally awesome because it means that even though I have a 4.5 inch difference between my Upper Bust and my Full Bust, which would mean an FBA for pretty much all other pattern companies, I do NOT need a Full Bust Adjustment on any of my Ellie and Mac patterns! And that feels like magic to me!
If you’re curious and want to see exactly what cup size the pattern piece in front of you is, just measure it! The Full Bust on the pattern will be about 1.5-2 inches down from the seam allowance at the bottom of the armscyth, measure across the pattern in a straight line, minus the seam allowance (¼ inch) and multiply by 2. Then do the same for the Upper Bust, which is going to be about half way through the Arm Scythe, measure straight across the pattern, minus the seam allowance (¼ inch) and multiply by 2. The difference between those two numbers will give you the pattern cup size. Voila! No need to pester the designer because you are so smart!

Doing the Final Calculations
Okay, now back to our little mythical XXS in need of an FBA. As a reminder, her measurements are as follows:
The very first thing that needs to be done is grading out for her hips. I am not going to show you how to do right now, I’m just going to do it. If there is any other kind of adjustments, like height, for example, that should also be done first. Both grading out for the hip and the height should be done to both front and back, but the FBA will only be done to the front, so set everything else aside for now.
Next, and this is going to sound silly and redundant, but it will all make sense in the end, retrace your adjusted pattern. I know, I know it seems like a waste, but it will make your Full Bust Adjustment easier in the end (believe me, this is the part I ALWAYS have issues with and I always wish I had just traced two).

Now for the hard part. Math. To find the amount of FBA needed to be made we need to subtract the Upper Bust from the Full Bust. Using our mythical numbers we take 34.5 and subtract 31 and get 3.5 and because only half of the pattern is being adjusted, because it’s cut on the fold, divide 3.5 in half and get 1.75. 1.75 is the magic number for our mythical FBA.
Well, the math is done, but we need to mark up our pattern some more. Do you remember those other measurements we took? The distance from Bust Apex to Bust Apex and the Trapezius to Bust Apex? We need those now. We need to mark the Bust Apex location on the pattern. Some patterns, mostly tissue patterns have this location, probably labeled as Bust Point, this is fairly common in fitted woven patterns with bust darts. As you can imagine, knowing where your Bust Apex is when sewing in darts is important for making sure things look good in front. Well, the same is true for a knit pattern and FBA, gotta make sure the fabric hangs right or it won't look as nice.
Let’s say the distance from Bust Apex to Bust Apex is 7 inches on our mythical person. Divide 7 by 2, because we are only using half the pattern. From the center fold we are now going to measure over 3.5 inches from the fold and draw a vertical line. We don’t need to worry about seam allowance because we are working from the fold on this one. In the picture below my line is very faint so that it can easily be erased if I wanted to later.

Then we are going to mark off the seam allowance on the upper corner of the pattern. Remember, this is the seam we want to fall across the Trapezius. We are going to take the Trapezius to Bust Apex measurement from above, which is 9 inches for our mythical XXS and line up the end of the ruler with the inside of the inseam at the top of the Shoulder Cap and find where it crosses our vertical Bust Apex line. Mark that spot! That is the Bust Point we need for the mythical XXS.

Converting the Measurements Into Pattern Pieces
Finally, it is time to make some changes to the actual pattern! Yay! Pull out your scissors and some tape, some scrap paper to fill in holes and a long, straight ruler. First, we are going to make the lines we are going to cut to make the adjustment. The first line is going to be straight down the pattern from Bust Apex to Hem. The second line is from Bust Apex to the Arm Scythe. The exact point on the Arm Scythe that you draw to is unimportant. I suggest a point somewhere between the bottom half to bottom third of the Arm Scythe, but you don’t need to measure to make sure it's in the right place. The third line is going to be from the Bust Apex to the Side Seam. This line placement is a little bit more important. This line will decide where the Bust Dart (if you choose to do one) will go, so it’s important that the dart come off the side of the breast in a flattering way. Bust Darts are usually more flattering if they tilt slightly upwards, so you may want to draw your line so that it sits slightly lower than your Bust Apex at the seam.

And now it’s time to cut out pattern. First, we are going to cut along the line from the hem of the pattern up to the Bust Apex and over to the Arm Scythe, right up to the Seam Allowance. Then we are going to make a tiny cut from the edge of the pattern, to the Seam Allowance line but not through to the other cut we just made. You want a little hinge left between the actual pattern and the Seam Allowance. You might want to reinforce it with a piece of tape.

Time to cut the last line. It needs to be cut from the Bust Apex to the Seam Allowance. And just like with the first cut, this one should not go through the Seam Allowance. The Seam Allowance will need to be cut, but leave a little hinge for the Side Seam so the pattern can move and pivot easily. Add a little bit of tape if you want. *Note* I will add a small section to the end about Bust Darts*

At this point, I like to prepare a long skinny piece of paper that is as long, or longer than the pattern with the adjustment amount. Do you remember the math we did to figure this amount?
Upper Bust - Full Bust / 2 = Adjustment Amount
And the adjustment amount that we needed for our mythical XXS was 1.75. So, on the long skinny piece of paper I am going to trace two parallel lines 1.75 inches apart.

Tape the premarked paper to the long straight side of the pattern, the side without the cuts towards the Seam Allowance. The small section attached to the Arm Scythe is the next thing to be taped down, and it needs to be pivoted out until it reaches the adjustment line. Make sure the hinge in the Arm Scythe doesn’t bunch too much, the cut sections will overlap a little, but not bunch up. And then the other side of the pattern needs to be rotated up until it lines up with the adjustment line marked on the premarked paper. Notice how the hinges work to keep the Arm Scythe and the Side Seam the same length?

And now our pattern now has one side that is longer than the other? This is a good thing! If you need an FBA, you know that frequently shirts are too short because they need extra fabric to go up and over and around. So this extra length being added to the pattern is a good thing, but both sides of the pattern need to match. One more quick cut and tape will fix this. There is really no exact place to make this cut, just somewhere at the bottom of the pattern. Go straight across. This pattern piece needs to be dropped half of the distance between the separation of the split Bust Point. I think the pictures is going to explain this best.

The difference is 1 ⅞ of an inch, but because I am no good at math, I’m going to round that number down a little and make it 1 ¾ of an inch and divide that by 2 and we get ⅞ of an inch. So we are going to extend the cut portion of the pattern down by ⅞ of an inch.

Use some scraps to fill in the empty places and add some paper under the hem because we need to redraw it. Remember, we didn’t change anything to the back of the pattern, so we need to be sure that the side seam stays the same length but we still need some length added to the center front to go up and over and around. The hemline I’m using as demonstration is nice and straight. If I were to make the hem go straight from center fold to side seam the hem would become pointed. That is not the look we are going for here. But, if we take a big, gentle curve from center front to Side Seam we can add length and give the illusion of a straight hem while the shirt is being worn.

The Last Step of Doing the FBA
And the very last step! Yay! Congratulations and thank you for reading this far and this long! We are so close to being done! Just this last little step. Remember how I told you to trust me about tracing out a second bodice? Well, now we are going to use it to redraw the side seam, because at the moment the side seam has been moved out about 1 3/4 inches and the pattern is too big. Take the unaltered pattern and lay it on top of the FBA pattern with the “fold” side and the bottom side seam matched up. Trace the original pattern, from the bottom hem to the hip and up to the waist (usually the narrowest part of the pattern) and then kind of bulge the edge out to meet with the edge of the new bust. This new pattern you just traced should remove the same amount from the edge of the pattern as was inserted into the middle to make the Full Bust Adjustment. So, in the case of our mythical XXS 1.75 inches will be removed from the outer edge of the pattern from hem all the way up to the waist so that those measurements don’t change just because the bust needed more room.

And now that funny boob bump. What do we do about that?

Well, in general, patterns should not take this crazy of a jump and jog around. I was really trying to give you the most extreme case I could think of. If these were my measurements and my pattern looked this extreme, then I would seriously think about going up a size and just redrawing the Neckline and Arm Scythes. But, in order to deal with a crazy boob bump like this, you are going to pin or clip the front and back bodices together at the shoulder, the hem, and the waist and then all that extra fabric at the bust would need to get eased into the back bodice fabric.
If that isn’t going to work, then you can always go with a good old fashioned dart! Remember that *Note* from way back when the cutting was starting? Well, it’s coming into play now. To change your pattern to have a dart you just cut the Bust Point to Side Seam the opposite direction.

You will follow all the same steps except that instead of a bulge at the bust you will get more of a triangle shape that will be transformed into the bust dart. The beginning of the dart, the sharp point, will need to be brought out (towards the side seam) from the original Bust Point by half an inch per pattern cup size. So if the pattern is drafted for an A cup the Bust Point would need to be moved ½ inch, B cup 1 inch, C cup 1.5 inches and so on. Reference back how to find the cup size of a pattern, if needed. There is only a quick handful of things left to do, trim the pattern, cut the fabric, sew and take lots of pictures to show off over at the Ellie and Mac Facebook page!

Full Bust Adjustment with Bust Dart done by Marieke de Jonge.

Full Bust Adjustment with Raglan Sleeves done by Amanda Hamilton Saulter

Full Bust Adjustment with Off the Shoulder Sleeves done by Jan Allison
I’d like to give a tremendous thank you to all the beautiful women who shared their before and after FBA photos with me and helped encourage me to write this! Thank you so much, Marieke de Jonge, Amanda Hamilton Saulter, Jan Allison and Melissa Eubank and all the others!!!!