Hi everyone, it’s Lakeisha from Sincerely, Shantelle! Today on the Ellie and Mac blog, I’ve tackled a much requested hack from within our Facebook group. That is “how do you hack a raglan into bishop sleeve?” The style has been quite popular for a while now, and is often seen on set-in sleeves. The style comes included with the Cuddle Up Tunic, which can sometimes be interchanged with other patterns, but other times not quite. I also show you how to modify a sleeveless top in this post, Annie shows you how to modify an set-in sleeve in this post, and Sonia even has a YouTube video showing you how to create them for set-in sleeves and dolman sleeves. As a bonus for my post, I will also show you how to hack a dolman sleeve into a bishop sleeve, also, but my method is slightly different than what Sonia used in the YouTube video I linked. These steps in this blog will work with any raglan top and with any dolman top that includes a long sleeve pattern piece. For the purposes of this tutorial, I am using the Going Home Raglan for the raglan sleeve and the Twist It Up Top (with personal modifications) for the dolman. You will need the sleeve pattern pieces, extra paper, pencil/marker, tape, ruler, and of course your sewing machine, sewing tools, and fabric :) Le't hop in....
Raglan Sleeve
For starters with the raglan sleeve, the first thing you’ll need to do is trace the original armscye and neckline from the sleeve. This can be on any scrap paper you have, as it's not a piece you will need to keep. It will help ensure you haven’t distorted any of the seams before you cut out your fabric. Once you have traced it, you can set is aside for now.
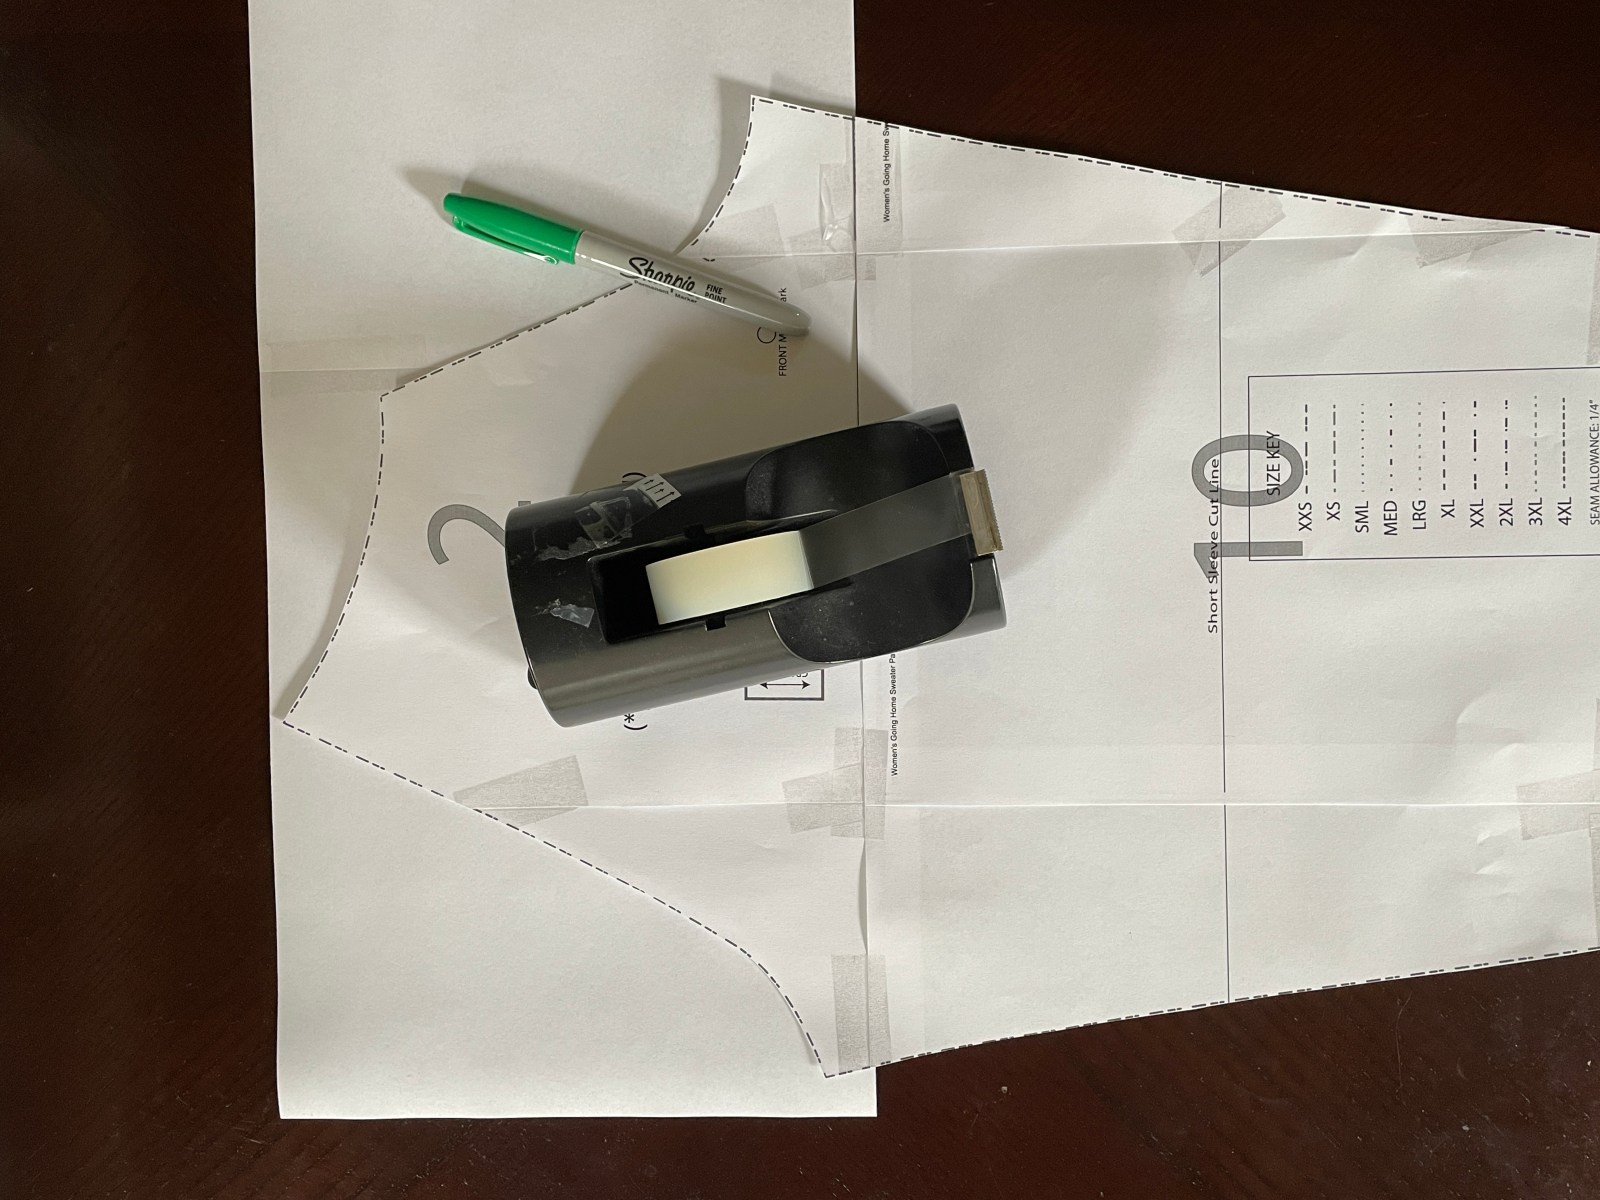

Next, using a ruler and your marking tool, draw vertical lines from the top of the Sleeve to the bottom. I started 1” from each side seam then worked my way toward the middle, drawing the lines about 1.5” apart. Once you have your lines drawn, cut the pattern piece, almost all the way to the top. You want there to be a tiny piece of paper still connected.


The next step will determine how dramatic your bishop sleeve is, combined with your fabric choice. In the first example, I used scraps to measure each cut 1.5” apart, since I knew my bamboo French Terry fabric was a little heavier. This resulted in a smaller, less dramatic bishop, but due to my fabric choice, it was a little more puffed out (which will be shown in my kawaii sewing top). In the second example, I used scraps to measure each cut 3” apart. This resulted in a much wider bishop, but it wasn't as puffed out since I chose a very lightweight, drapey fabric (which will be shown in my purple floral top). Consider your fabric choice and desired amount of "poof" when deciding on your spacing amount. Make sure to smooth out the bottom curve of your sleeve piece after you have completed your spacing.

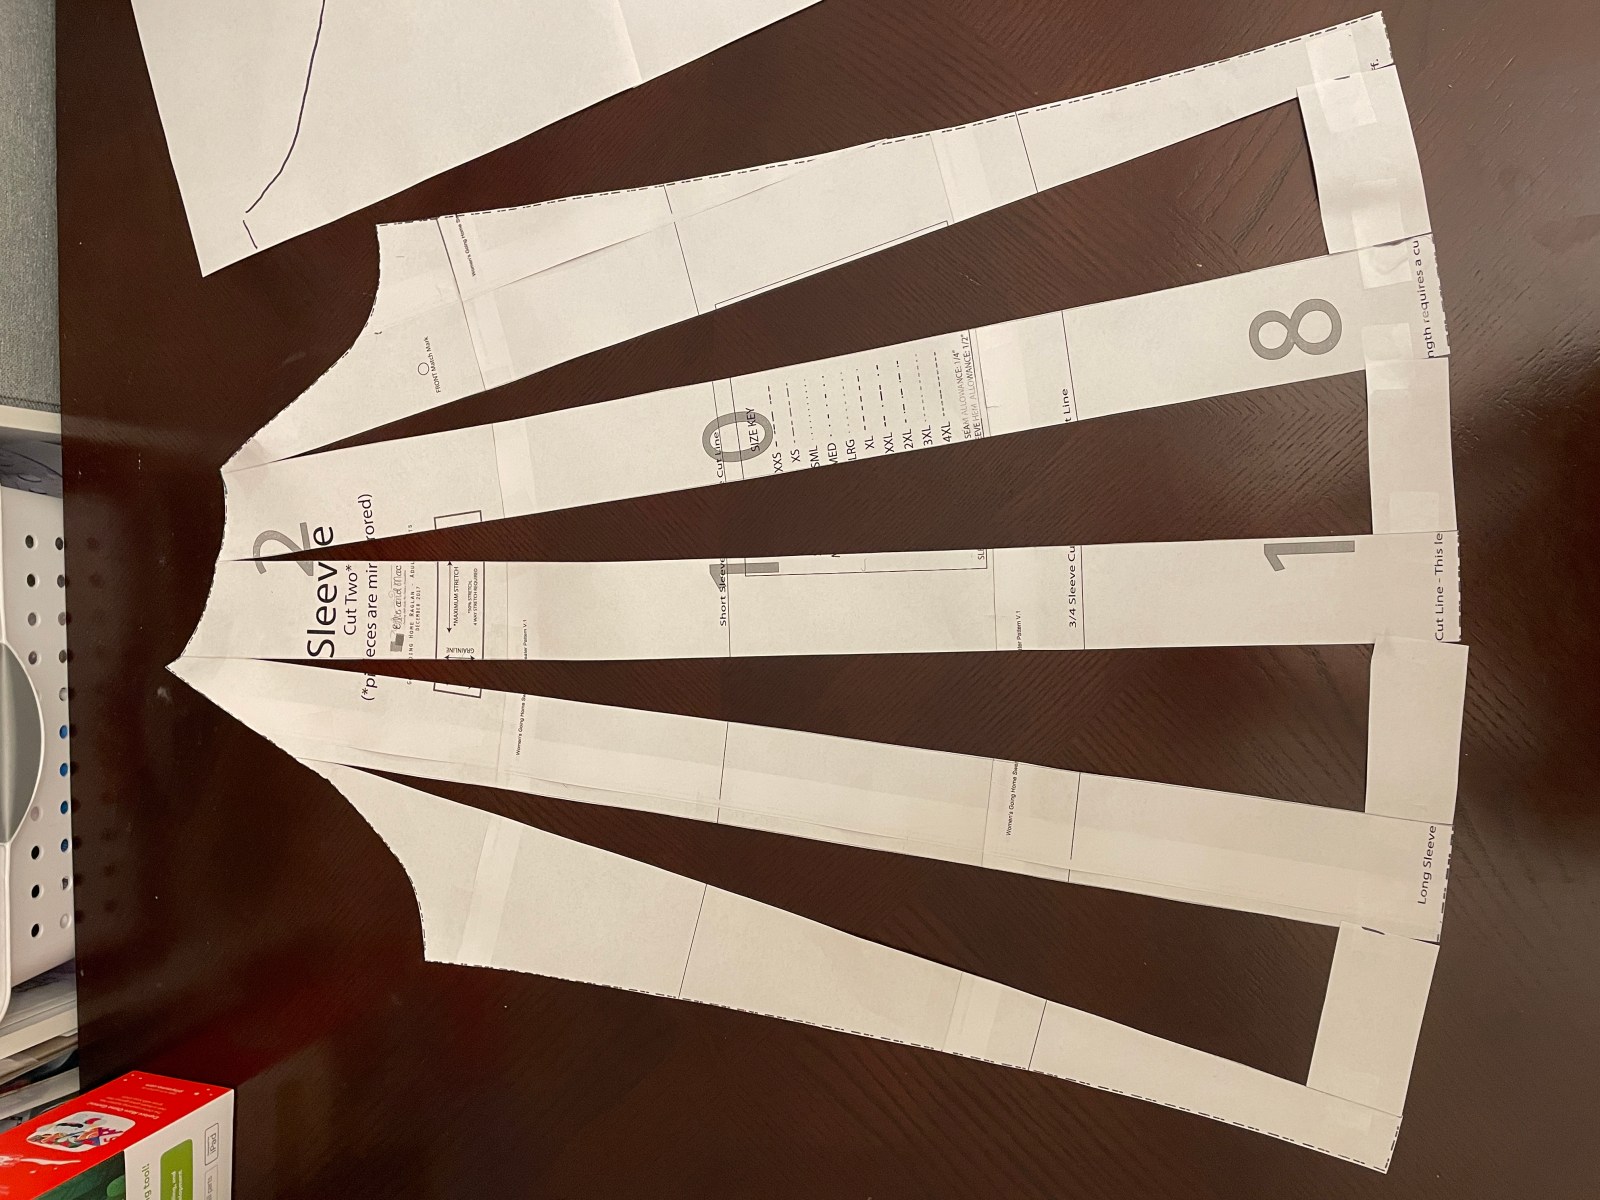
This is where the template comes in. You will need to do some smooshing and flattening of the upper portion of the sleeve pattern to get it to lie flat. The wider you make your spacing, the more out of shape the lines of the sleeve will become. It is less important that it’s shaped identically than it is about how long each seam is. The sleeve will naturally become a little bit wider throughout from the spreading process, so the template won’t be a 1:1 fit. What you will need to do is measure each individual seam against the template to make sure they haven’t changed, so the top (neckline) and each side (armscyes). This will ensure that the neckline and armscyes haven’t changed. If anything has, make adjustments to the new pattern so it measures the same length as the template. Once you're finished, you can trace this finalized pattern piece onto fresh paper if you’d like, but I just cut out the fabric as is.

The next step isn’t 100% necessary, but I decided to do it because the Going Home Raglan sleeve cuff is on the narrow side. I just added 1/2” to the pattern piece so there would be extra space to accommodate the added bulk of the gathers.

Construct your top all the way, except for adding the sleeve cuff. Once you get to that step, you will need to sew two rows of gathering stitches along the hem of the sleeve. Afterwards, with the shirt right side out, pull on the bobbin threads to gather the sleeve hem to the width of the cuff. Place the cuff over the right side of the sleeve, making sure your gathers are neatly and evenly distributed. Sew on the cuff. If you're done with the rest of your construction, your top is complete :)


Dolman Sleeve
Now, onto our dolman sleeve hack! Remember, I pointed out that I instruct you to do it differently than the linked YouTube video. I like the addition of the gathers along the top portion of the sleeve. (If you don't, you can use the slash/spread method, but you will need to draw the top of the sleeve as a template first so you can make sure you have the same width there when it comes time to attach). If that just confused you, it's probably easier to just watch the YouTube video haha! For my version, we will start out by drawing vertical lines on the sleeve pattern piece. Since this sleeve is cut on the fold, I started 1/2” from the fold edge and drew lines 1” apart. Unlike the raglan sleeve, which you cut almost to the top, you will actually cut this one completely apart.


Just as with the spacing on the raglan sleeve, the amount of space you choose to add between your pieces will increase the effect of your bishop. I chose 1.5” for my spacing and used scrap paper to fill in the space between. If you’d like a more dramatic shape, add more spacing in between. Make sure to space at the top and bottom. This is your new long sleeve piece to cut.

Sew the shoulder seams of your bodice, press the shoulder seams toward the back, then position bodice right side up. Sew two rows of gathering stitches along the top of the long sleeve piece. Mark the center of the top of the sleeve with a pin or clip to match to the shoulder seam. Pull on the bobbin threads to adjust the sleeve piece to fit the bodice. With Right Sides Together, match the sleeve piece to the bodice piece. Sew this seam and press.


Sew up the side seams of the bodice. Next, you will sew two rows of gathering stitches around the sleeve hem. Afterwards, with the shirt right side out, pull on the bobbin threads to gather the sleeve hem to the width of the cuff. Place the cuff over the right side of the sleeve, making sure your gathers are neatly and evenly distributed. Sew on the cuff. If you have finished rest of your construction, your top is ready!

Tips
- Choose lighter weight fabrics for this sleeve hack, no matter whether you choose the raglan or dolman. It'll make them look more flowy. Heavier fabrics will make the sleeves feel heavier, especially since there is extra fabric there. It can create a fuller look with less drape though, as shown with my kawaii sewing top.
- Always sew with two rows of gathering stitches. It makes your gathers so much neater and gives you greater control for distributing them. I like to sew one within the seam allowance and one outside of it. Once you have sewn the cuffs on, to easily remove the visible gathering stitches, pull one end of the bobbin thread, sliding and shimmying the fabric to help the thread come loose. Once it’s out completely, the upper thread will be on the outside of the sleeve and you can just pick it up and throw away. I also like to stretch the cuff a few times so the other gathering stitch (inside your regular stitches) pops. Sometimes the sleeve cuff will feel constricted if you don’t do this. If I can easily pull it out, I do so, if not, I don’t worry about it.


Here are the finished raglan tops! The purple/floral combo has the fuller bishop sleeve with 3" spacing. It’s made from a rib knit for the bodice and a slub knit for the sleeves. The sleeve fabric is very lightweight and makes them super billowy, which I love.
The kawaii sewing one has the less full sleeve with only 1.5" spacing. The fabric is bamboo French Terry, which is a little heavier and thicker than the fabrics used in the first one, so it didn’t gather as nicely. I also think it would have made the sleeve a bit heavy, so I’m glad it’s less full haha! Ultimately, I still love both shirts and will happily wear each of them!


Here is this finished dolman top! It’s made from DBP and I quite like it a lot. I think I’d even go for 2 or 2.5” spacing on the next one for an ever fuller sleeve, but I’m still happy with how it turned out. Oh, and if you remember from the beginning, I mentioned I used the Twist It Up with personal modifications. For this top, I simply folded the pattern piece directly above the twist, so it had a straight bottom, and I straightened the side seam out. I then cut a band 6” tall, 85% of the opening and sewed that on. I think having a band on it vs a traditional hem balances out the fullness of the sleeve and cuff, at least to me, anyway!


I now have three shirts that I just love and adore so much and will wear a lot. I mean, that bishop sleeve is just divine!! So now that I’ve shown you how to modify sleeves, which version will you try first? Raglan or dolman?
(Written by: Lakeisha Webb)