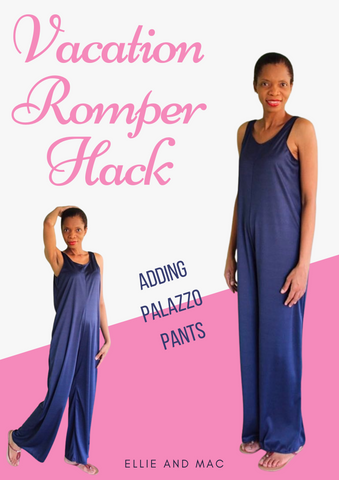
 Cool and comfortable closing is something that I love and I have always had my eye on those oversized loose fitting jumper looking overalls. If you know the correct names for those comfy on trend styles , leave a comment below.
Well, today I am going to show you how to create just this using the Ellie and Mac Vacation Romper. If you are link me, you love comfort. But what is even better it is when comfort and style goes together. This hack will be just as easy to sew as the Vacation Romper giving you limitless wardrobe staples for the summer or if you actually plan to go on vacation. You may even cut it into a shorts length is you desire.
To begin, we will need to take two body measurements.
The first one is shown in the photo below and is the armhole length. You will take this measurement from the shoulder to your armpit. We will call this measurement “A” and will use this in the last step to recreate our shoulder length on the pattern piece. 
Next you will take your crotch measurement - both front and back . Make a note of that figure. 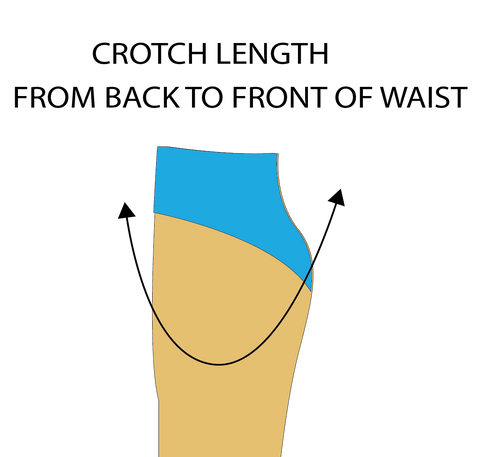
So now that we have taken the body measurements let us move on to adjusting the Vacation Romper pattern.
We will need to draw a couple of lines on the pattern to get the desired style and fit. It is super easy and will only take a few minutes.
Below is the guide photo to make the easy adjustments. 
As mentioned earlier, we will use adjustment "A" in a later step. So let us start with B.
B = This line is to add width to the pattern - if you prefer a fitted look you can leave the width of the pattern as is . Measure out between 1 and 2” from the armscye (red dot) and draw a vertical line all the way to the end of the pattern piece + 1” .
C = we will be lengthening the arm hole ( this is optional, you can use the same depth as per the pattern) - from red dot measure and mark down 2” then draw a horizontal line across the pattern at the end of the 2” mark.
D = The yellow dot is placed right where the Vacation Romper pattern forms a V . This line will prepare you to draw the crotch curve. From the yellow dot, measure down 2” and draw a horizontal line.
E = Take 1/2 of your crotch measurement and measure a horizontal line and mark E. This line will start from the Vacation Romper fold line and curve out to the crotch measurement mark - see red line in photo.
Now let us use that arm depth measurement you took earlier - You may choose to use the current top of the Vacation Romper with its binding edges, however if you choose to make the broader straps shown in the finished photo, then follow along .
Take your arm depth measurement and use it to extend the height / top of the Vacation Romper. You will then draw a box 1.5 -2” wide to form a wider strap as shown in the photo below. Reshape your armhole to connect to C.
And we are done!! We are on our way to a beautiful pattern!!
So let us connect all the dots as per the illustration so that your pattern will now look like the orange shaded area!
The next step is to sew it up. It is so quick and easy you will make a few of these in no time!
1. Cut out two mirrored sets from your main fabric.

2. With two pieces right sides together, pin and sew as shown in the photo. Repeat for the other two pieces.

3. Open each piece and lay them right sides together aligning the shoulder and side seams. Pin and sew.

4. Pin and sew the crotch.

5. Hem the neckline and the armholes by folding 1/2” and sew. 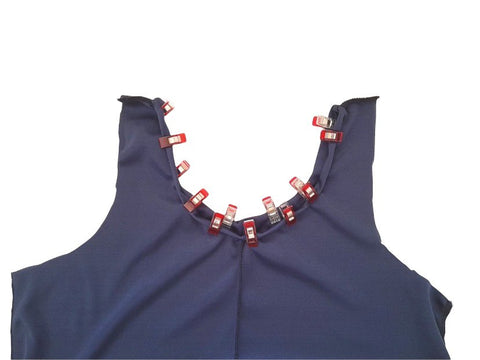
And guess what, you are ready to add a new style to your vacation wardrobe.


If you totally loved this hack, why not grab the Vacation Romper here and sew one up !! #aff #vacationromper # hack
Happy Sewing!!
(Written by: Kelly Grooves)