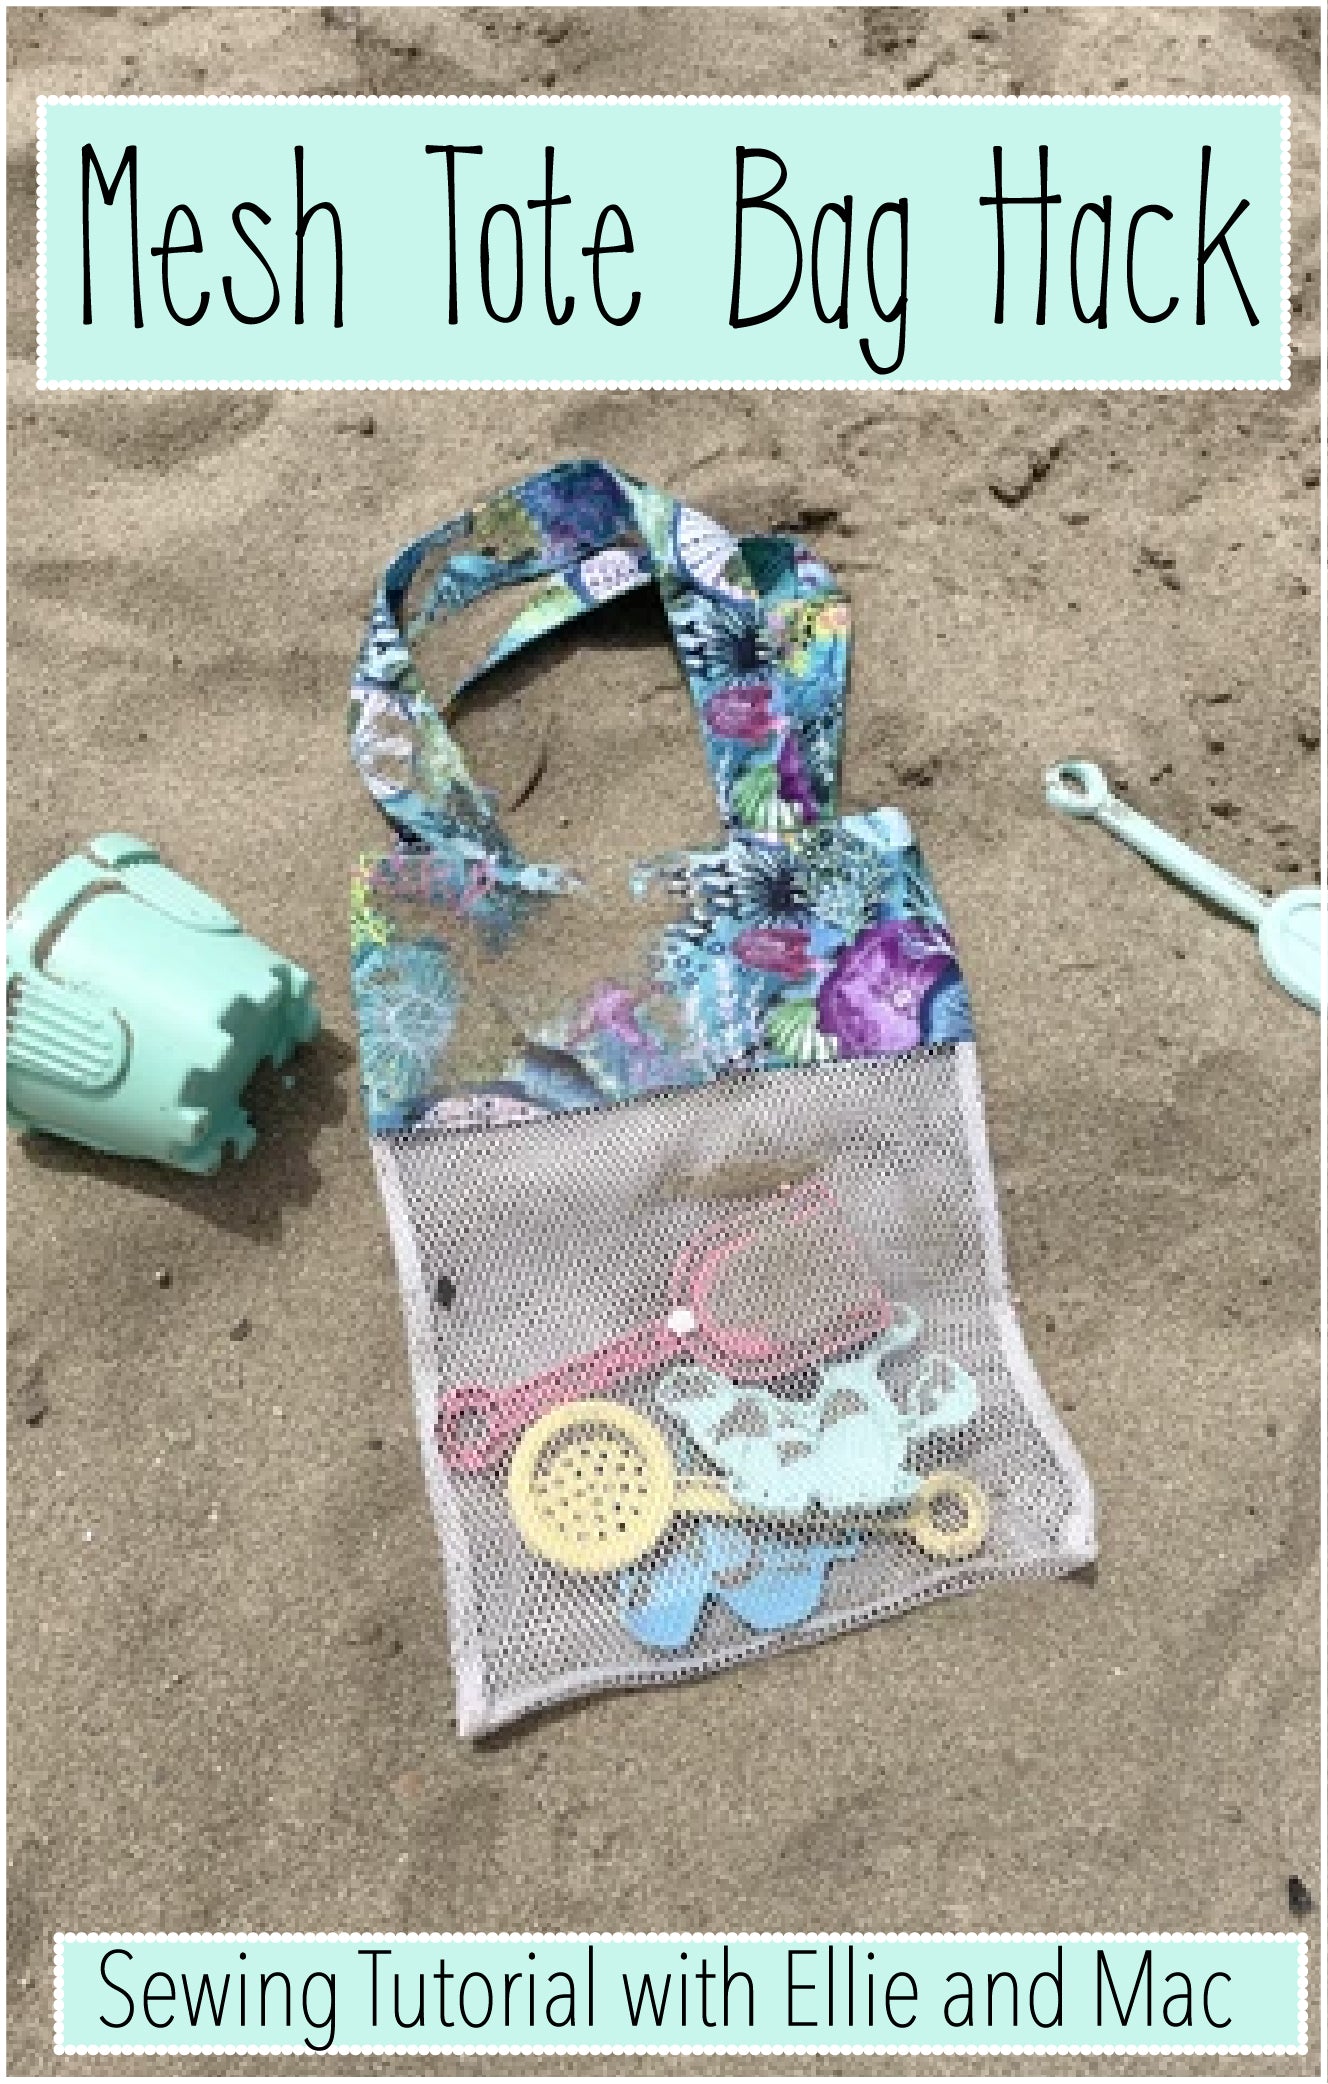
Hi, my friends! Lakeisha, again from Sincerely, Shantelle with a tutorial for ya, and it's a super duper easy one that's perfect for the summer. Ellie and Mac recently released their Free Tote Bag Pattern*, and as I was sewing mine up, the idea for this project came to mind. When our daughter was smaller, I remembered buying some beach toys that came with a little mesh bag. The idea was perfect, as it allowed you to load up all the beach toys and give a good few shakes to get rid of most of the sand before putting em up in the car. Since we were actually planning a beach trip for our daughter's birthday, I figured this needed to be made ASAP…and I wanted to share with others!
For the materials, I bought 1 yd of woven fabric from JoAnn (I didn't use the entire yard) and this package of mesh from Amazon. I also added KAM snaps at the end, which required a scrap of interfacing. You'll need thread and a sewing machine, and to create your pattern from these measurements. The end result was sized perfectly for our 5 year old. If you're making for an older child, feel free to increase measurements to your liking, including adding length to the straps. The steps will still be exactly the same, regardless of the measurements you choose. I added a 3/8" seam allowance to my top and bottom seams, but used 1/2" on the top with the straps. Use whichever seam allowance you are comfortable sewing with.

The bottom piece will be cut 2 of mesh. I used the width of the mesh, which was 12" and for height, I measured 10" (added seam allowance to top and bottom after I drew it out). The top will be cut 4 of fabric. I kept the 12" width and measured 5" for height (also added seam allowance after I drew it out. 1/2" for the top and 3/8" for the bottom). The straps will be cut 4 on the fold, and I measured 1.75" wide and 11" tall (on the fold, 22" if cutting straight out). As with the other pieces, I added 3/8" seam allowance to both sides and the top (not cut on fold) portion after I drew it out. Note my grainline markings. Strap placement was 2" from each side seam (the little box for positioning them is 1.75"). Center X for snaps is in the center about 1" from the top. Once all of the pieces were cut, I had 2 bottom bags, 4 top bags, and 4 straps.


The mesh did not have a distinguishable right/wrong side. To start, press the bottom of one of your top bag pieces to the Wrong Side along your seam allowance. This will help you close the bag accurately at the end. Place the other top bag pieces so that the Right Side of the bottom touches the mesh. Sew to attach them together. If the mesh stretches slightly, simply trim the excess before continuing. This will likely happen since it has more stretch than the woven fabric.


Finger press your seam allowance up toward the top bag on both pieces. Place both bag pieces Right Sides Together and pin or clip side and bottom seams. It is important to keep your seam allowance pressed up while sewing. Though a serger is not required for this step, it is highly recommended to use some sort of overcast or zigzag stitch to provide stability to the seam and catch the mesh pieces. I lowered my stitch length on my serger to a 2. I usually sew about 2.5 for other fabrics, for reference. Afterwards, I tied the corners in knots. You an also use a bias tape binding if you only have straight stitch capabilities and are worried about seam strength.


For the straps, place two of them Right Sides Together and sew at the side seams. Turn them Right Side Out and press very well, making sure you're being neat about the seam allowances. Topstitch along each side of each strap.


To mark the strap placement, place your other top bag pieces Right Side up and position the pattern piece on top. The folded and pressed edge should be at the bottom. Place a strap onto the strap placement guide, and then loop the other side of the strap to the second guide. Pin or clip in place, and do the same for the other top bag and strap. Baste the straps in place. If you will be adding a KAM snap later, you can iron scraps of interfacing to the Wrong Side of both of these pieces about 1/2” from the top center. I ended up adding mine way later because I almost forgot, so no photo available.


Place both of these top bags Right Sides Together. When you pin or clip them, make sure the pressed edge remains pressed. Sew along the side seams. Turn the bag Right Side Out and leave the top bag Wrong Side Out and upside down. Place the top bag over the main bag, and pin or clip in place around the top, making sure your straps are down. The raw edges of the Straps will be caught within the seam when you sew the top. Sew around the opening to attach the second top bag to the first one.


Pull top bag out of the bag, as shown and press the seam allowance up toward it. Understitch the bag by sewing a straight stitch on the seam allowance through the inner top bag. Now’s the time to close up the bag! Remember the seam I mentioned to iron earlier? Let’s simply fold it over the seam of the mesh. Use pins to help hold the layers together and sew slowly to attach the inner top bag to the outer one.


If you'd like to add a KAM snap to the top bag, now's the time. You will need one set, unless you’d like to add more. A little tip I picked up on KAM snaps a while ago was to place them in boiling water and allow them to cool. Once they’ve cooled, dry them off and apply to your project. They won’t be as hard to open and close, or make you think you’re gonna rip your project apart lol!


Use the center marking to help place it, and apply your snaps to these locations. Your bag is done!!! Now, load it up with beach toys and head to the beach or sand box :) I hope you enjoy making and using this bag, and I’ve love to hear if you found this tutorial particularly useful.


*This post contains affiliate links, which add nothing to the cost for you, but provide me with a small commission that enables me to keep writing and sharing. I so appreciate your support!


(Written by: Lakeisha Webb)