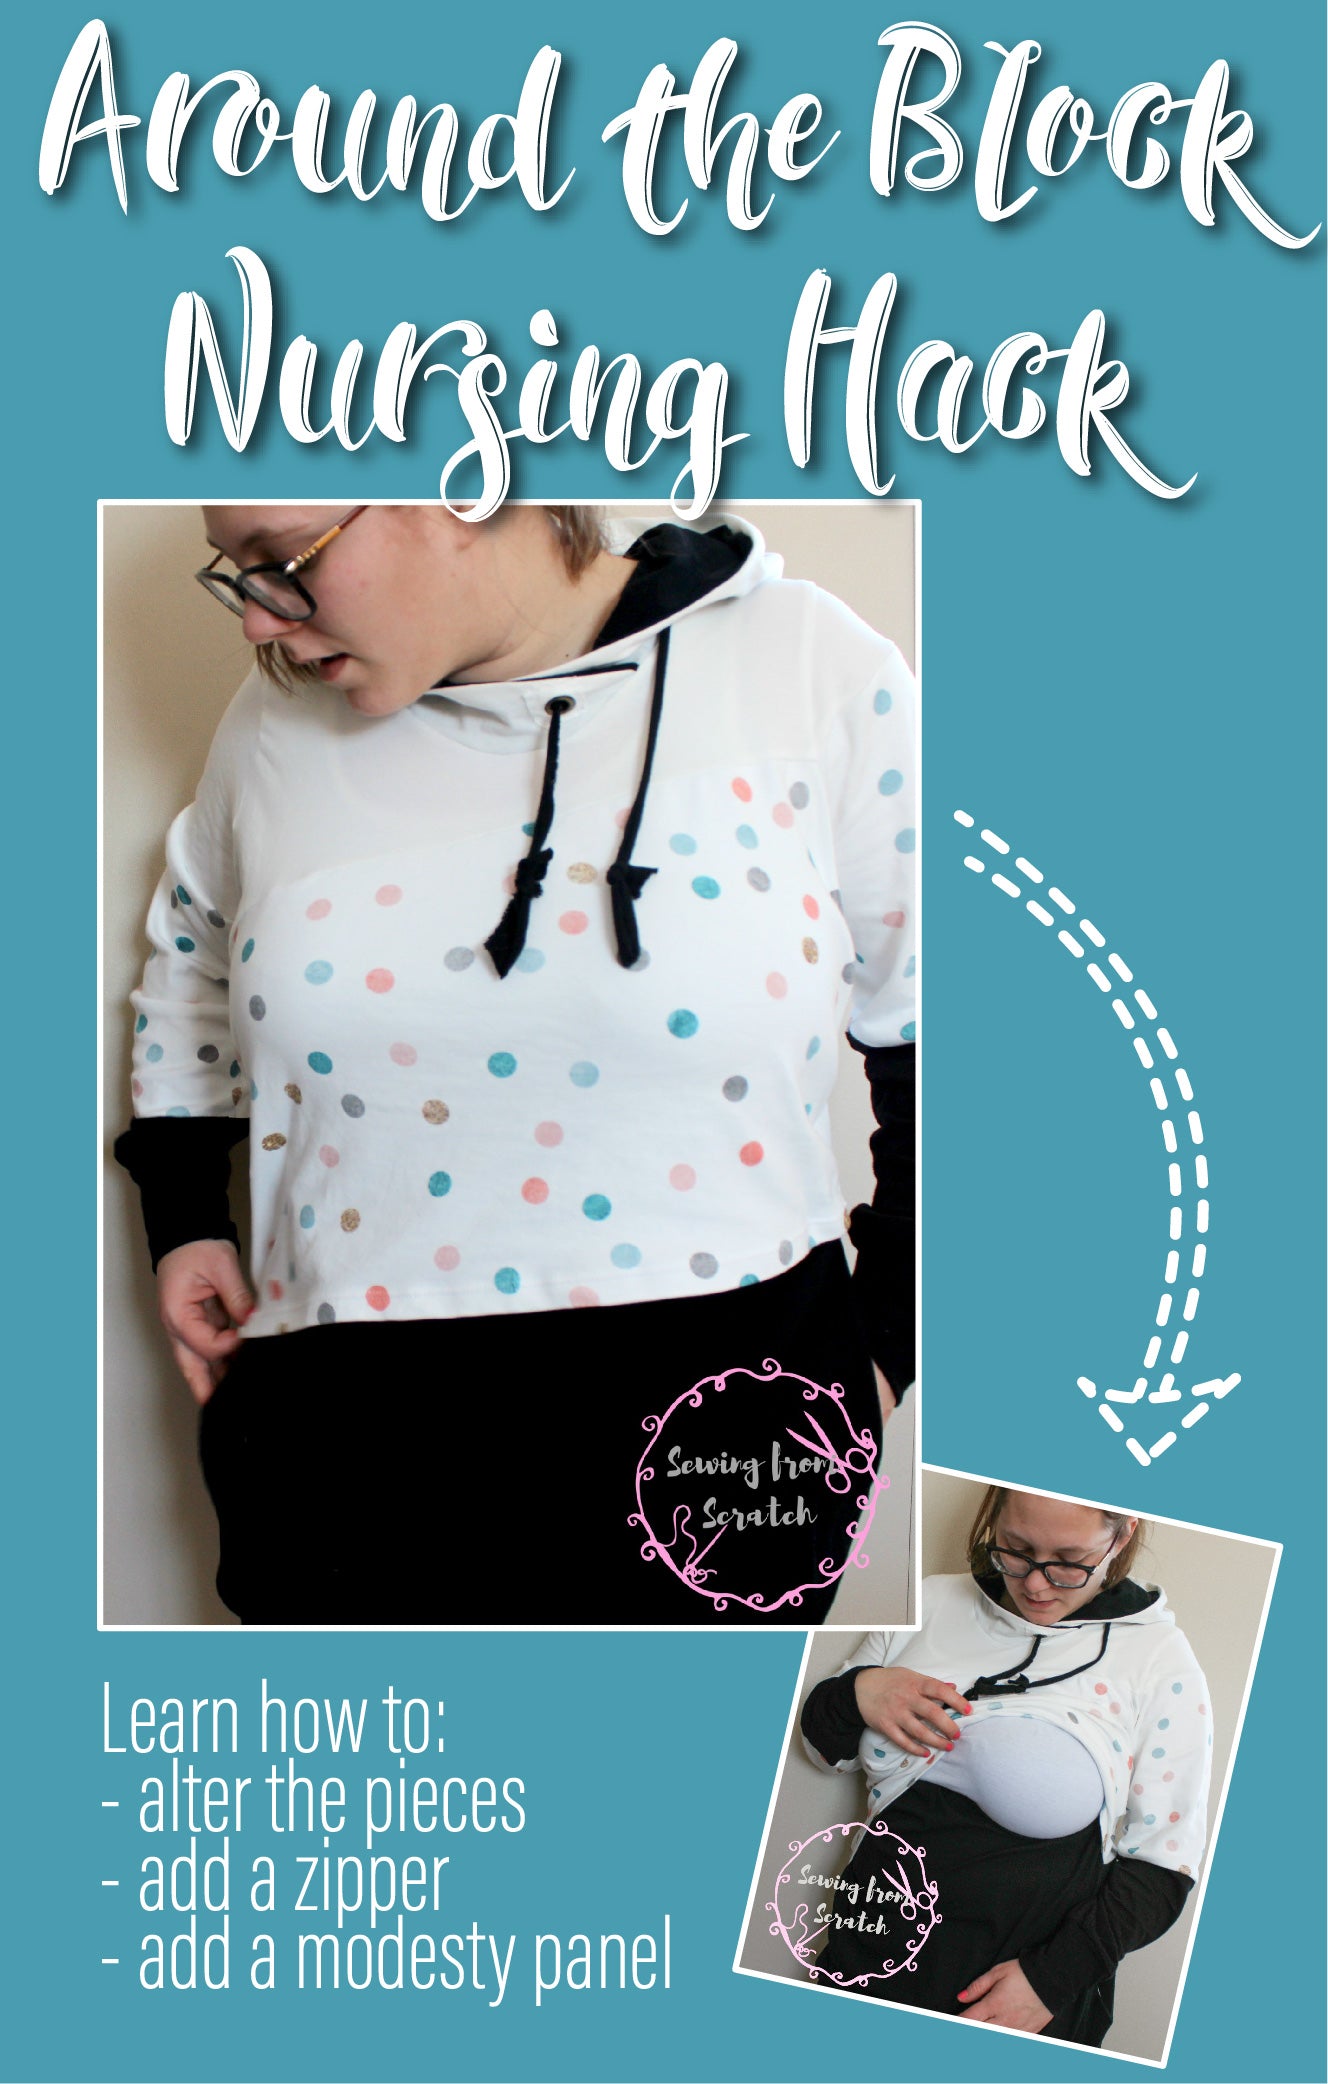
Hey everyone! I'm Stephanie, here to show you today how to turn the Free Spirit Kimono up a notch by adding a ruffle to the sleeve! & Just in time for Kimono Season! I keep seeing all these cute kimonos with ruffle sleeves. I sent it to Lindsey and she said, “I bet you can totally do that with our kimono!” and she was RIGHT! This was such an easy hack that keeps up with the trends!

So you are going to take your Free Spirit kimono pattern and cut the pieces per the instructions, but you are also going to cut two strips of fabric for the sleeve ruffle the length that you want your ruffle. I wanted about a 4 inch ruffle, so I added ½ inch for the hem and ¼- ½ inch for the allowance where it attaches to the sleeve. I went with 5 inches in length by the width of my fabric, which was 44 inches. You want the width to be at least 40 inches. The “sleeve” you make for the kimono should be 22 inches around per the patterns instructions, and you normally want to double the width when adding a ruffle, so 40 inches seems pretty good.

You'll want to finish the bottom edges of the ruffle pieces and memory hem by pressing the hem ½ toward the wrong side.

Align the short edges right sides together, unfold the memory hem, and pin or clip in place.
Sew in place.
Turn right sides out, fold your memory hem back in place and stitch in place.
Stitch two rows of gathering stitches along the top raw edges of your ruffle pieces. Set your ruffle pieces aside. Construct your kimono all the way, leaving your side edges raw. (Finish the neck, and bottom edges of kimono by finishing the edges, turning and pressing per the tutorial)
For your side seams you have two options. For both you will find the point where the tutorial instructs you to bar tack to make the sleeve opening, place a pin or clip at this point.
If you would like to close your kimono sides, stitch from this point down to the hem, starting at the raw edge and curving inward ¼ inch and then down to the hem. To create a “sleeve” opening.
If you would like to leave your sides open, you will stitch *with your sewing machine* from the pin/clip point in from the raw edge ¼ inch and down another ¼ inch.

Next you will clip into the seam allowance ¼ inch, close to but not through your stitches.
You will then finish the raw edges of the front and back sides SEPERATELY, from the clip point down to the hem. Press each side toward the wrong side and sew in place. I started at one side at the bottom and went up, across the top, and back down the other side.

Now you have your sides finished and have a little sleeve opening.
Gather your ruffles to fit your sleeves.
Align raw edges of your gathered ruffle to the raw edges or your sleeve, right sides together. Pin or clip on place.
Sew in place
Flip right sides out and press the seam up towards the sleeve. *Optional: Topstitch the seam allowance.
You are finished! You just jazzed up an already super pattern! Time to make all the cute kimonos!