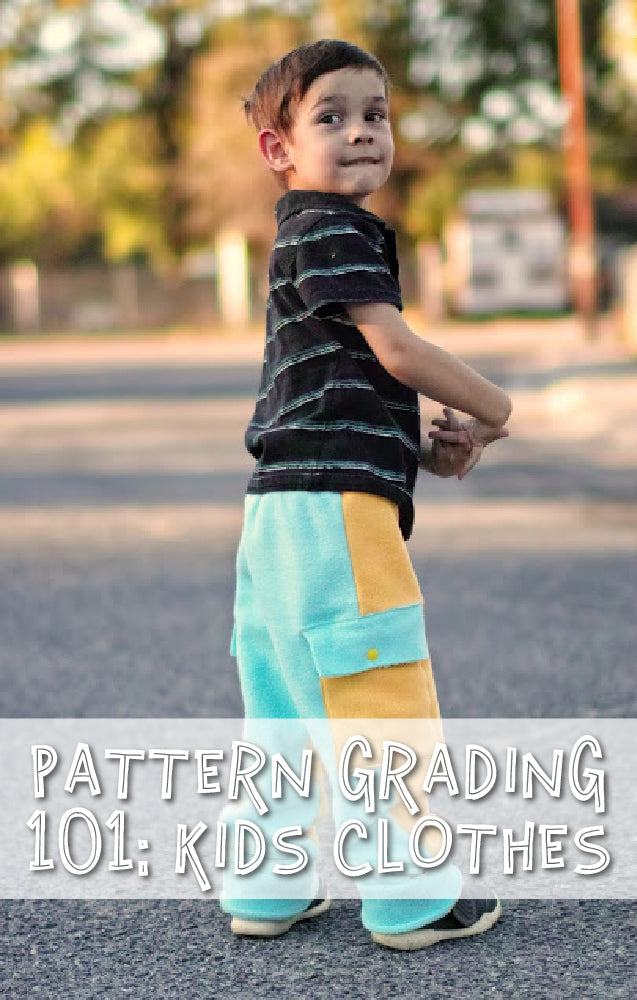
Hello sewing friends! It's me, Nellie, from Sorry About the Mess, again. In my last blog we talked about grading kid's patterns and today it is time to switch gears over to adult patterns. Since we just finished with a kids shirt, an adult shirt wont be too terribly difficult. But lets take the difficulty level up one by adjusting the Adults Discoverer Tee.

I would like to note, before we get started, that adult patterns cannot be graded for height like kids patterns can be, because they are all drafted for the same height. Adjusting for height is a separate adjustment from size grading and is done after you grade, actually. Here is a link to a great starting place for learning how to adjust for height from Manda.
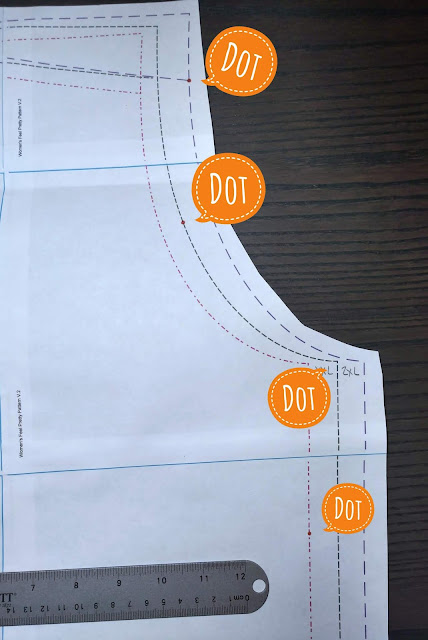
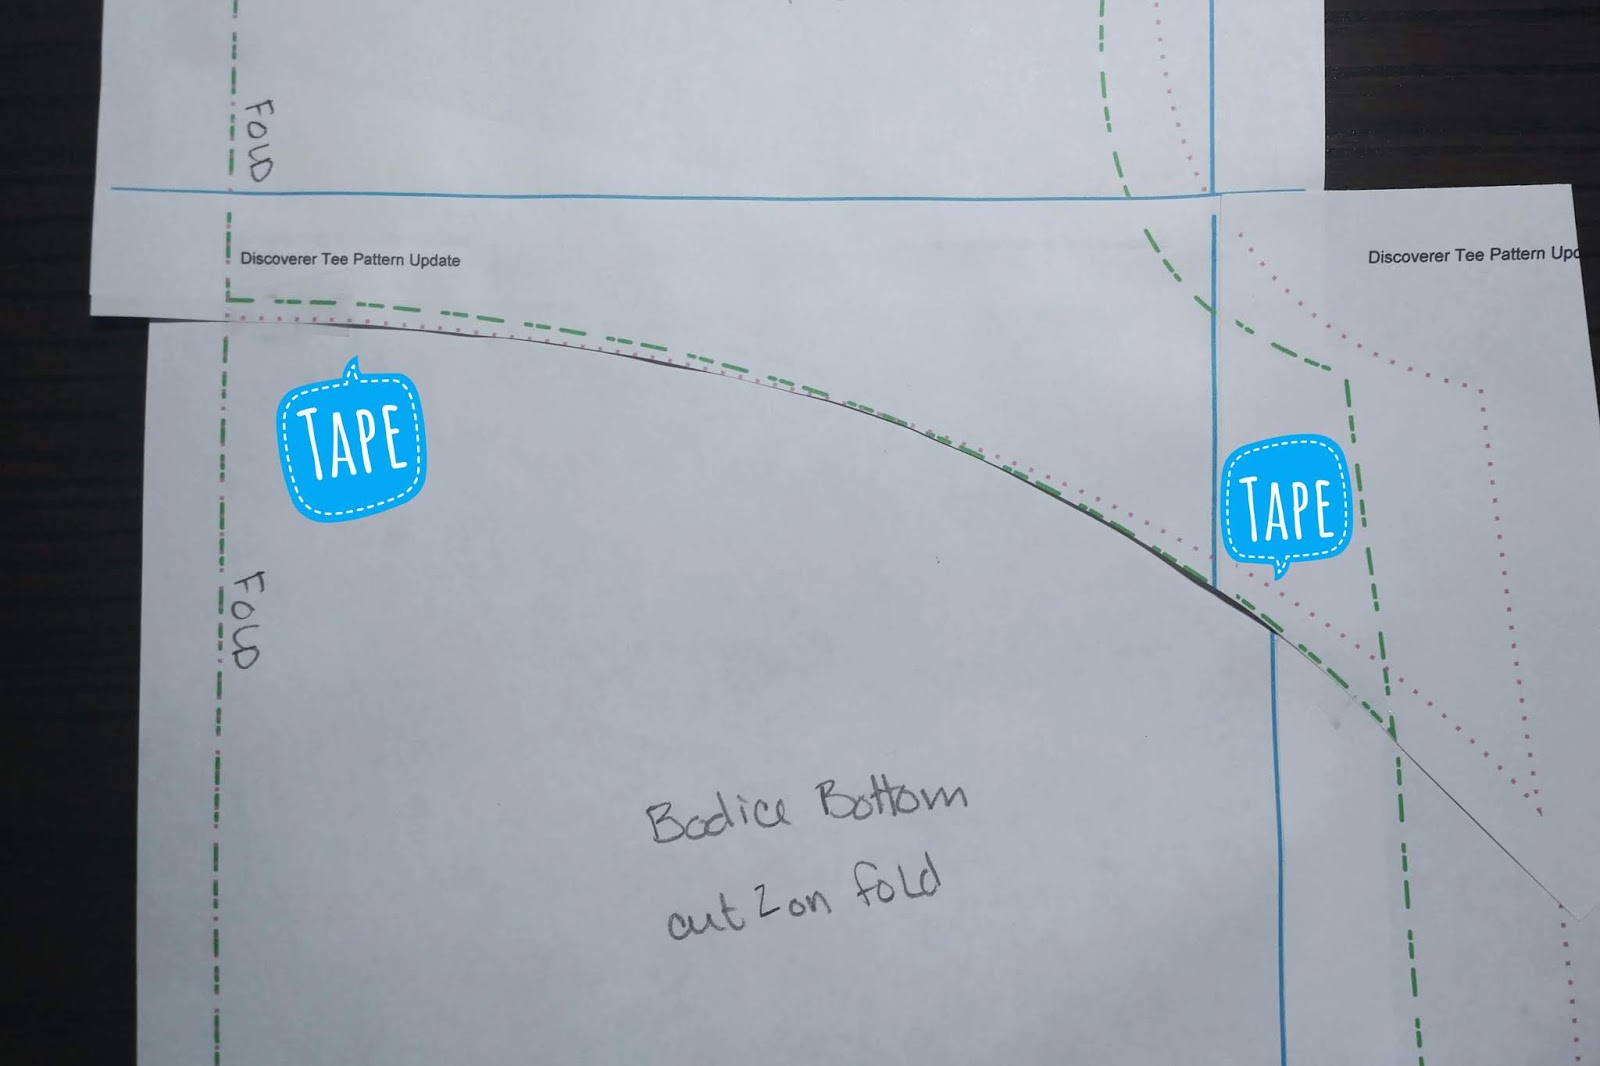
Back to the Discoverer, where we note that the bodice is in two pieces. So, the first thing I am going to do is attach the bodice top to the bodice bottom overlapping by the seam allowance, 1/4 inch. And then I'll treat this as one solid piece for the pattern grading. Because of the curved shape, this isn't the easiest pattern to line up with multiple sizes, but the outcome will be worth it.

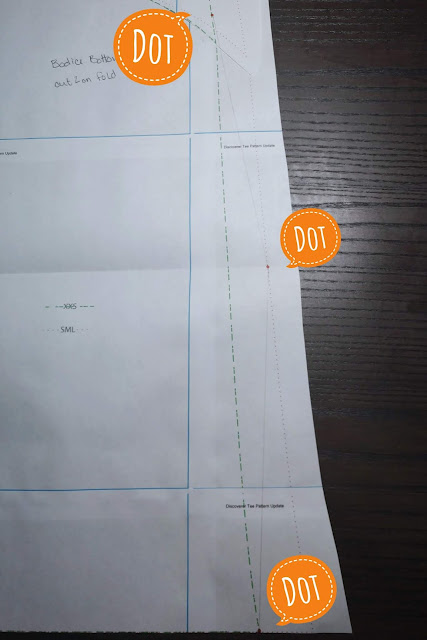
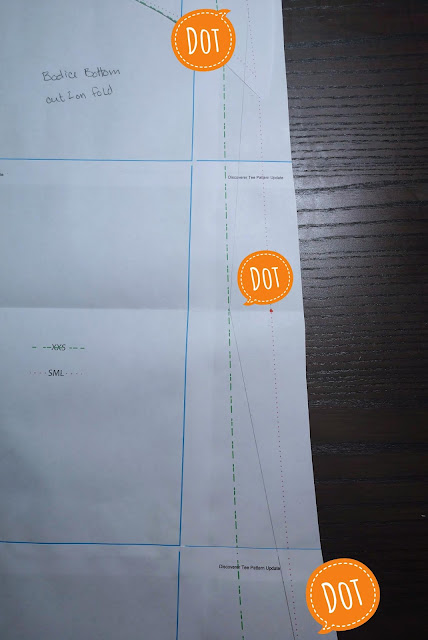
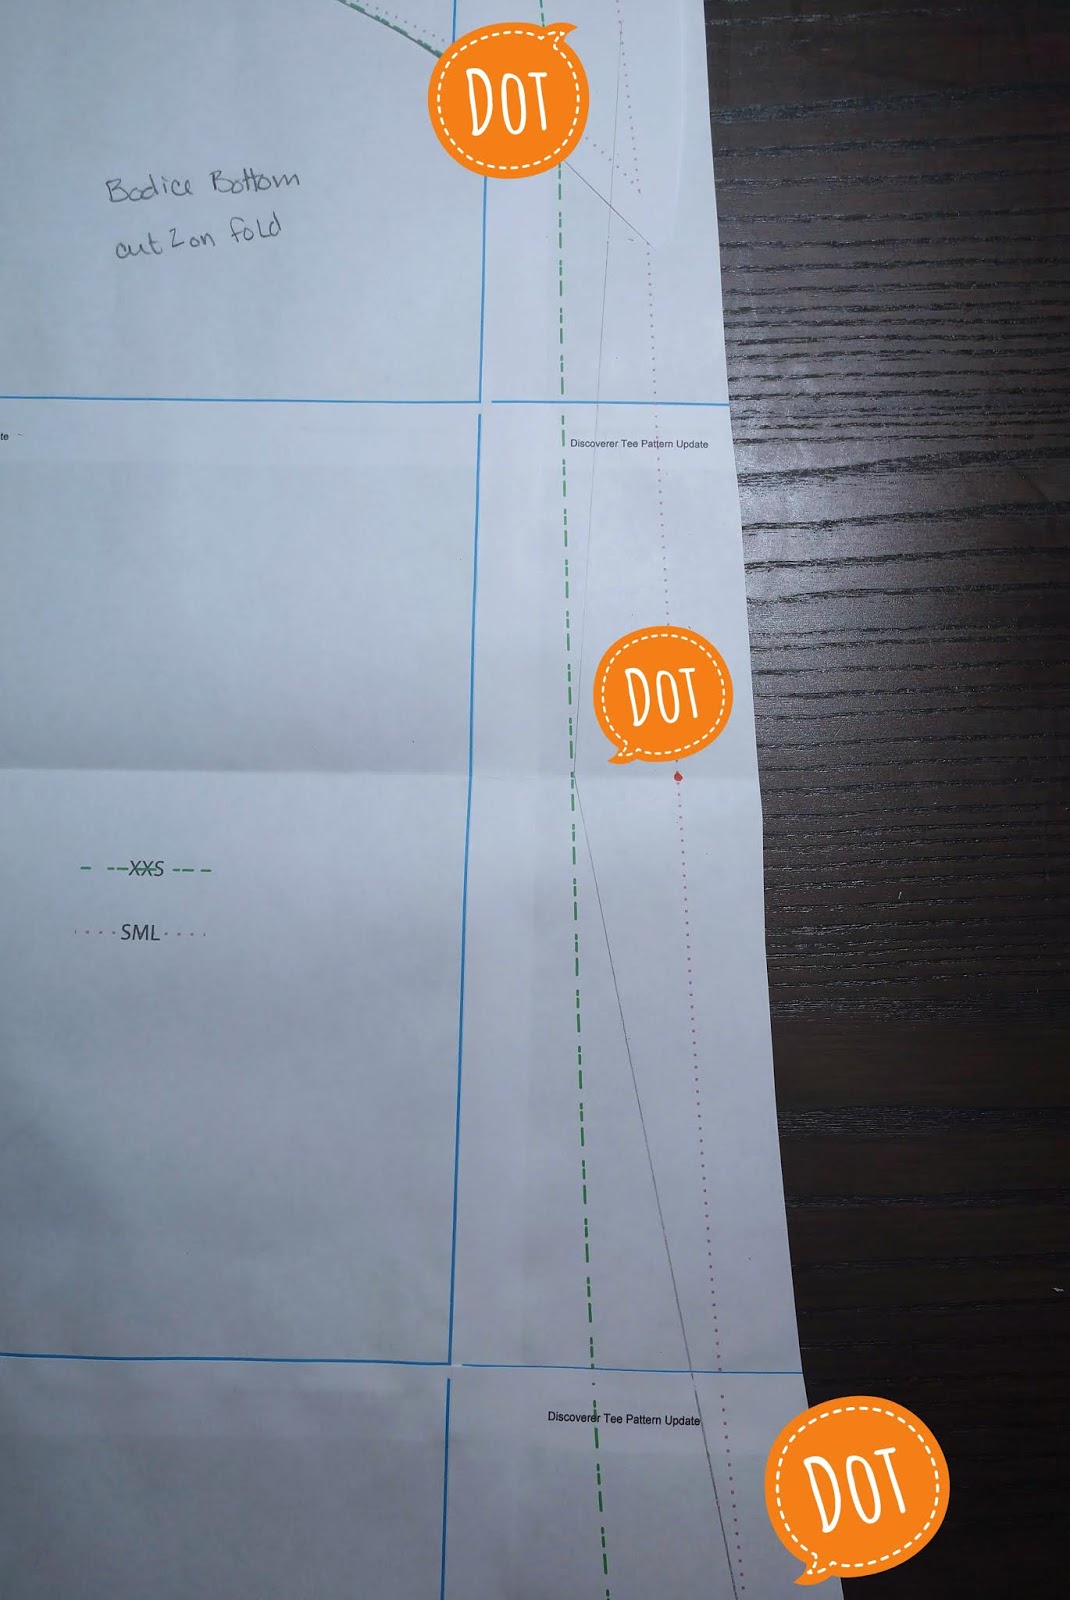
Now it's time to play Dot to Dot again. Place a dot at the bust (which can be located about 1.5 inches below the bottom of the armscye) for size XXS and a dot at the waist for S (again I folded the pattern in half to find this location, it's a very rough placement) and one at the hip again for XXS. Then I will use my ruler to draw a light line with pencil from dot to dot.
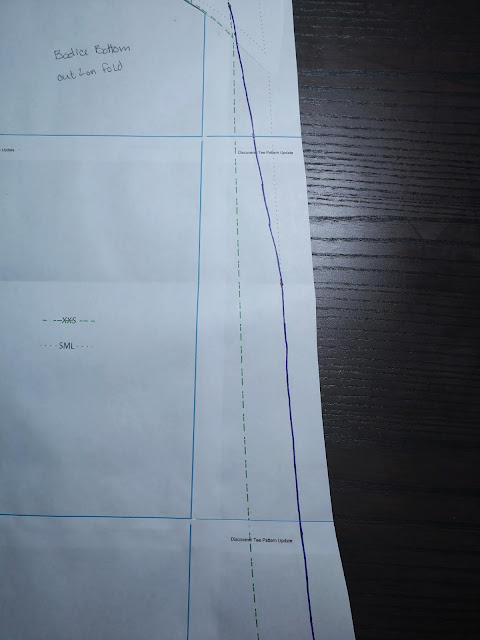
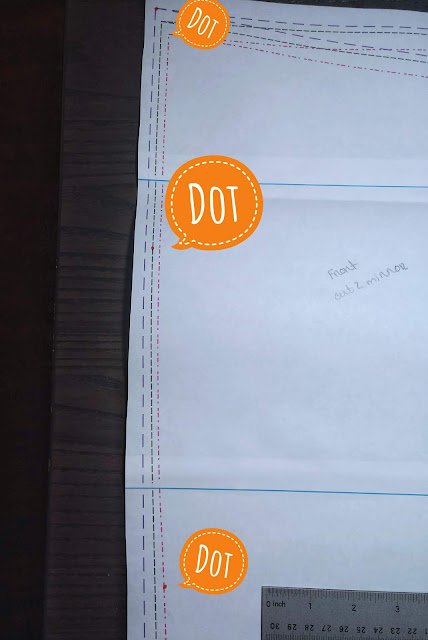
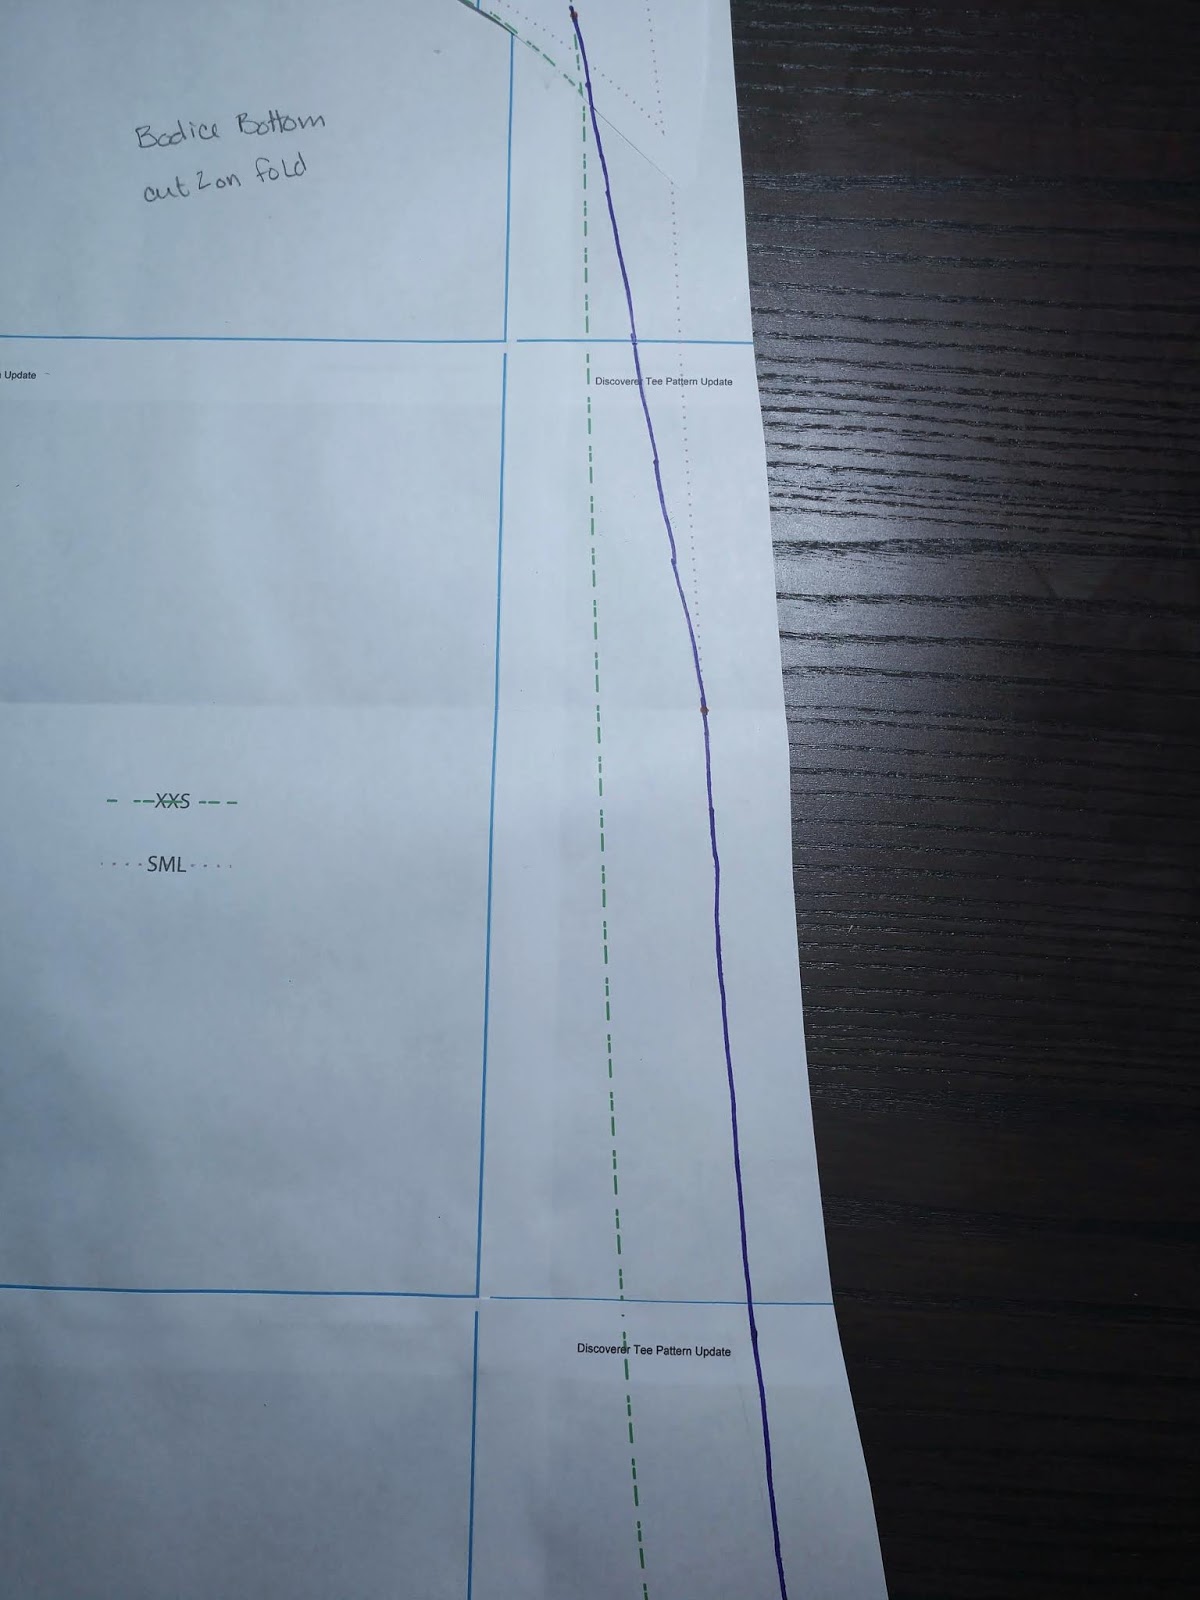
In this case, the pattern has a bit of an A line and bringing it back into the hip after grading out from the waist would actually eliminate that shape, so in this case I am going to stay graded out to the small and not bring the top back in at the hip. When doing this the other direction and grading in for the waist, on the other hand, the shape is a little more natural and I would definitely keep this grading.
So, this is the way that I will end up grading this Discoverer. It's a little rough and I might smooth out the curve at the waist a little more, but those are really more of my personal opinion on the fit rather then any kind of "rule" because in sewing, there really aren't any rules, as long as you like it, that's all that matters.
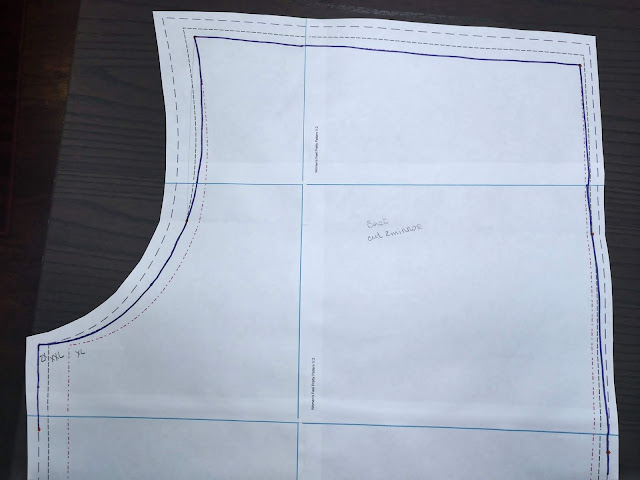
Now the great thing about grading the Discoverer, you don't have to do the same thing to the back as you just did to the front because it's already done! Yay! You will use the same sleeve and neckband as top of the bodice, so an XXS for me. And when you get down to the waistband, my pattern wont have one, but if it did, I would use the S waistband because it's the size that coincides with the bottom line of the top.
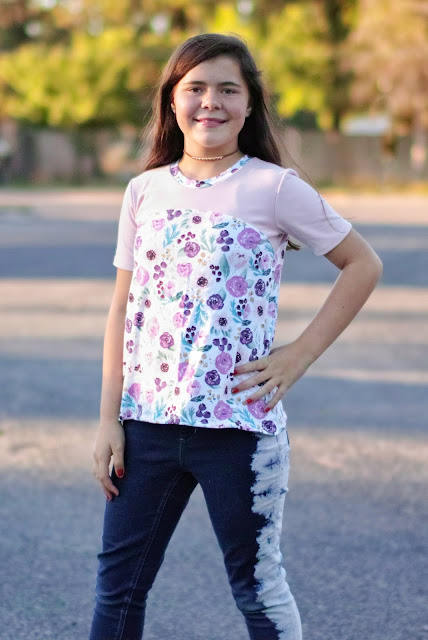
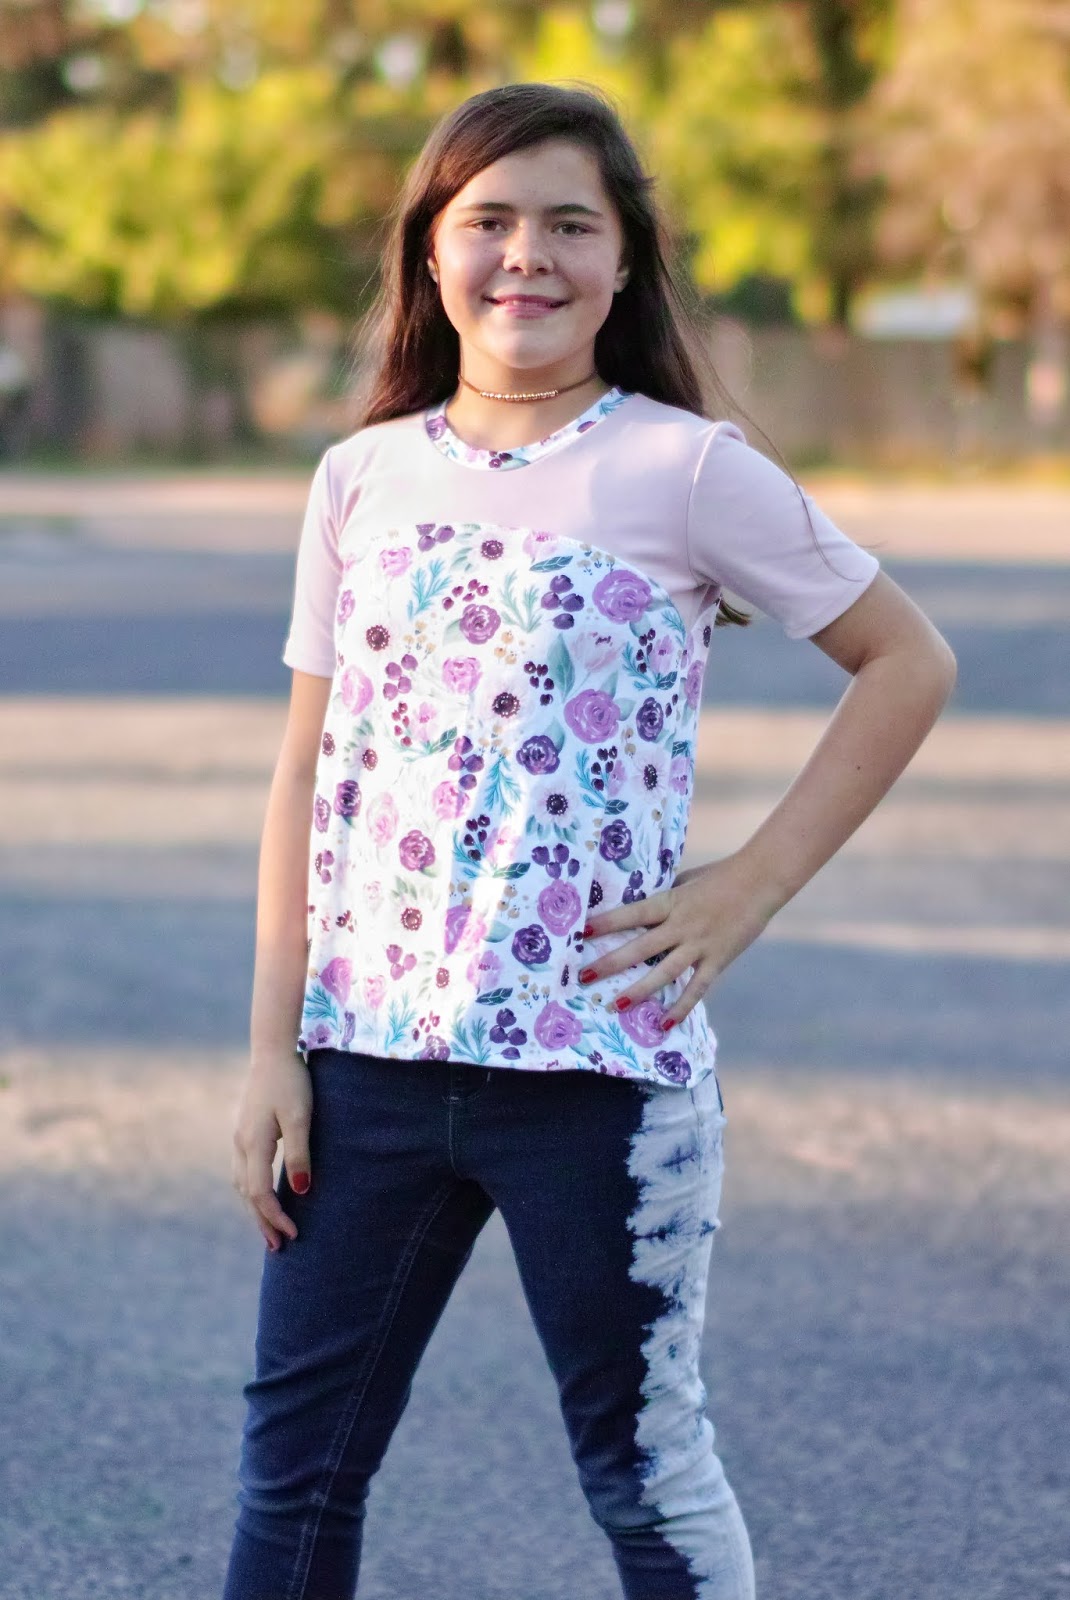
And here is a finished shirt with this grading! It turned out lovely!
Now we end with the Adult Feel Pretty Pants in my size. I've had the pattern for a while and I'm looking forward to sewing it up! Only, I am going to need to grade them for my measurements.

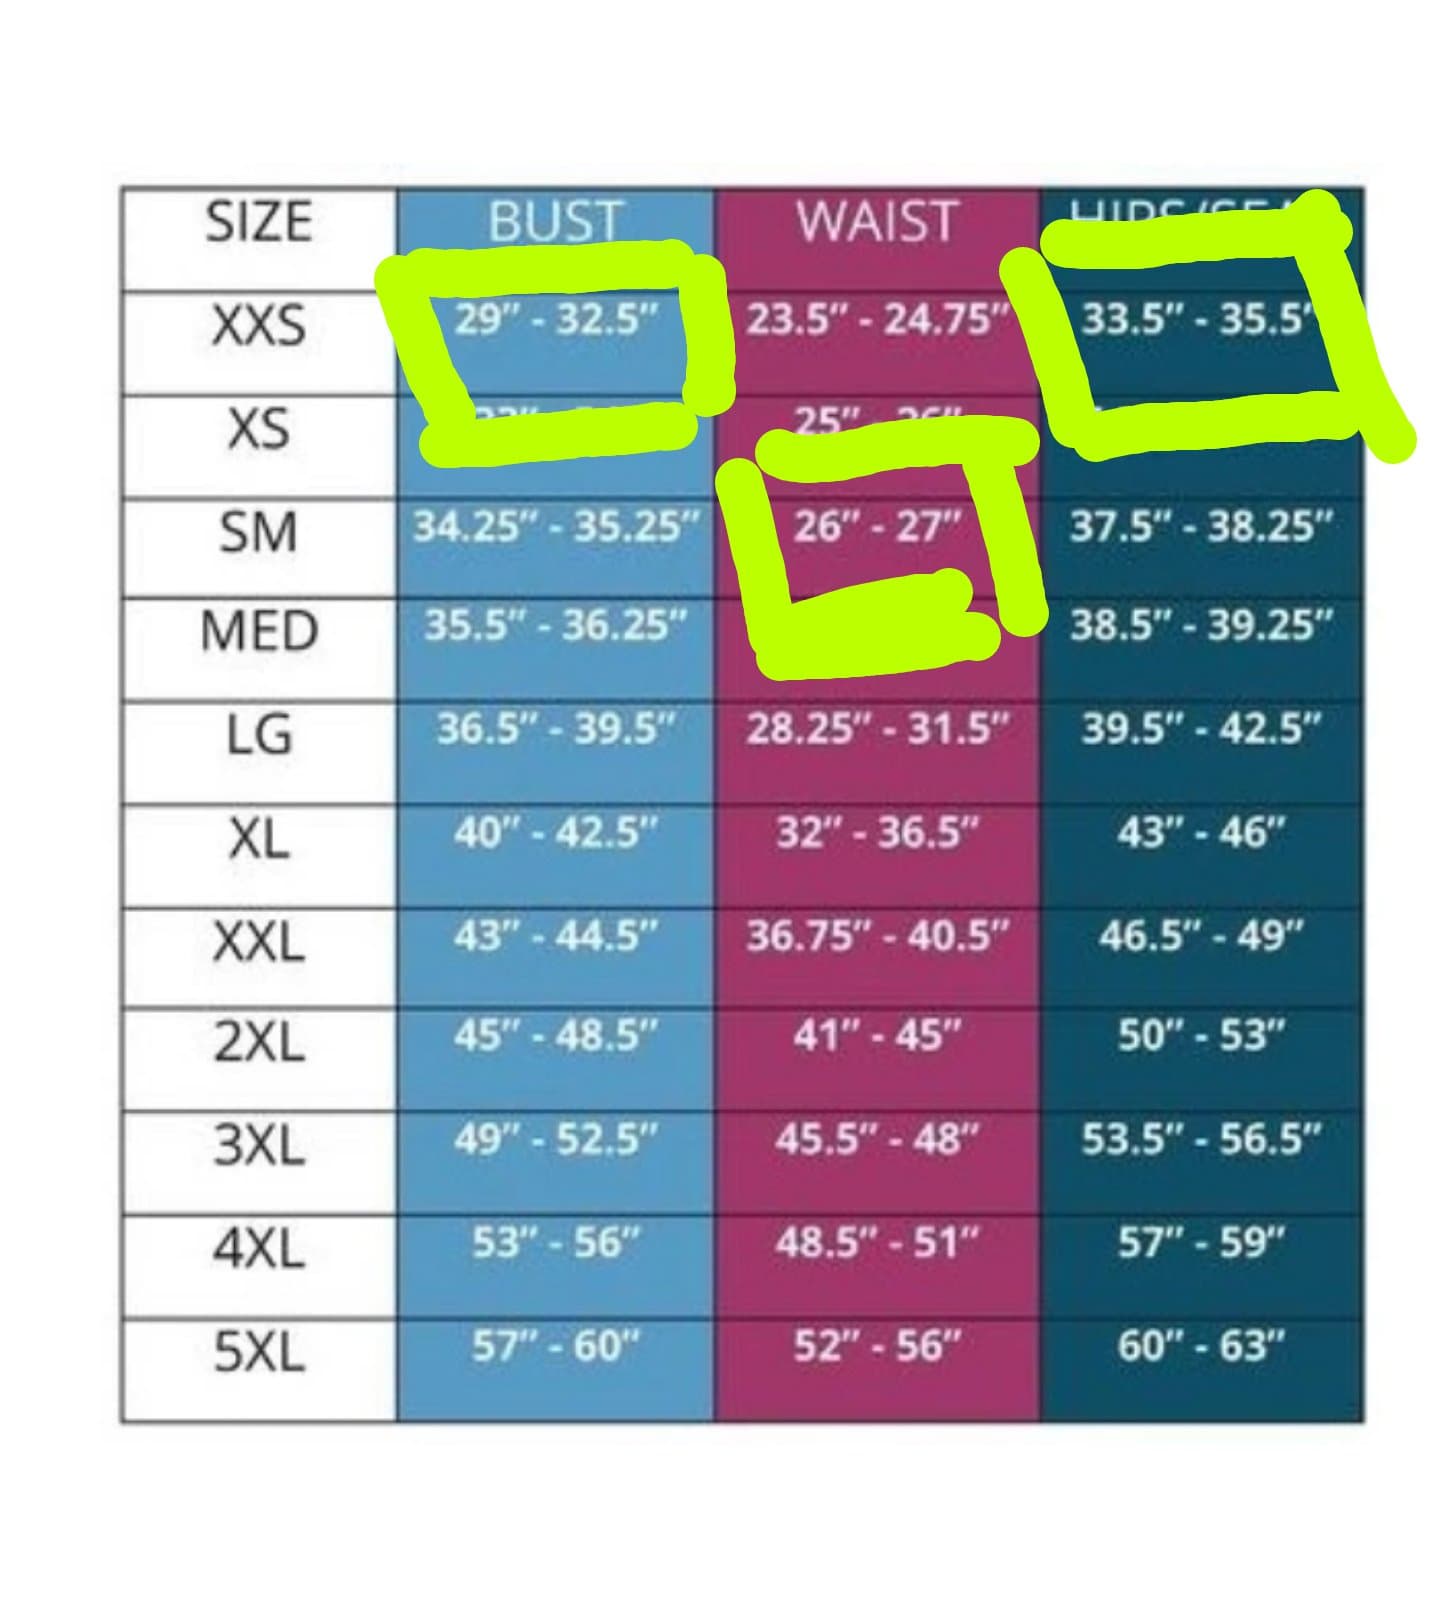
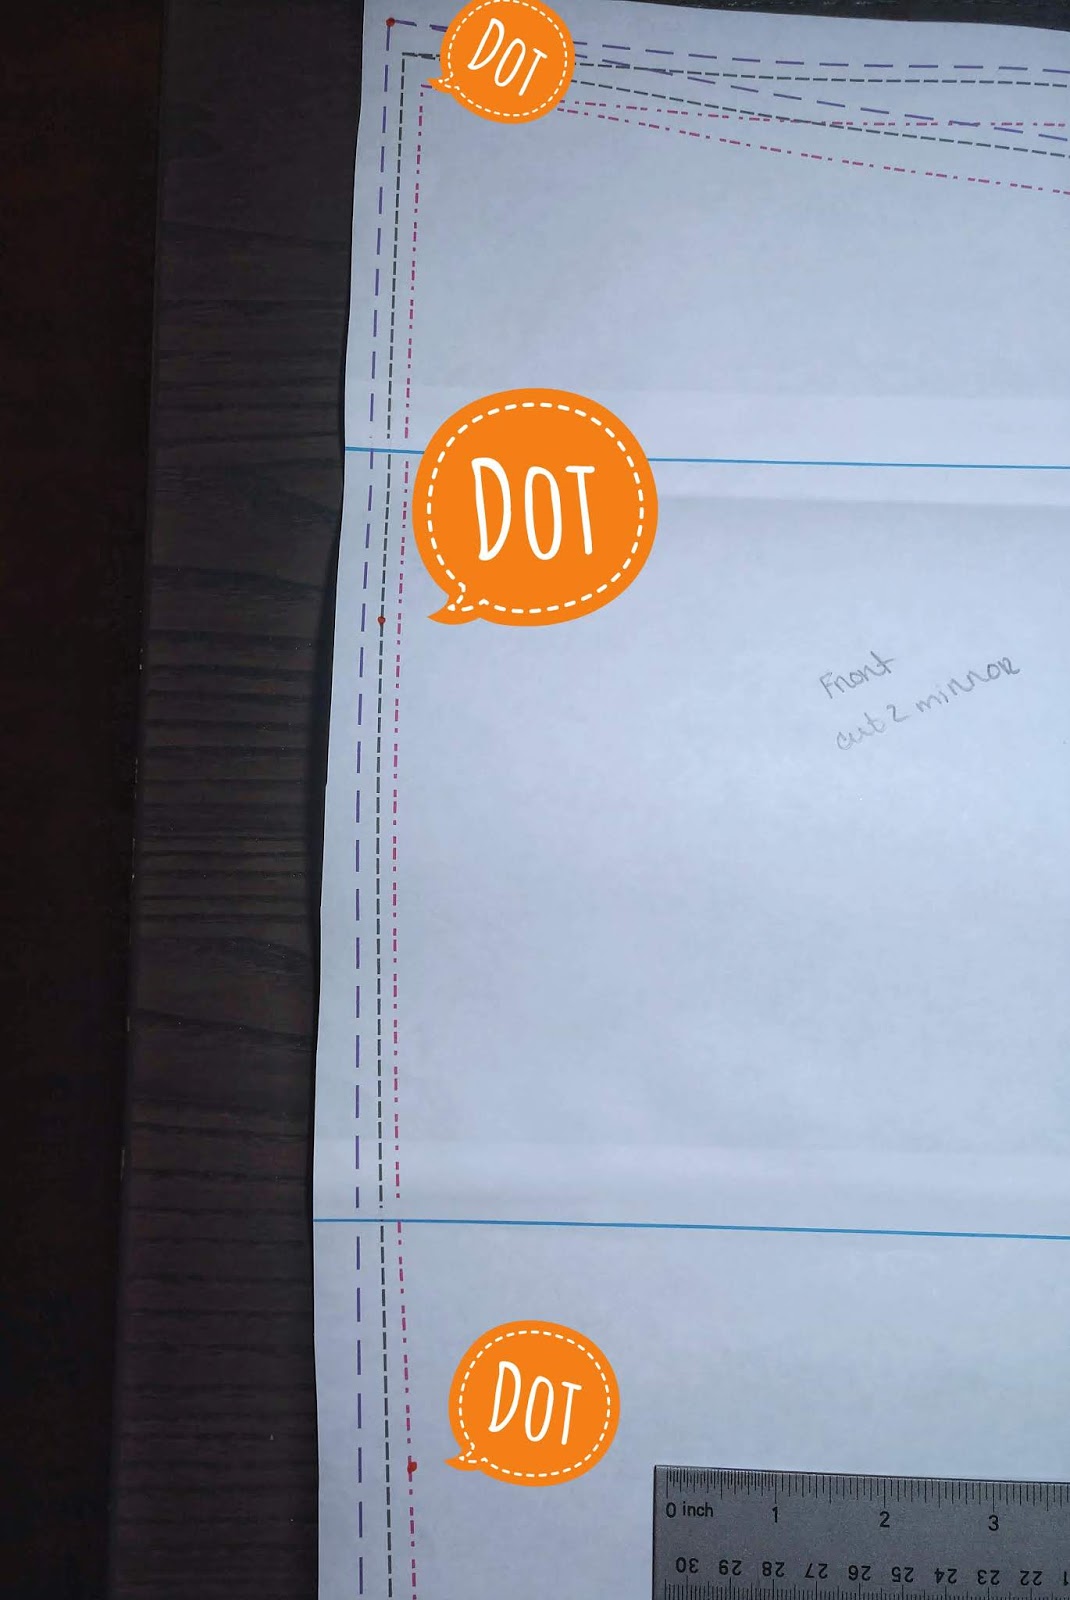
Before beginning to play Dot to Dot, I want to mention that I already know that I have trouble getting my pants to fit the way I like, I always end up needing to size down in the legs to feel comfortable, so I am going to grade down immediately, without even making a muslin 🤭 🤫 and without a measurement chart to say I'm being accurate. With that admission out of the way, I start to play Dot to Dot, placing a dot at the waist for 2XL (low rise option for me), the hip for XXL (which is located about the bottom third of the crotch curve) and the rest at XL (I find I like to go in right about mid thigh). I mimic these same dots on the out seam before starting to draw long straight, smooth lines between each dot and then I retrace my lines to be a similar shape to the original pattern.


There you have an approximation of how my grading will look. You will see that on the inseam I carried the line down quite a bit past the dot, I did this to create a smooth line. You may also notice that my out seam didn't even reach the orange dot before it was smoothly running on top of the XL line. Both of these things are okay. It's the way I like to grade, and it works for me. You will find what is right for you.
Here is an example of what grading out what look like on Feel Pretty pants with legs of 2XL, hip of XXL and waist of XL.
Deciding a waistband is the same as how it's chosen for the kids pants, use the size waistband that corresponds to the size waist you used. So my waist was a 2XL, so I need to use the 2XL waistband with no adjustments. The graded out pants had a waist of XL so the waist band would need to be an XL waistband.
And now I'm off to sew some Feel Pretty Pants, but not before I finish my adjustments!

Grading is not a fool proof way to get the perfect fit! But it is a great place to start, a good place to begin learning how to make your patterns work for you and compliment your figure and style! Now go give it a try and let me know how it turns out. I'll be seeing you in the Facebook Group be sure to tag and/or mention me because I'd love to see how your creations work out!
I would like to note, before we get started, that adult patterns cannot be graded for height like kids patterns can be, because they are all drafted for the same height. Adjusting for height is a separate adjustment from size grading and is done after you grade, actually. Here is a link to a great starting place for learning how to adjust for height from Manda.
Back to the Discoverer, where we note that the bodice is in two pieces. So, the first thing I am going to do is attach the bodice top to the bodice bottom overlapping by the seam allowance, 1/4 inch. And then I'll treat this as one solid piece for the pattern grading. Because of the curved shape, this isn't the easiest pattern to line up with multiple sizes, but the outcome will be worth it.
Now it's time to play Dot to Dot again. Place a dot at the bust (which can be located about 1.5 inches below the bottom of the armscye) for size XXS and a dot at the waist for S (again I folded the pattern in half to find this location, it's a very rough placement) and one at the hip again for XXS. Then I will use my ruler to draw a light line with pencil from dot to dot.

In this case, the pattern has a bit of an A line and bringing it back into the hip after grading out from the waist would actually eliminate that shape, so in this case I am going to stay graded out to the small and not bring the top back in at the hip. When doing this the other direction and grading in for the waist, on the other hand, the shape is a little more natural and I would definitely keep this grading.
So, this is the way that I will end up grading this Discoverer. It's a little rough and I might smooth out the curve at the waist a little more, but those are really more of my personal opinion on the fit rather then any kind of "rule" because in sewing, there really aren't any rules, as long as you like it, that's all that matters.
Now the great thing about grading the Discoverer, you don't have to do the same thing to the back as you just did to the front because it's already done! Yay! You will use the same sleeve and neckband as top of the bodice, so an XXS for me. And when you get down to the waistband, my pattern wont have one, but if it did, I would use the S waistband because it's the size that coincides with the bottom line of the top.
And here is a finished shirt with this grading! It turned out lovely!
Now we end with the Adult Feel Pretty Pants in my size. I've had the pattern for a while and I'm looking forward to sewing it up! Only, I am going to need to grade them for my measurements.
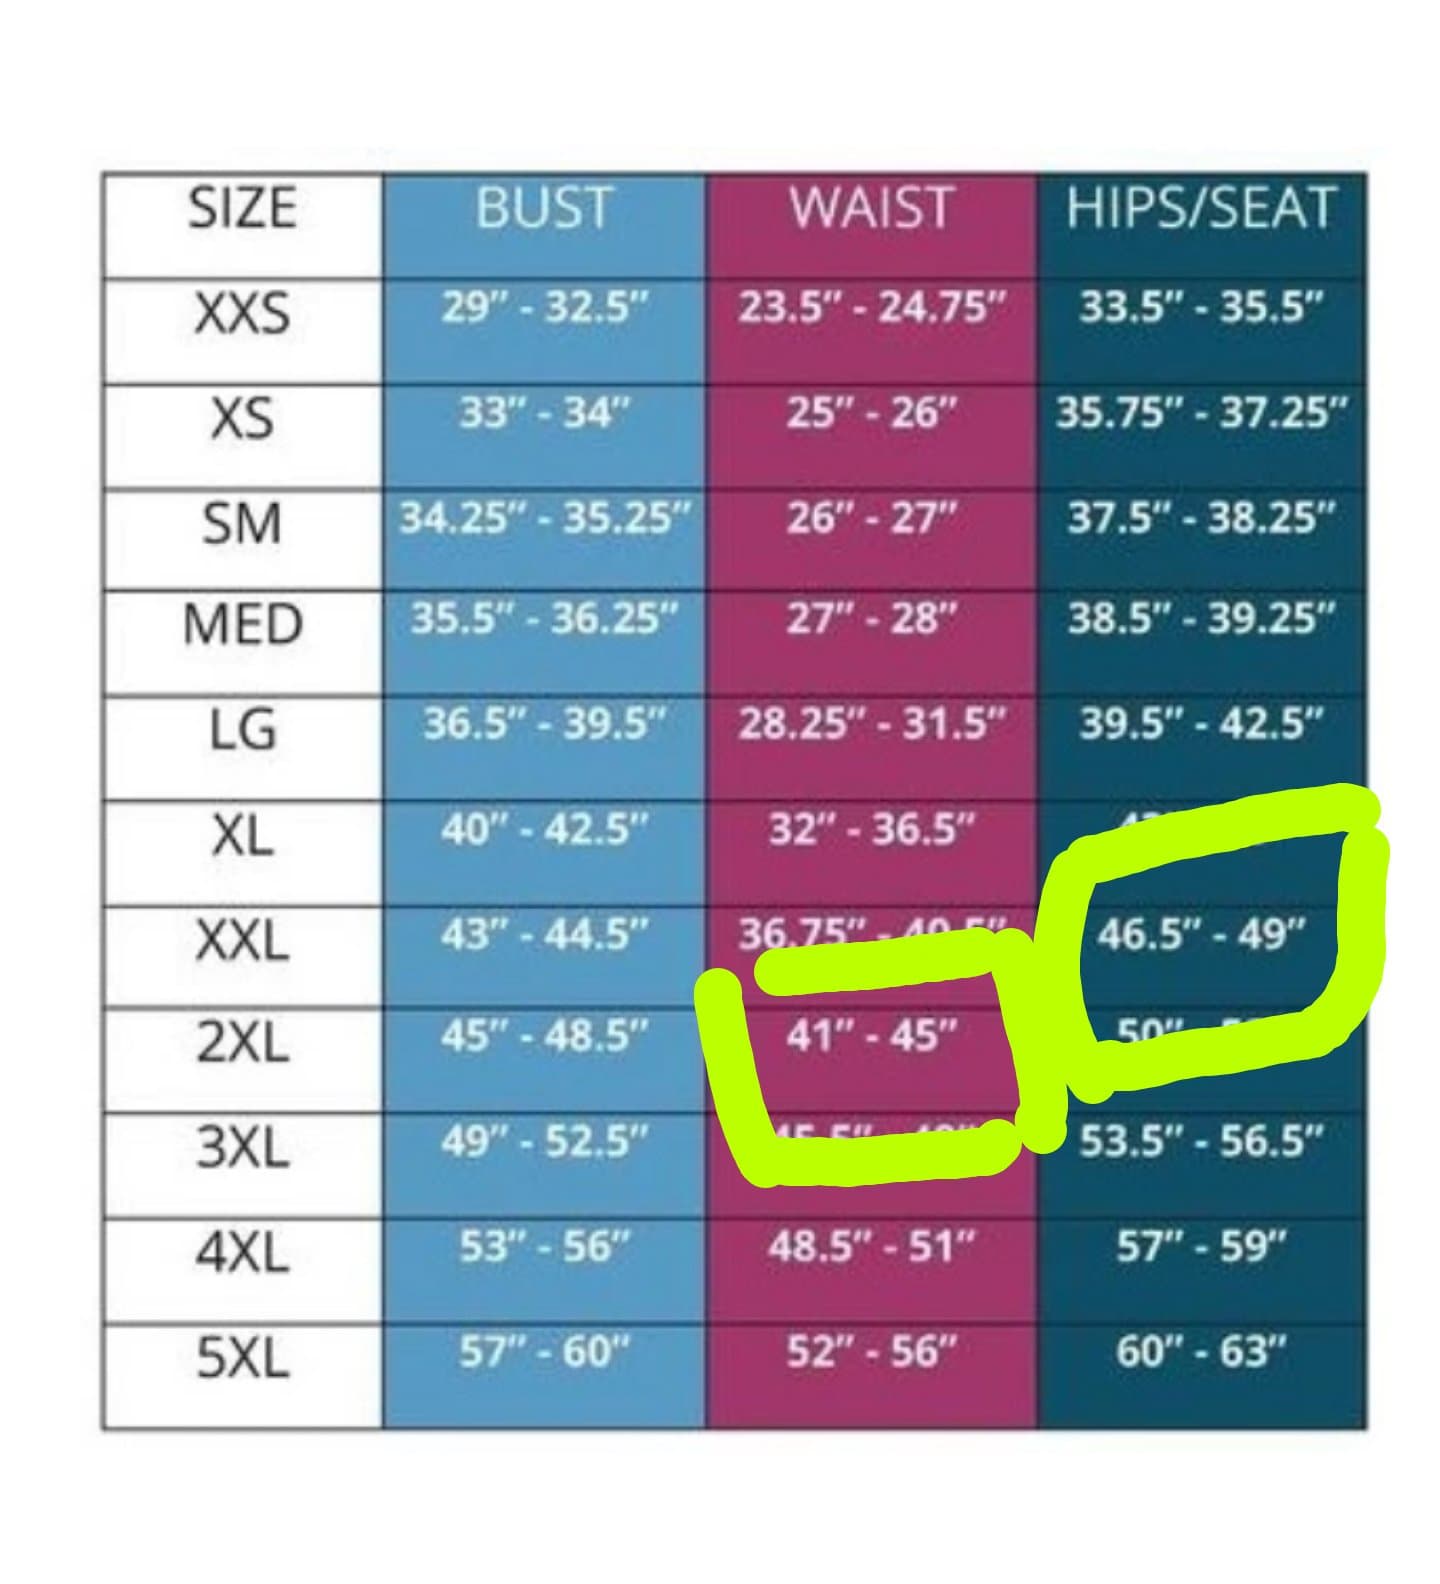
Before beginning to play Dot to Dot, I want to mention that I already know that I have trouble getting my pants to fit the way I like, I always end up needing to size down in the legs to feel comfortable, so I am going to grade down immediately, without even making a muslin 🤭 🤫 and without a measurement chart to say I'm being accurate. With that admission out of the way, I start to play Dot to Dot, placing a dot at the waist for 2XL (low rise option for me), the hip for XXL (which is located about the bottom third of the crotch curve) and the rest at XL (I find I like to go in right about mid thigh). I mimic these same dots on the out seam before starting to draw long straight, smooth lines between each dot and then I retrace my lines to be a similar shape to the original pattern.


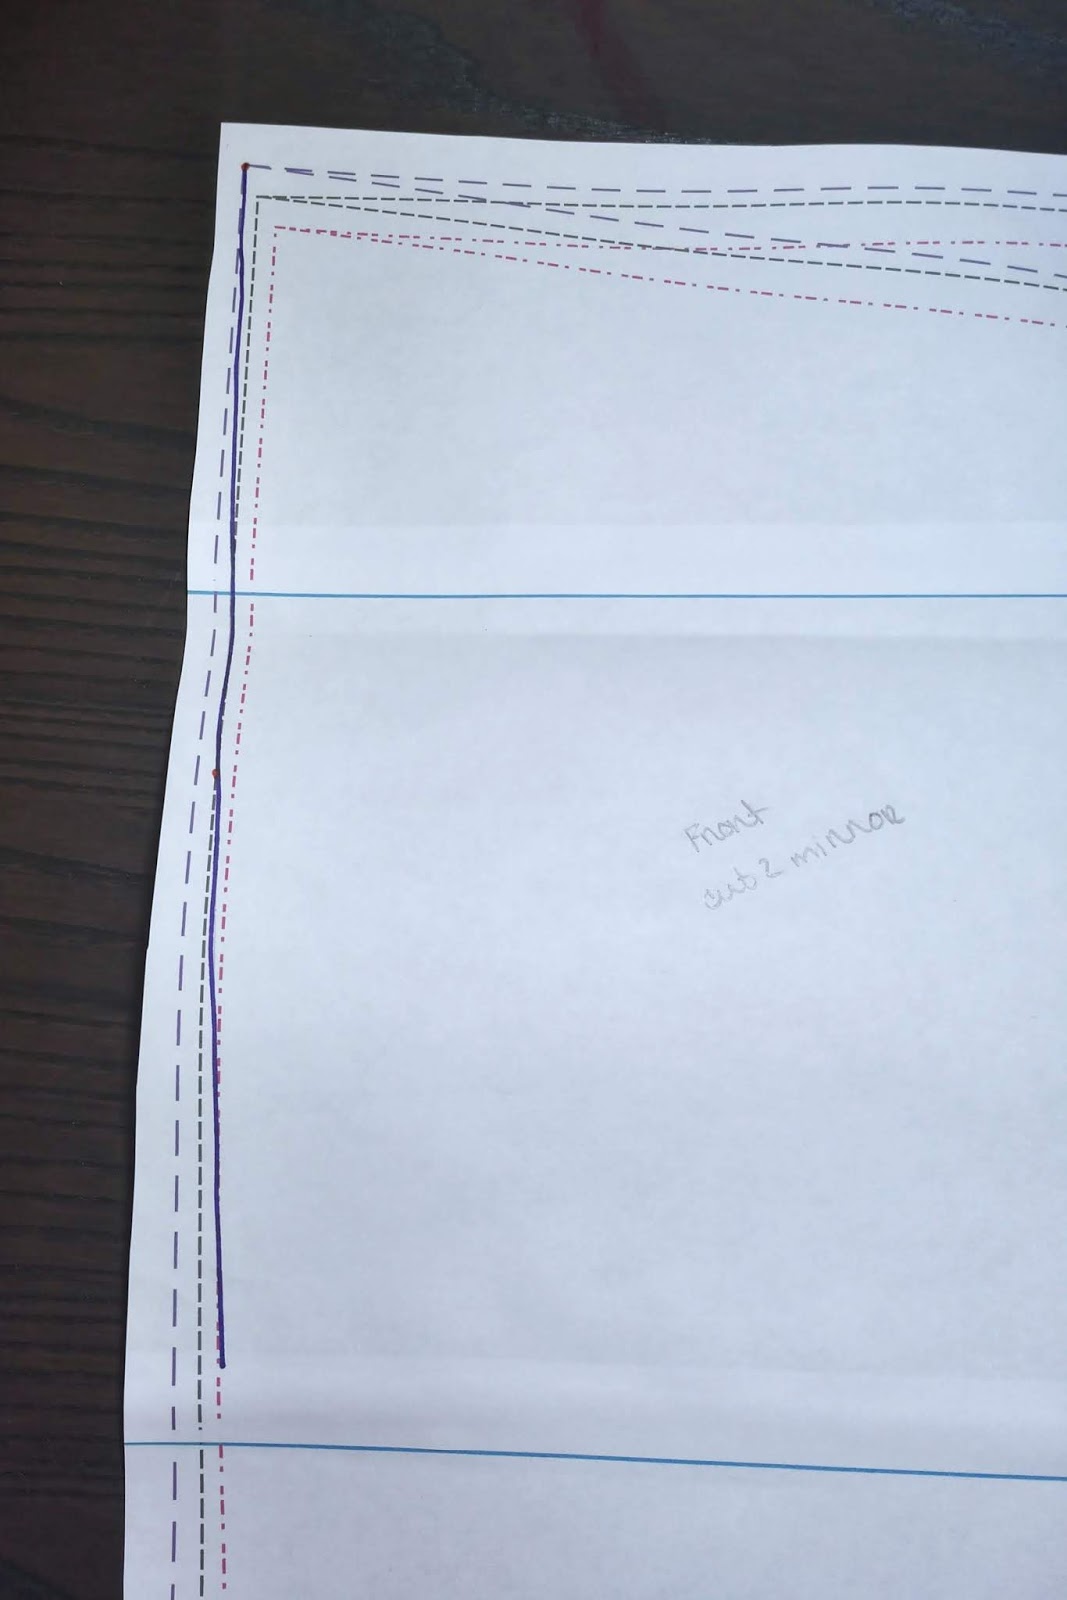
There you have an approximation of how my grading will look. You will see that on the inseam I carried the line down quite a bit past the dot, I did this to create a smooth line. You may also notice that my out seam didn't even reach the orange dot before it was smoothly running on top of the XL line. Both of these things are okay. It's the way I like to grade, and it works for me. You will find what is right for you.
Here is an example of what grading out what look like on Feel Pretty pants with legs of 2XL, hip of XXL and waist of XL.

Deciding a waistband is the same as how it's chosen for the kids pants, use the size waistband that corresponds to the size waist you used. So my waist was a 2XL, so I need to use the 2XL waistband with no adjustments. The graded out pants had a waist of XL so the waist band would need to be an XL waistband.
And now I'm off to sew some Feel Pretty Pants, but not before I finish my adjustments!
Grading is not a fool proof way to get the perfect fit! But it is a great place to start, a good place to begin learning how to make your patterns work for you and compliment your figure and style! Now go give it a try and let me know how it turns out. I'll be seeing you in the Facebook Group be sure to tag and/or mention me because I'd love to see how your creations work out!