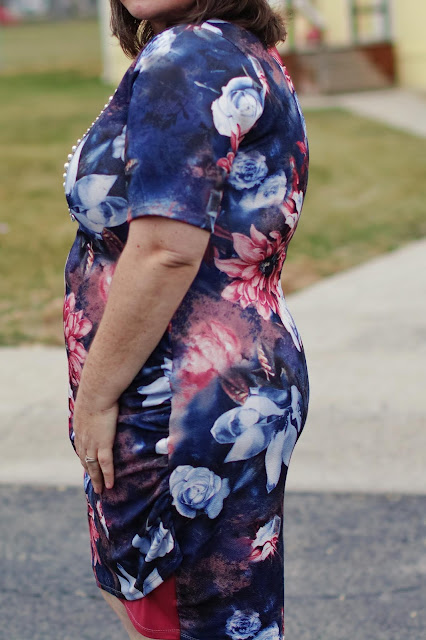
Hello, friends! It's Nellie again, from Sorry About the Mess. Bringing you another instructional blog post. I'm not sure if you'll want to cheer or groan, but here it is either way. This time we will be talking about sway back adjustments.
Okay, I'm not going to lie, this is a hard one to diagnose because the little ripples at the small of the back have multiple causes, but for the sake of this post we are going to assume that sway back is the only cause, but we will talk about some of the other causes.
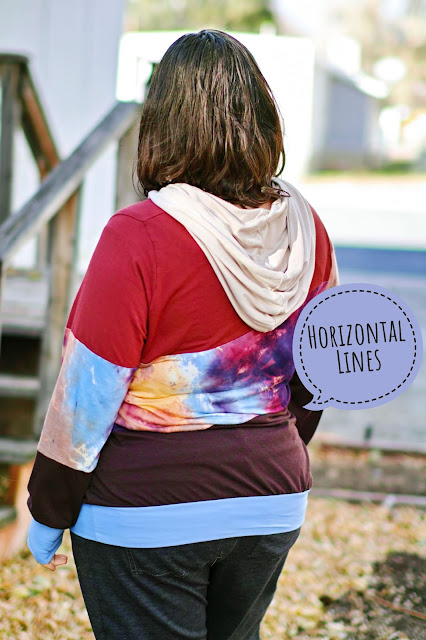
First, let me show you what it looks like when you need a sway back adjustment. This is my Around the Block Hoodie. Adorable, huh? Few things to notice about this hoodie, first, my band it pretty straight across my tush, it isn't pushed up over my hips and it fits pretty well, not too tight, not too lose. My back is straight and my shoulders are back. This fabric is rayon spandex, that's important because rayon grows and will exacerbate the problem. Okay, now I need to point out all the wrinkles and extra fabric pooling right at the small of my back. Yeah, that's what says I need a sway back adjustment.
Now, if the band was constantly pulling up over my tush, or if the band was too snug, that might indicate that I might need to grade out more in the hip, or maybe even need to do a full booty adjustment (that tutorial will come, eventually). Basically, this pooling can also happen when there isn't enough room in the garment for the tush and the fabric wiggles its way up to a smaller, less restrictive place and pools at the small of the back.
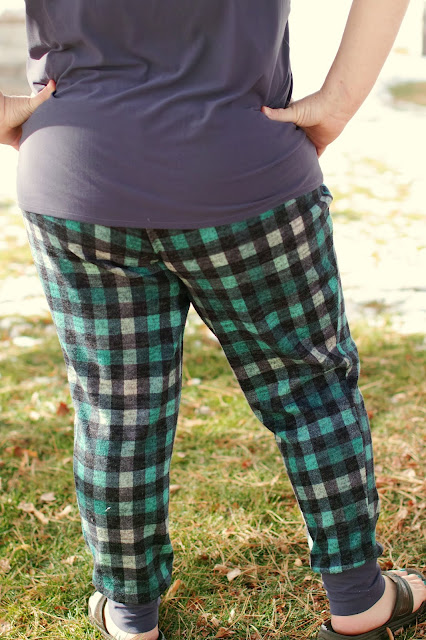
Here is another example of me needing a sway back adjustment on the Discoverer Tee. Part of the need for a sway back adjustment on this shirt comes from being too tight on my hips (this was before the update and a super quick sew so I forgot to do my usual adjustments). But for this tutorial, we are going to assume that I just need a sway back adjustment and my grading is correct.
There is really only one way to determine the amount of adjustment that needs to happen. And that's by making a top or dress, putting it on and seeing/feeling the extra fabric and then having someone help to "pinch" out the excess fabric.
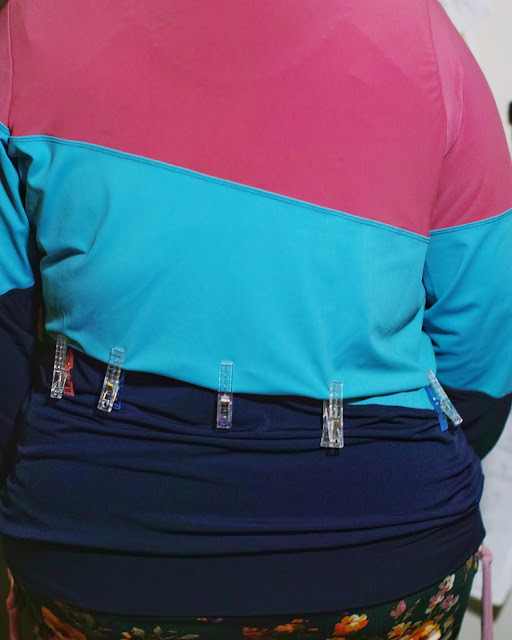
It is important that the person clipping the excess know what they are doing so you don't get results like the one above. Miss 11 was "helping" me and wouldn't listen to my advise about where my waist location was. The fabric for this top is a bunch of very drape-y mystery fabrics and I have gone down a whole size since making this shirt, so there is a lot more lines and room then there would be if I had were wearing my proper size. So use this photo only as a rough example of how your "pinching out" should look.
You can kind of see where clips in the center have "pinched" out the most fabric go to having nearly zero "pinched" out at the side seams. If you happen to have fabric to pinch out all the way around the top, you would probably benefit from a height adjustment rather then sway back. There should only be an extra wedge of fabric that needs to come out. And unfortunately, with most shirts and dresses without a waist seam, this can't be done on an already made shirt, you'll have to start from scratch. The amount of fabric pinched at the center is the amount that we will adjust for. For me this amount is 1.5 inches.
Speaking of starting from scratch, lets take a look at a pattern that is perfect for explaining how all this works, the Tulip Dress and Tunic. The Tulip dress is perfect because it has a center back seam., but the seam is a straight seam, so it's easy to adjust for and easy to remove if you want to cut it on the fold instead of with a seam. When adjusting for sway back with a top that has a center back seam, the adjustments is quick and simple. Let's go though it.
I printed out the pattern and adjusted it for my side waist, but not for my height, I wanted the dress to hit at my knee instead of above it. I did a petite adjustment through my shoulders. I tell you this so that you can understand some of the other cuts and tapes you may see on my pattern. And to remind you that you will want to make your other adjustments before starting the sway back adjustment.
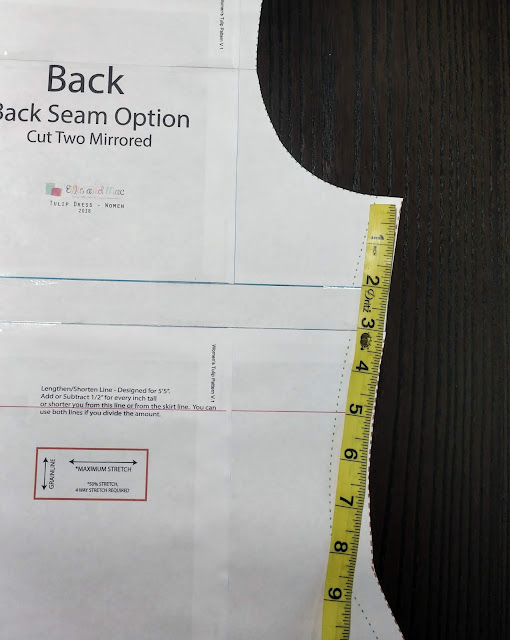
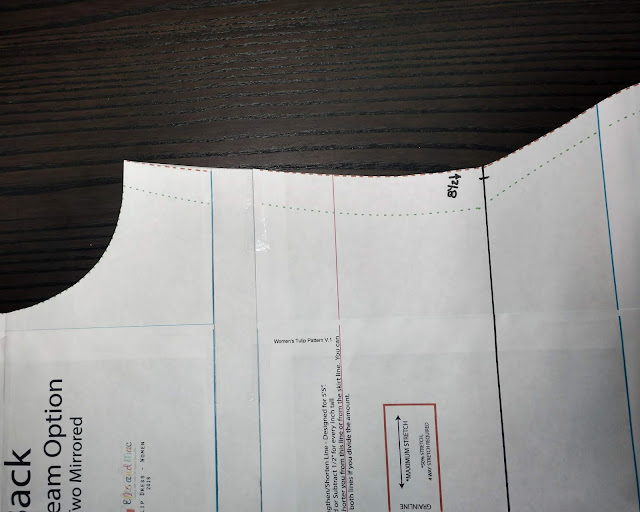
Here is my pattern, or at least just the back half of it, no need to do anything to the front of the pattern. The sway back adjustment needs to happen at the natural waist because that's where the small of the back is, so here I am measuring so to mark my waist on the pattern piece. Notice that the measuring tape is down 1/4 inch from the bottom of the armscye to account for the seam allowance.
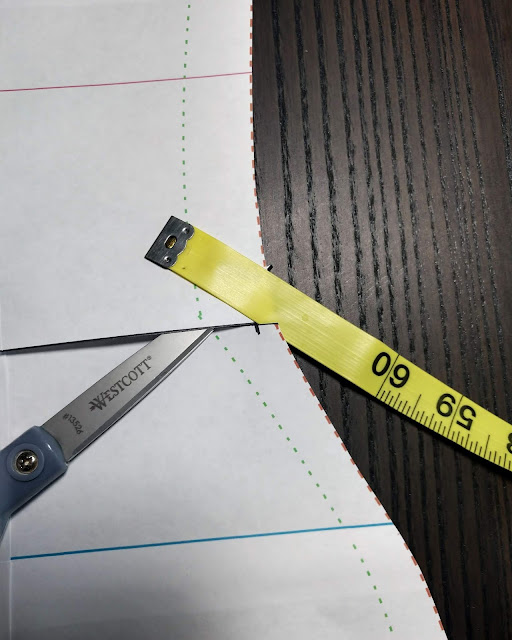
Alright, I marked the waist with a line that is perpendicular (or at a right angle to) to the center back seam. Then I made a small little mark at the seam allowance. This mark is going to act like a hinge. It needs to be cut from both sides, but not through. It's okay if you do, just add a little tape to reinforce the hinge.
Here is a close up of what the hinge will look like. Cut on both sides but still attached in the middle.
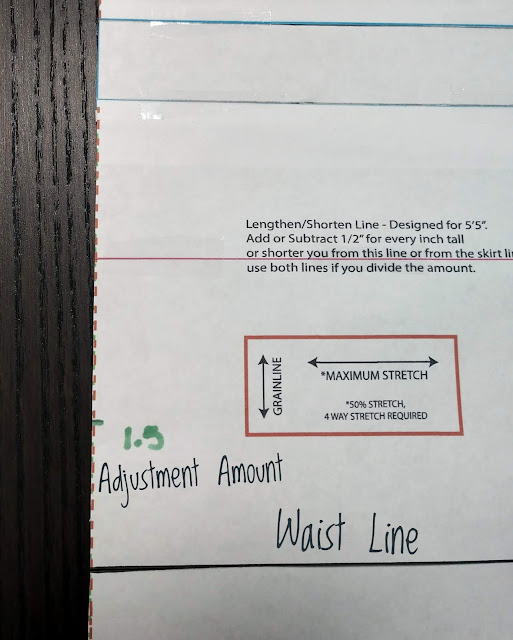
This is the center back seam. The waist line is already cut. The Adjustment Amount I needed was 1.5 inches. I have it marked in green.
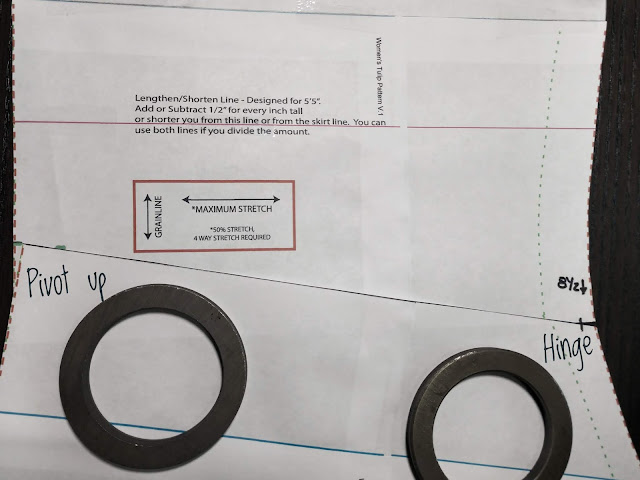
Using the pattern slash and pivoting the pattern up until the corner reached the adjustment line, I used my industrially ugly pattern weights to hold down the wedge until I could tape it down properly.
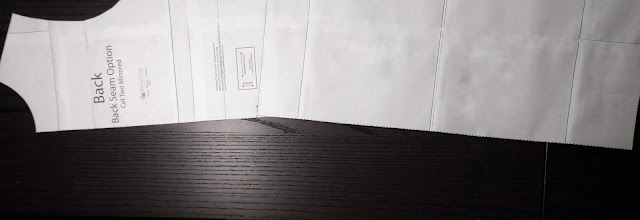
This is what the back center seam of the pattern should look like now, with that dip in the back right at the waist. And it's done! Pretty simple really. Cut out your fabric, sew right sides together down the back center seam like usual and put the dress together. This is what I do. I don't mind a back center seam and I like how much fabric it helps me save by cutting this way!
But wait! What if you don't want a seam down the middle of your back? Not everyone wants to have all those extra seams or the extra time it takes to sew a seam up the back. But everyone needs to have well fitting clothing, so lets make this happen on the fold! We are still going to use the Tulip, because all the same steps above need to be taken. But once you get to this point, there is more to do.
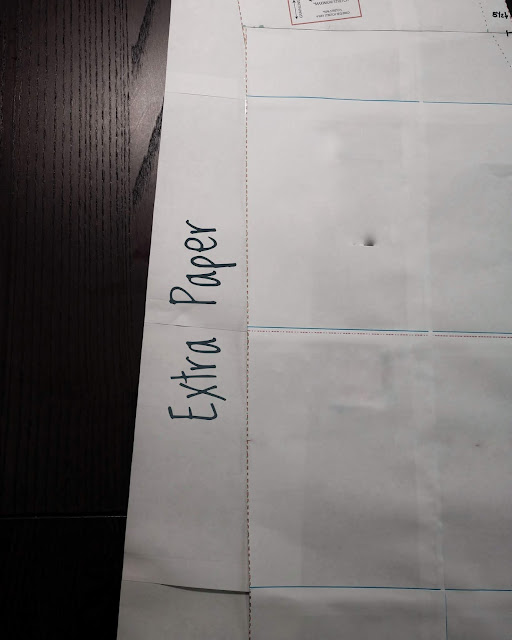
Add some extra paper to my center back seam because we are going to redraw the back seam and we need some extra room to do it.
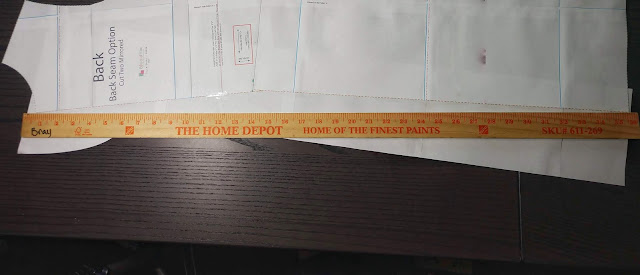
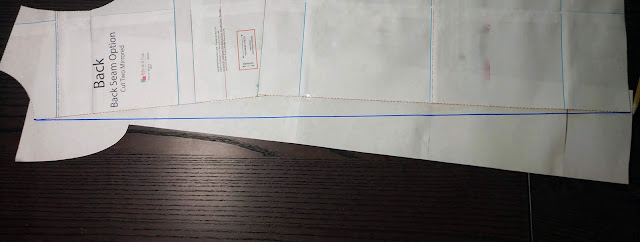
Find a nice long, straight stick. I used this ugly yardstick, but you can use anything straight and long enough. Line it up from the center back of the neck and down to the center bottom of the hem. And this new back is why we added the extra paper.
This is now (almost) the center back seam to be cut on the fold, but we aren't quite done yet.
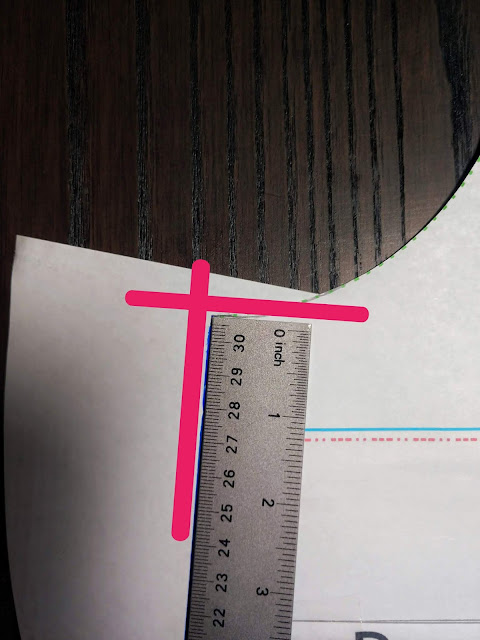
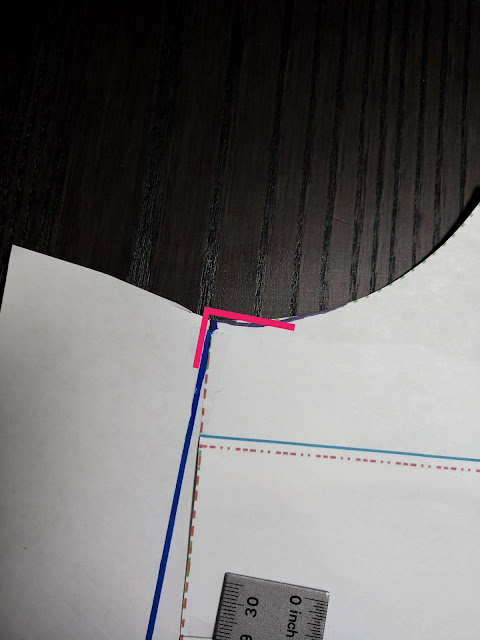
Because the pattern was slightly twisted the corners are no longer trued, or lined up to be straight instead of creating points. We want the corned to be trued because if they are not and we cut them on a fold, they will come out kind of pointed and not straight. There isn't really anything wrong with this, but it doesn't look as nice, but if you don't do this step, it should still come out and sew up nicely.
Using a straight edge make the angle nice and 90 degrees. It doesn't have to be 90 degrees for very far in the pattern, just near the edge. Be sure to take the angle and trace it right back into the neckline. We aren't redrawing the whole neckline, matter of fact, this adjustment shouldn't change the length of the neckline at all.
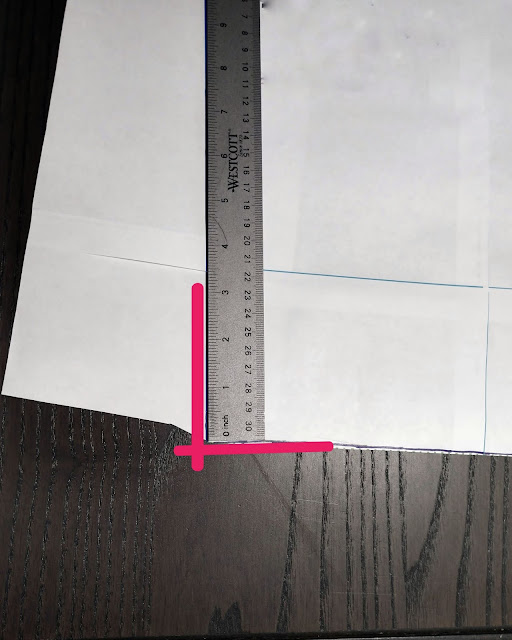
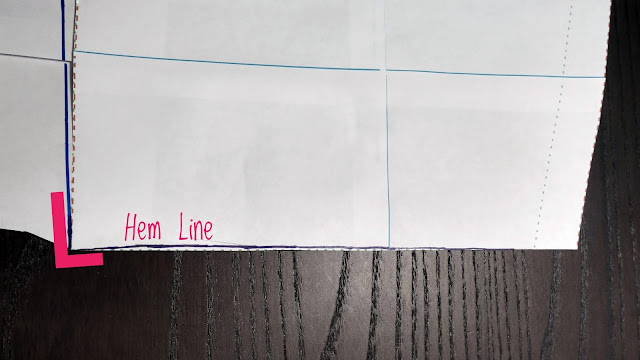
Don't forget to true the bottom of the pattern, at the hem, as well.
My Everyday Tee Relaxed fit with a sway back adjustment. Check out how it hangs straight down from the back of my shoulders, just how it should!
Everyday Tee fitted version with a sway back adjustment. The hem falls nice and even around my hips.
Okay, I'm not going to lie, this is a hard one to diagnose because the little ripples at the small of the back have multiple causes, but for the sake of this post we are going to assume that sway back is the only cause, but we will talk about some of the other causes.
First, let me show you what it looks like when you need a sway back adjustment. This is my Around the Block Hoodie. Adorable, huh? Few things to notice about this hoodie, first, my band it pretty straight across my tush, it isn't pushed up over my hips and it fits pretty well, not too tight, not too lose. My back is straight and my shoulders are back. This fabric is rayon spandex, that's important because rayon grows and will exacerbate the problem. Okay, now I need to point out all the wrinkles and extra fabric pooling right at the small of my back. Yeah, that's what says I need a sway back adjustment.
Now, if the band was constantly pulling up over my tush, or if the band was too snug, that might indicate that I might need to grade out more in the hip, or maybe even need to do a full booty adjustment (that tutorial will come, eventually). Basically, this pooling can also happen when there isn't enough room in the garment for the tush and the fabric wiggles its way up to a smaller, less restrictive place and pools at the small of the back.
Here is another example of me needing a sway back adjustment on the Discoverer Tee. Part of the need for a sway back adjustment on this shirt comes from being too tight on my hips (this was before the update and a super quick sew so I forgot to do my usual adjustments). But for this tutorial, we are going to assume that I just need a sway back adjustment and my grading is correct.
There is really only one way to determine the amount of adjustment that needs to happen. And that's by making a top or dress, putting it on and seeing/feeling the extra fabric and then having someone help to "pinch" out the excess fabric.
It is important that the person clipping the excess know what they are doing so you don't get results like the one above. Miss 11 was "helping" me and wouldn't listen to my advise about where my waist location was. The fabric for this top is a bunch of very drape-y mystery fabrics and I have gone down a whole size since making this shirt, so there is a lot more lines and room then there would be if I had were wearing my proper size. So use this photo only as a rough example of how your "pinching out" should look.
You can kind of see where clips in the center have "pinched" out the most fabric go to having nearly zero "pinched" out at the side seams. If you happen to have fabric to pinch out all the way around the top, you would probably benefit from a height adjustment rather then sway back. There should only be an extra wedge of fabric that needs to come out. And unfortunately, with most shirts and dresses without a waist seam, this can't be done on an already made shirt, you'll have to start from scratch. The amount of fabric pinched at the center is the amount that we will adjust for. For me this amount is 1.5 inches.
Speaking of starting from scratch, lets take a look at a pattern that is perfect for explaining how all this works, the Tulip Dress and Tunic. The Tulip dress is perfect because it has a center back seam., but the seam is a straight seam, so it's easy to adjust for and easy to remove if you want to cut it on the fold instead of with a seam. When adjusting for sway back with a top that has a center back seam, the adjustments is quick and simple. Let's go though it.
I printed out the pattern and adjusted it for my side waist, but not for my height, I wanted the dress to hit at my knee instead of above it. I did a petite adjustment through my shoulders. I tell you this so that you can understand some of the other cuts and tapes you may see on my pattern. And to remind you that you will want to make your other adjustments before starting the sway back adjustment.
Here is my pattern, or at least just the back half of it, no need to do anything to the front of the pattern. The sway back adjustment needs to happen at the natural waist because that's where the small of the back is, so here I am measuring so to mark my waist on the pattern piece. Notice that the measuring tape is down 1/4 inch from the bottom of the armscye to account for the seam allowance.
Alright, I marked the waist with a line that is perpendicular (or at a right angle to) to the center back seam. Then I made a small little mark at the seam allowance. This mark is going to act like a hinge. It needs to be cut from both sides, but not through. It's okay if you do, just add a little tape to reinforce the hinge.
Here is a close up of what the hinge will look like. Cut on both sides but still attached in the middle.
This is the center back seam. The waist line is already cut. The Adjustment Amount I needed was 1.5 inches. I have it marked in green.
Using the pattern slash and pivoting the pattern up until the corner reached the adjustment line, I used my industrially ugly pattern weights to hold down the wedge until I could tape it down properly.
This is what the back center seam of the pattern should look like now, with that dip in the back right at the waist. And it's done! Pretty simple really. Cut out your fabric, sew right sides together down the back center seam like usual and put the dress together. This is what I do. I don't mind a back center seam and I like how much fabric it helps me save by cutting this way!
But wait! What if you don't want a seam down the middle of your back? Not everyone wants to have all those extra seams or the extra time it takes to sew a seam up the back. But everyone needs to have well fitting clothing, so lets make this happen on the fold! We are still going to use the Tulip, because all the same steps above need to be taken. But once you get to this point, there is more to do.
Add some extra paper to my center back seam because we are going to redraw the back seam and we need some extra room to do it.
Find a nice long, straight stick. I used this ugly yardstick, but you can use anything straight and long enough. Line it up from the center back of the neck and down to the center bottom of the hem. And this new back is why we added the extra paper.
This is now (almost) the center back seam to be cut on the fold, but we aren't quite done yet.
Because the pattern was slightly twisted the corners are no longer trued, or lined up to be straight instead of creating points. We want the corned to be trued because if they are not and we cut them on a fold, they will come out kind of pointed and not straight. There isn't really anything wrong with this, but it doesn't look as nice, but if you don't do this step, it should still come out and sew up nicely.
Using a straight edge make the angle nice and 90 degrees. It doesn't have to be 90 degrees for very far in the pattern, just near the edge. Be sure to take the angle and trace it right back into the neckline. We aren't redrawing the whole neckline, matter of fact, this adjustment shouldn't change the length of the neckline at all.
Don't forget to true the bottom of the pattern, at the hem, as well.
The hem is going to do something kind of weird because it isn't going to line up quite right. That's okay, just make it kind of curved, just a nice gentle curve so that it isn't very noticeable. It should still hang evenly around the body, especially where there is just that little bit being removed.
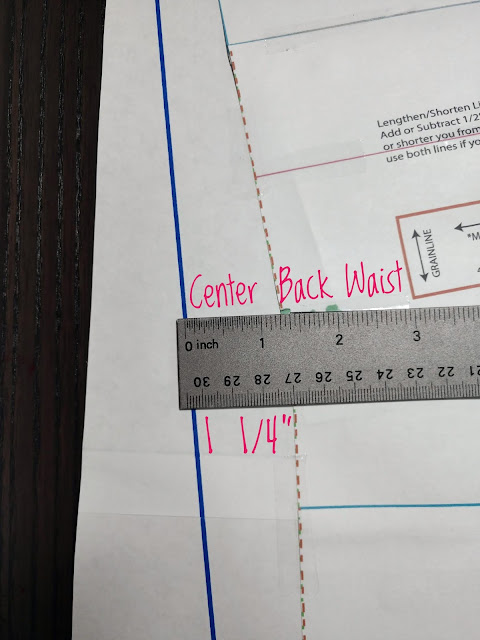
Taking a good look at how the pattern is starting to look, we notice that in the process of redrawing the center back seam we actually gave the whole dress some extra width. This isn't good because this body con dress isn't going to fit well with an extra 1.25 inch around the middle. This concept is true even for tops and dresses that aren't form fitting, the extra width is going to change the way the pattern is drafted to fit. So we need to fix it.
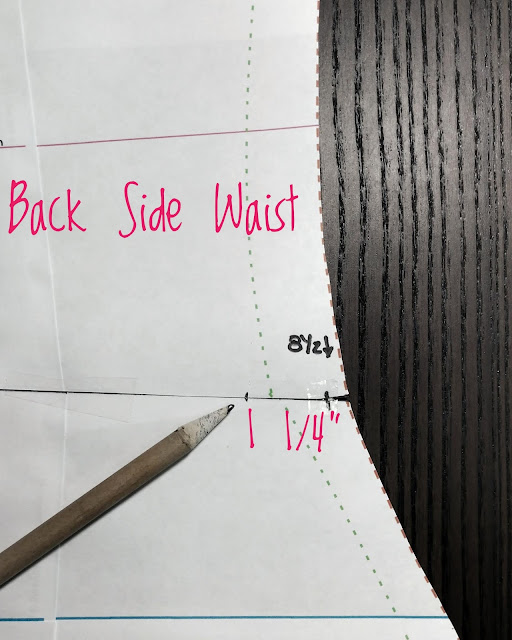
There is 1.25 inch extra width at the Center Back Waist. Let's flip the pattern around and look at the Back Side Seam, at the waist. This is where we will remove that extra width.
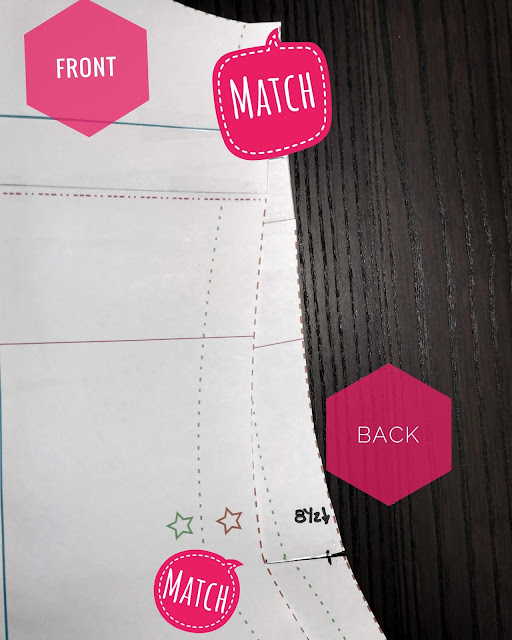
Mark the adjustment amount at the Back Side Waist. It was 1.25 inch. Then we are going to put the front piece on top of the back piece. Line up the waist and the bottom of the armscye and all the way down to the hem.
And then trace the lines of the front piece onto the back.
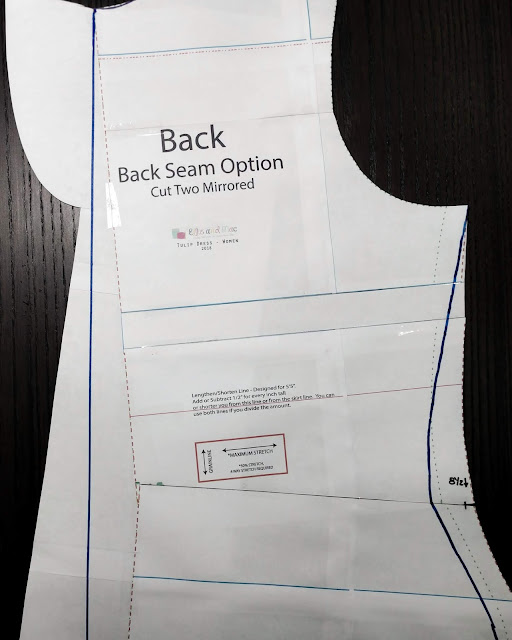
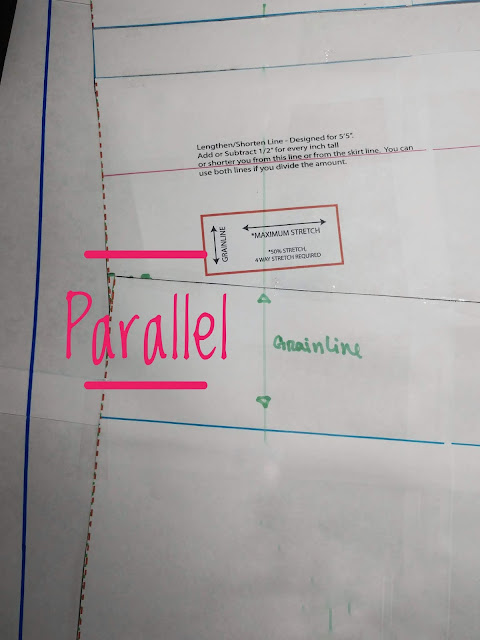
The back pattern piece will now look something like this. But there is a big thing that needs to be adjusted, redrawing the grain line. This is a super easy step because the grain line needs to be parallel to the center back seam. Just draw it back on you're ready to cut some fabric.
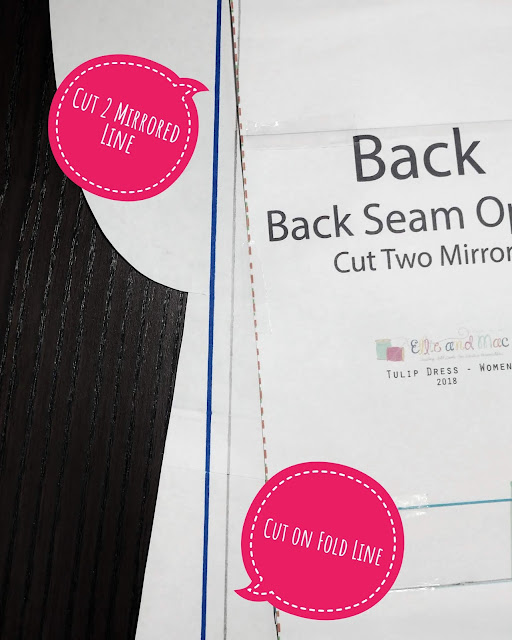
Unless!! Of course, if you are making a sway back adjustment on a pattern with a center back seam and you're trying to remove the seam to cut on the fold, you have to remove the seam allowance. The blue line is the one with the seam allowance and could be cut if you wanted a center back seam, or the pencil line,1/4 inch inside the blue line, can be lined up on a fold and cut there to create a back without a center seam that has been adjusted for sway back.
And that is it my friends. That's how you do it. A sway back adjustment in two ways. To be honest, there are other ways to do a sway back adjustment, but these two happen to be the easiest to understand to do. And I will leave you with a few of my creations with a sway back adjustment.
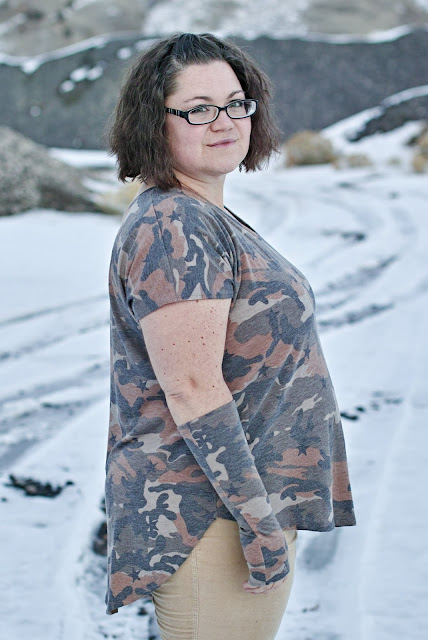
My Everyday Tee Relaxed fit with a sway back adjustment. Check out how it hangs straight down from the back of my shoulders, just how it should!
Everyday Tee fitted version with a sway back adjustment. The hem falls nice and even around my hips.
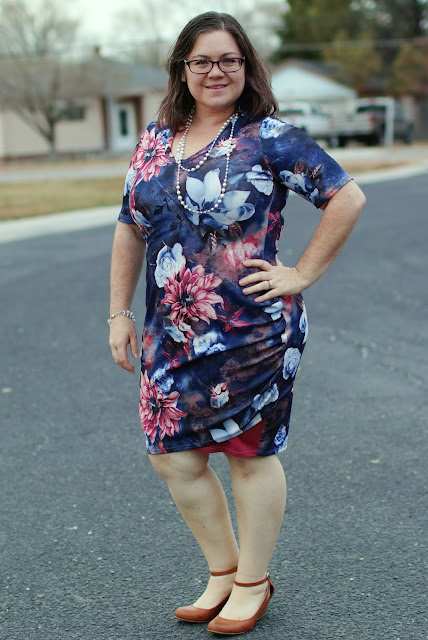
Even the Tulip, a body con dress, sits nice and even across my hips and smooth on the small of my back. Oh my goodness, I am so grateful that I learned how to do a Sway Back adjustment! And I hope you enjoy learning to do one yourself and make lots and lots of beautifully fitting tops with this new adjustment!
I can't wait to see what you make! Please join me in the Ellie and Mac Facebook group and show off your beautiful makes with the Sway Back Adjustment!


