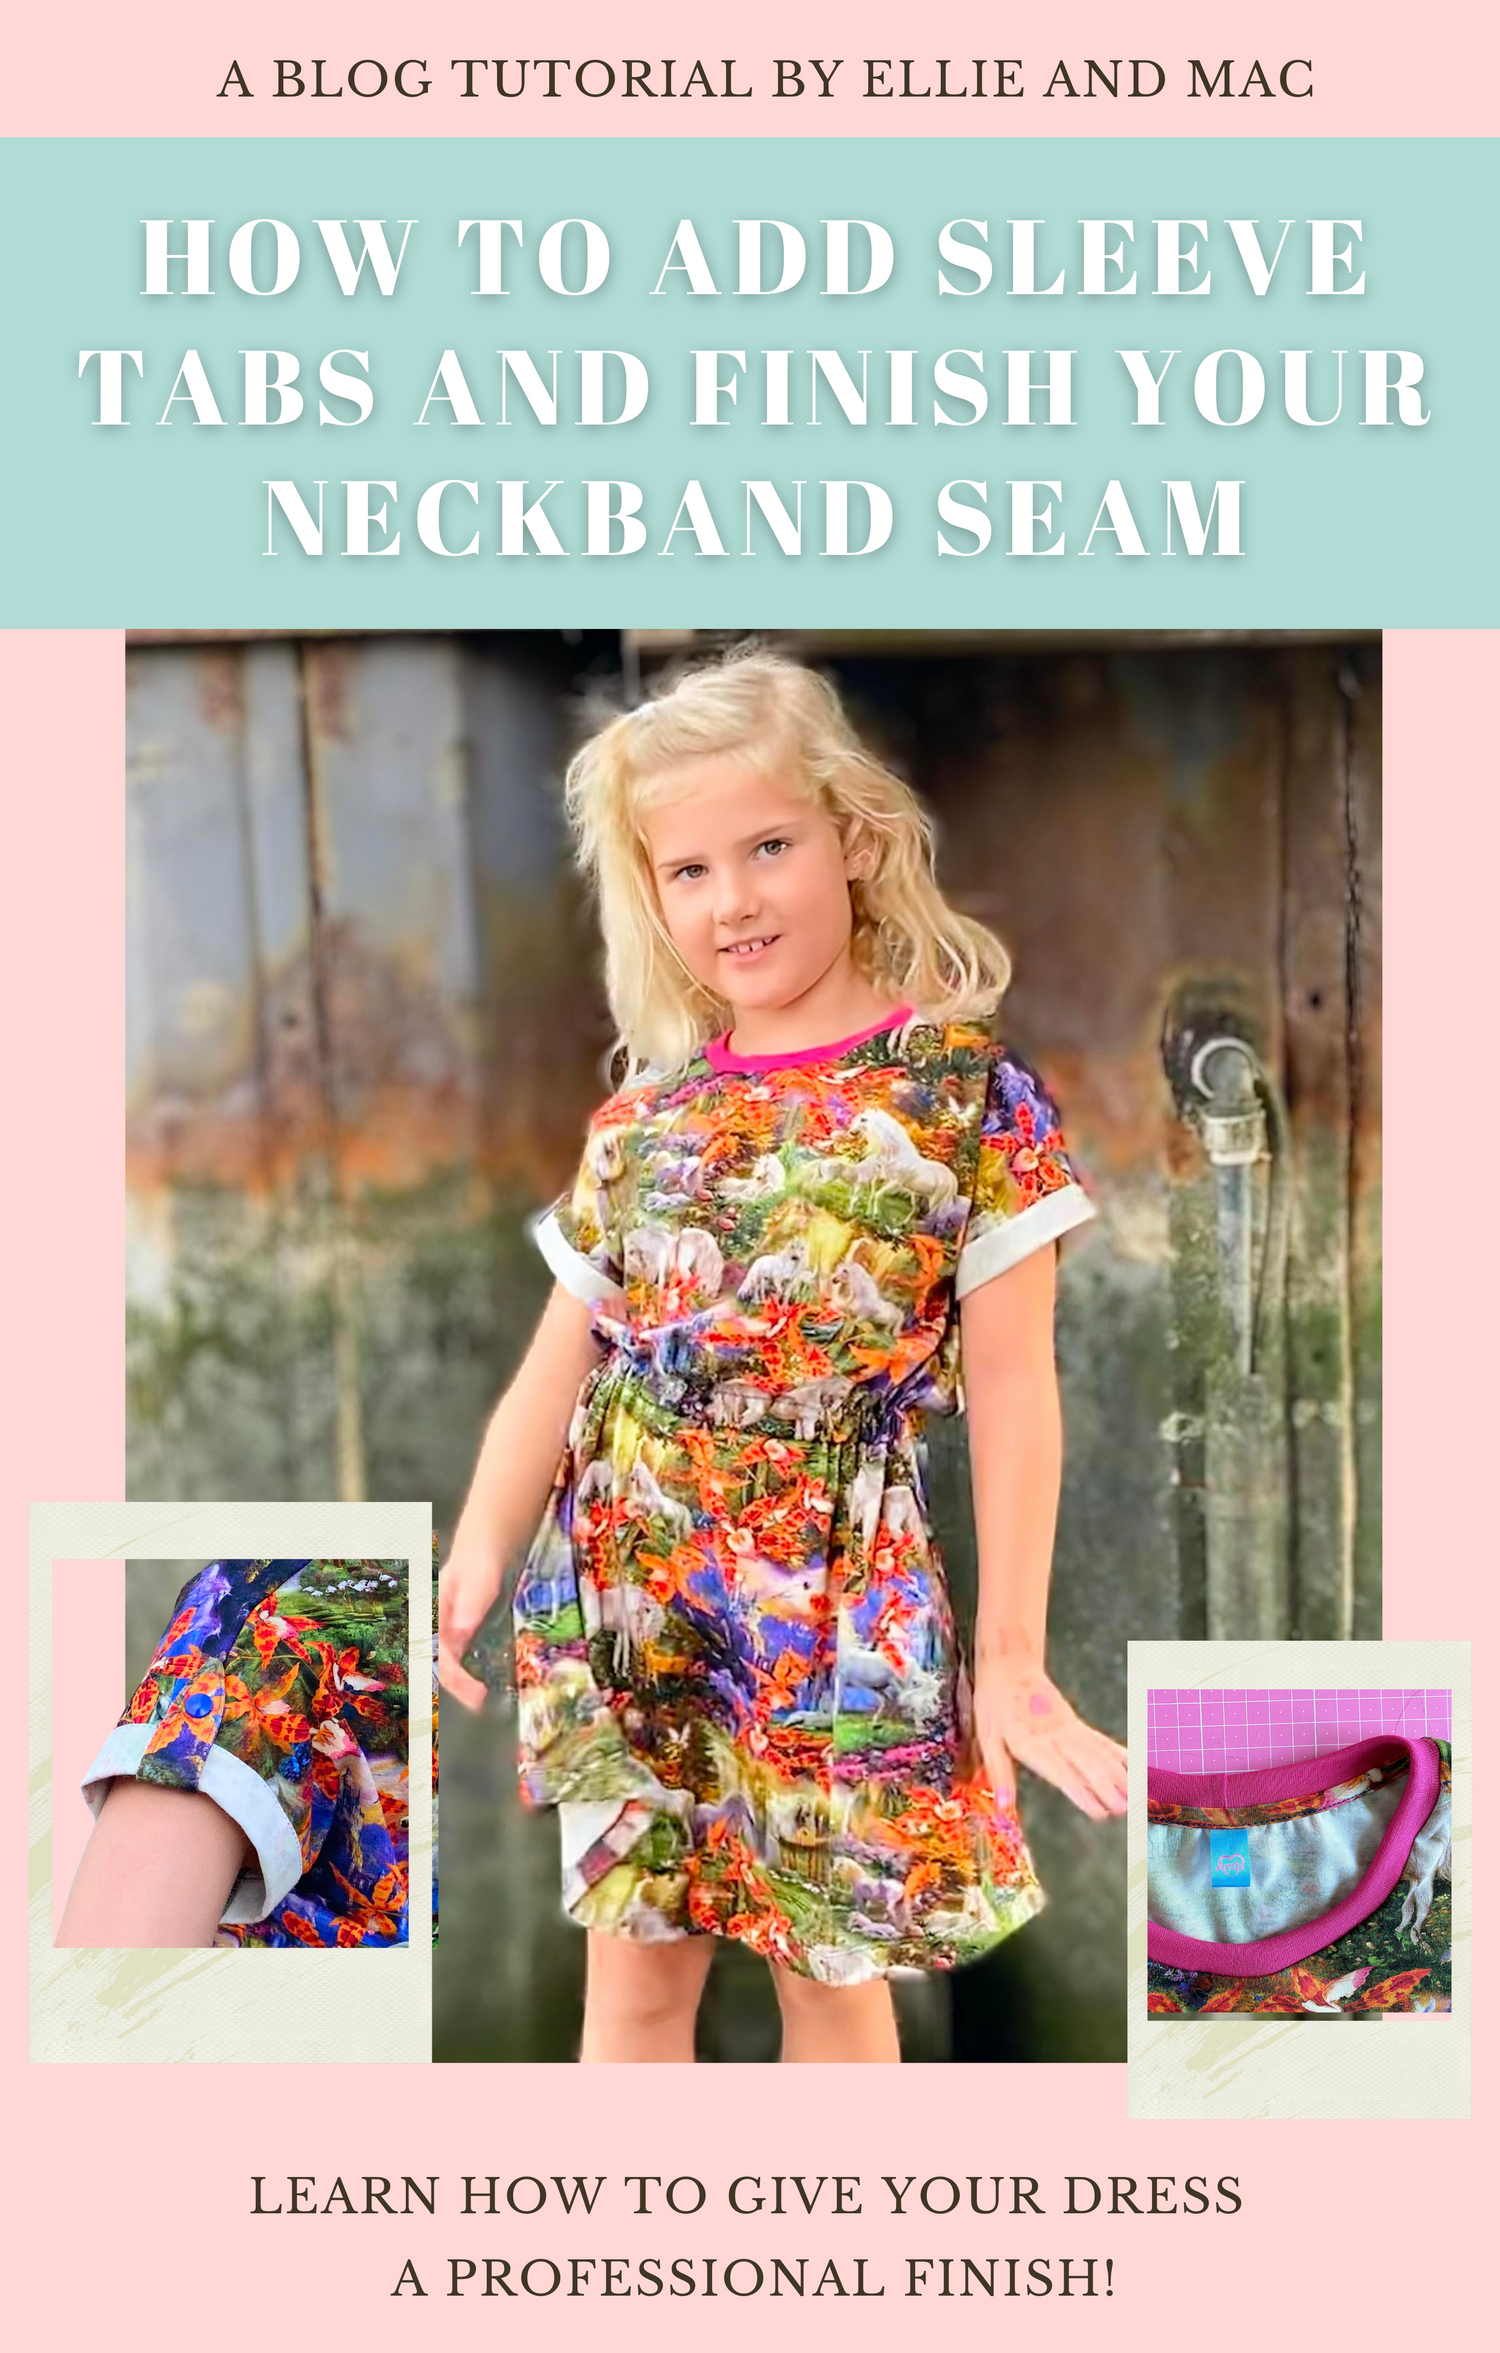

Hi there! I am Manda, and we have just released the Essential Dolman Dress for Kids and Adults! This dress is a dolman dress, meaning the sleeves are drafted at the bodice (no insert sleeves). That makes this dress really easy to sew: the one-piece dress contains two pattern pieces to use, and the two-piece dress with casing contains three pattern pieces to use. Easy-piecy!
The sleeves of the Essential Dress are folded up a few times and stitched onto the sleeve, so they will keep looking crisp. If you want to add some extra flair to your dress and up your game a bit: this is the tutorial!
This blog will show you how you can add sleeve tabs to the side of the sleeves and how you can finish the back of your neckband seam to give your dress that professional look & feel.
Adding Sleeve Tabs
First, we need the pattern pieces to work with. You can download your printable pattern pieces in your account, the file is called "Sleeve Tabs Print." 

Cut 4 Sleeve Tabs using the template width of your preference. Add fusible knit interfacing to the wrong side of 2 tabs, press, and mark the 1/4" seam allowance at the pointy end of each tab with a dot. Fold over the straight ends of all four sleeve tabs to the wrong side and press. Pin right sides together one interfaced tab and one non-interfaced tab. Make sure the straight ends stay folded.


With a 1/4" seam allowance, sew around the tab while leaving the straight end open to turn the tab to the right side. Trim the seam allowance in half and snip the seam allowance, making sure to get as close as you can to the stitching without clipping into it.
Turn the tab to the right side, press, and topstitch the edge. 

Position one sleeve tab at the wrong side of the sleeve end (top seam of the sleeve). Check the position of the tab when folded over to see if there is enough room to add a snap or button, and stitch the end of the tab to the wrong side in a rectangular shape with an "x" in the middle for reinforcement.

Add the snap bottom piece (or button) to the sleeve (right side). Add the snap top piece to the tab (or sew a buttonhole) at the correct position.
And you are done!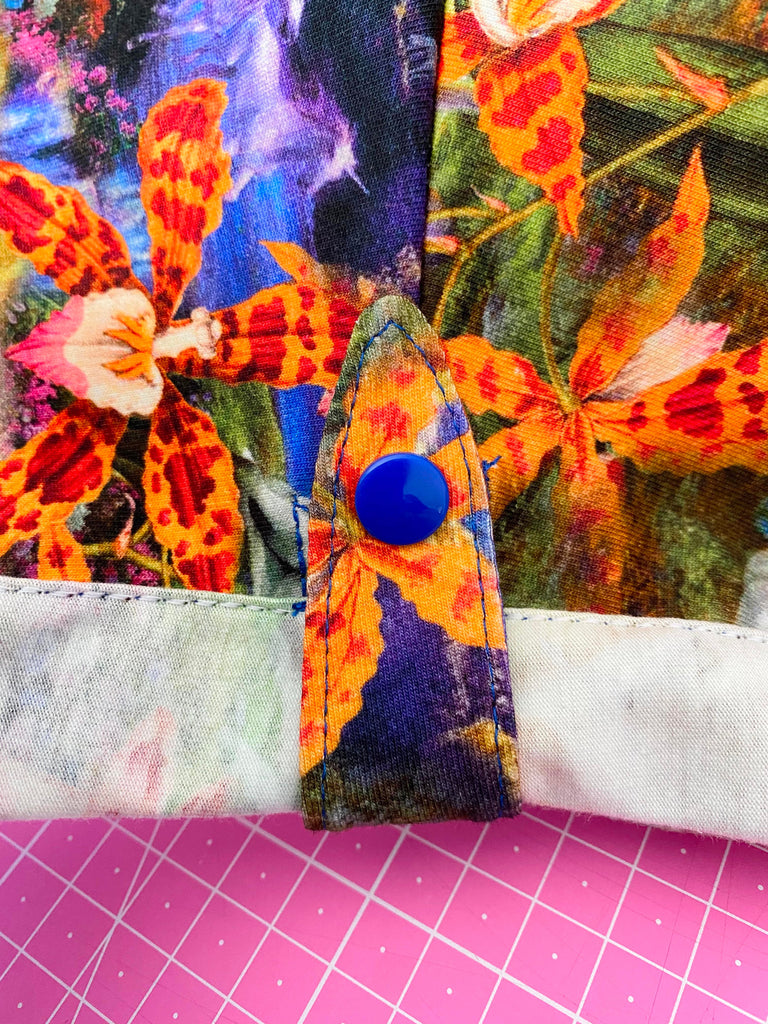

Finish Your Neckband Seam
Have you ever looked at your store-bought clothes and wondered why the neckband looked so clean and crisp? Chances are that the neckband seam at the back side has been hidden with a strip of fabric. This looks so professional and is easy to do as well! So let's start!
Take your fabric neckband pattern piece and fold it lengthwise in half. Cut a strip of fabric (not on the fold). Fold the short edges to the wrong side of the fabric strip and press. 
Place the fabric strip over the neckband (right side strip to the wrong side of the neckband) at the back of the dress from shoulder seam to shoulder seam.
Sew or serge the neckband together with the fabric strip to the neckline of the dress. It should look like the second picture when done.
Fold the fabric strip over the seam allowance of the neckband, fold toward the dress, and pin.
It should look like this when pinned down. This is also the time to add a tag if you want to. Place it at the center back and pin. 
Topstitch the fabric strip with a straight stitch (I used stitch length 3.0). And you are done: you have finished your neckband seam!
The back of the neckline will look like this:
Enjoy the new dress with sleeve tabs and a finished neckband seam!
We also have a YouTube video available where Diana shows how to finish a neckband seam:
(Written by: Manda Hoogstra-Rademaker)