Hey Everyone, Kendall here again. I wanted to share with you something I found on gathering. If you’re like me, you love the look of a gathered skirt, but dread making it happen. I have a serger, but it’s kinda 50/50 whether the gathering works for me on a particular day. Alternatively, I’ve read that you can baste two lines of stitching across the area to gather and pull it with the bobbin thread. I’m not a fan of this method because it never seems to go the way I want it to. A thread might break, or there would be a big gap where the baste threads ended. I thought I was doomed to dread gathers, and actively avoided patterns with gathering. Until I saw a new method. This one has changed my life and it is much easier than either of the two methods previously mentioned (at least for me).
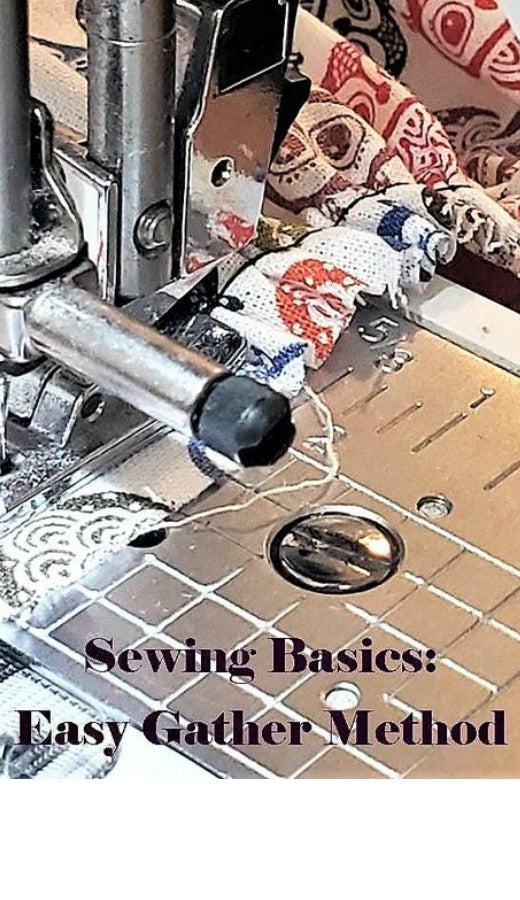
Presenting, the new and improved, no-serger-required, gathering method. You will need two things, your sewing machine and a thicker piece of string/floss/yarn. So the idea here is to set your machine to the biggest zig zag stitch possible, both in length and width. Then you stitch the yarn into the inside of the zig zag stitch.

When you get to the end of the section to gather, cut off your thread and then use the yarn to gather the fabric. The benefit of this is that you don’t get the weird gap when you have the double basting threads. I also don’t have to worry about my serger complying.

Once your yarn is sewn between your zig zags, hold the yarn and pull to cinch your fabric to the desired width and pin to whatever you’re sewing it too. For example, I was making the Girl’s Be Smart Jumper, so I was cinching the skirt piece to the width of the waistband, so I pinned it to the waistband.
An extra tip: I try to sew the yarn below where the seam allowance and seam would be. See my pic below. That way, you can easily leave the zig zags and thread in place while you sew the seam with the gathered fabric. When you’re done, just pull out the yarn to save for later and seam rip the zig zag stitches. Voila!
If you have a fabric that will attract lots of fibers from the yarn (maybe a crushed velvet would?) then you would want to use a thicker thread. Embroidery floss, cording, or even regular thread would work just as well.


