![]()
Hi everyone! It's Lakeisha again from Sincerely, Shantelle! I'm back again today with a pattern hack that is surprisingly easy and so fun! When I recently participated in Project Run & Play, I came up with the idea to create a Puffer Vest for my son. I delved into my pattern collection to use a pattern as a base, and was instantly drawn to the Dutchie. A little thinking it through and a little help from a blog post on the Mood Fabrics blog was confirmation...and that was the beginning of my creation!
For the purposes of this tutorial, the pattern pieces you will need are the Front and Back Liner of the Dutchie, as well as the waistband pieces, and the Collar (or Hood if you'd like). I cut one set as the main, and one set as the liner. I also used the pocket and pocket method from the Duke, but you could just as well use the welt pocket method and placement from the Dutchie pattern if you don't own the Duke. For materials, you will need to cut your pieces in main fabric, liner fabric, and then enough quilt batting to thicken the pattern up to your liking. Of course you'll need a sewing machine, thread, and some pins. I highly recommend sizing up in width only for this jacket to account for the batting. I used two layers of thin batting and only sized up once. If using anything thicker or more than two layers, consider sizing up twice.
To begin, decide on how you want to distribute your "quilt" lines. I settled on 2" spacing and started from the bottom, drawing the lines in tailors chalk. I also drew a line 1.25" from the center, which is where the buttons are to be installed. I did not want to quilt lines on that side, as you'll see at the end. Draw your lines on a mirrored set of the outer pieces and the back. You do not need to draw them on your front or back liners.

Next, trim pieces of quilt batting that are larger than your outer pieces (the ones with the quilt lines). Pin the fabric to your layers of bating. Keep pieces right side up, making sure the keep layers as smooth as possible. I highly recommend using a walking foot on this part. Starting from the side seam, stitch your lines, using as small a stitch as your machine can handle. Make sure to backstitch at the beginning. I was able to sew mine with a 2.5, but you may need to increase. When you get to the center line, not the actual center of the bodice, backstitch and remove your work each time.


Repeat the quilting process for your other front outer and your back piece. Trim the batting down to the same size as your outer. On the waistband add-on pieces, place them on the same number of batting scraps as your bodice, and sew them around the outside edge. Trim batting down, afterward.


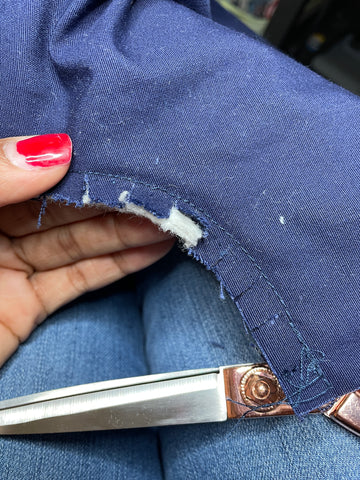
Begin attaching your pockets, following the pattern instructions. To reduce bulk at the pocket welt, carefully trim away the excess batting around the seam. It is good practice to do this at any seam where there is batting involved.
Place your set of Liners Right Sides Together and pin or clip at shoulder seams. Sew, and repeat the same steps with the Outer pieces. Trim excess batting from seam.


Place the Outer and the Liner Right Sides Together and pin or clip along the center front. Sew that seam, and trim the excess batting from it. Insert the Collar or Hood, following the instructions from the pattern. Check to make sure it is done to your liking and that all raw edges are concealed before moving on. While the Outer and Liner are still Right Sides Together, pin or clip along the armscye, and sew together.


Snip the curves of the armscyes and trim the excess batting. This will make the curves very neat when you turn them right side out. Carefully reach in between the back bodice liner and outer and pull the front through the shoulders on each side. I like to grab he bottom corner of the front to make this as easy as possible. Be gentle. Once you have the jack Right Side Out, give it a good press. If your arsmcye isn't looking smooth, turn it back Wrong Side Out and snip the curves more.


To close up the sides seams, fold the front and back Outers with Right Sides Together and the Front and Back Liners Right Sides Together. Leave a 4-6" opening on one of the liners. This is necessary to turn the jacket right side out after you've sewn the waistband. It may be a little wonky to maneuver, but it'll work. Sew each side seam and trim the batting from the seam allowance.

Prepare your waistband. Mark the center of it and the jacket with a pin or clip. Insert the waistband into the Jacket and pin or clip all the wall across, stretching your waistband to fit, aligning your raw edges. Sew seam. Carefully turn jacket right side out through the opening left in the liner. Afterward, press your sew allowances toward the inside and hand stitch closed with a ladder stitch, or stitch very close to the edge with your sewing machine. It'll be on the inside, so it's up to you ;)


Topstitch the whole jacket, install your snaps or buttons, dust off that tailors chalk, and it's ready to wear! I recommend denim type snap buttons, as buttonholes may be difficult to sew through the batting and normal snaps may not have a long enough shank for all the layers. I hope you found this tutorial very easy to follow and that you use it to create something awesome. I'd love for you to share over in the Ellie and Mac Facebook group. Until next time…