Some time during high school my son decided that he did not like jeans and would only wear cargo pants. As he grew taller but not wider, finding clothes for his lower half became a difficult task, and belts were essential since commercial cargo pants were only long enough if they were too large.
Then I started sewing. My first few attempts at making cargo pants for him fell flat. They didn’t fit quite right and I didn’t know how to alter them. Finally, I resorted to taking apart a worn-out pair and cloned them. Unfortunately, this meant that they were still too wide, and I still didn’t know how to fix them.
Then came the call to test the new Ellie and Mac Stephan Straight Fit Cargo Pants (hereafter to be referred to as the Stephans).
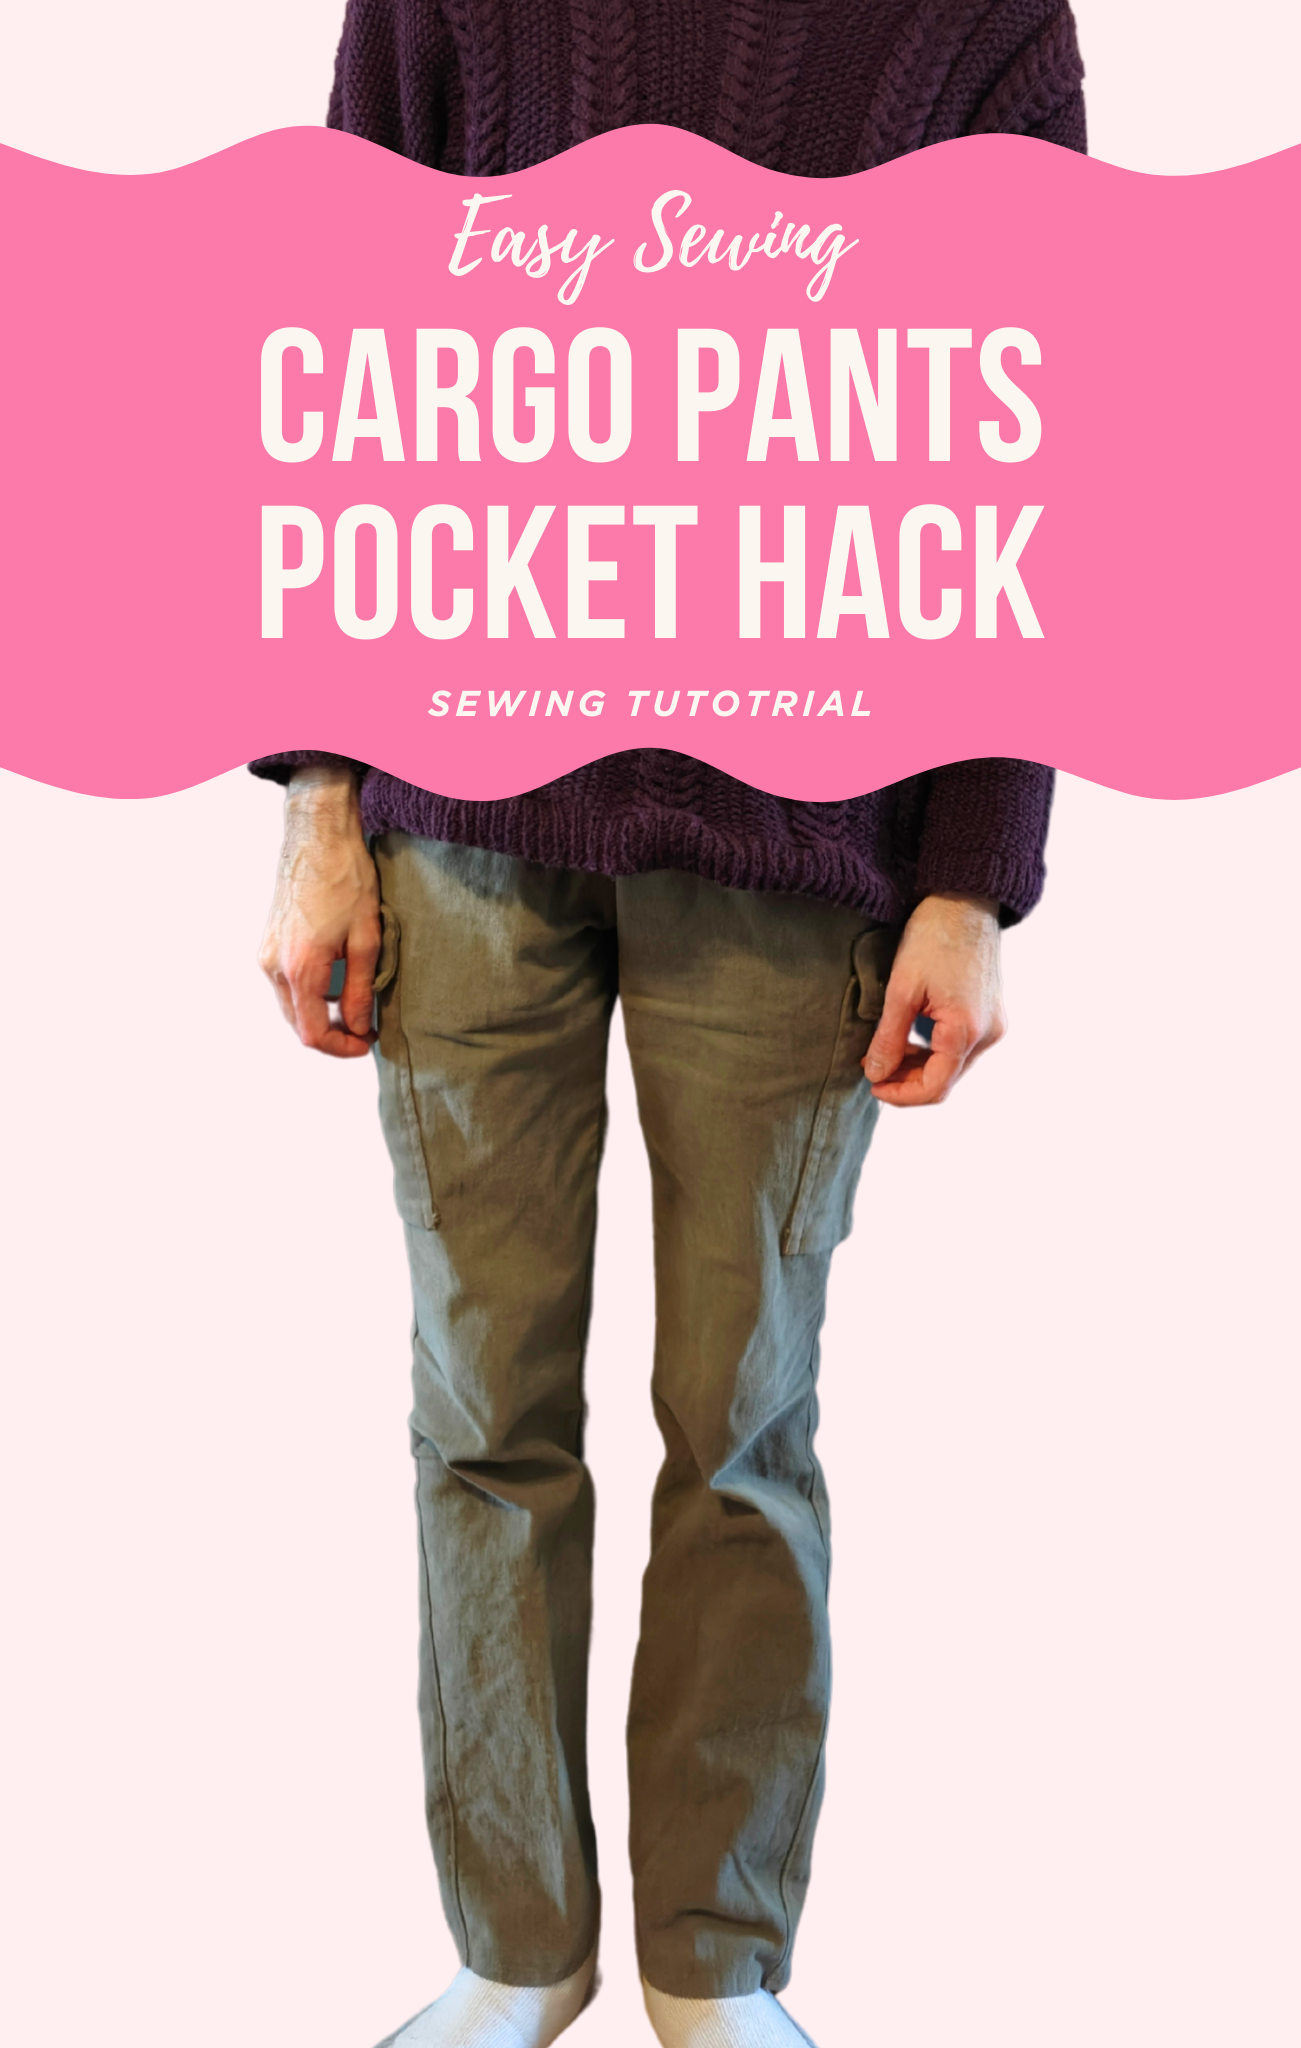
With clear lines for guiding my required modifications from one size at the waist to a second at the hips (and a third at the thighs!) I achieved a really good fit on the first try. On the second try, I made a small flat seat adjustment and that did it! My son’s only complaint was the cargo pocket.
As designed, the pocket on the Stephans is an origami masterwork. It is a fabulous bit of architecture but a bit of a challenge for my sewing machine. That, along with my son’s preference for a flatter cargo pocket and the need for more pants, led me to some experimentation.
The pocket had to be wide enough to hold a Playbill, though not necessarily long enough. The flap had to fasten with either snaps or buttons. Hook and loop tape was a no go.
After studying the situation, I settled on a vertical pleat and a single accordion fold at the bottom to provide enough room for his hat or a Playbill. I usually use snaps to fasten the flap but have made a single pair with a center button.
To construct the new pocket, I took the pocket piece I had created from my commercial clone and merged it with the Stephan cargo pocket design.

After adding interfacing to the pocket's top hem, I created a 1.5-inch pleat with 0.75 inches on each side of the center.


I folded at the center, to the wrong side.

Then, I folded 0.25 inches back out and pinned in place. Press.


I sewed that to the pant leg along the fold and just above the edge. The sides were then sewn flat to the pants. The top of the pocket is placed 10 and ¾ inches down from the top edge of the pants, before the waistband is added. This placement works for my son but may not work for everyone.


Snaps or buttons were attached before attaching the pockets. I've found that attaching them this way gives me better flap-to-pocket placement. I use hammer-on snaps and buttons because I like the look.
And here you go!


Written by Devorah Zamansky